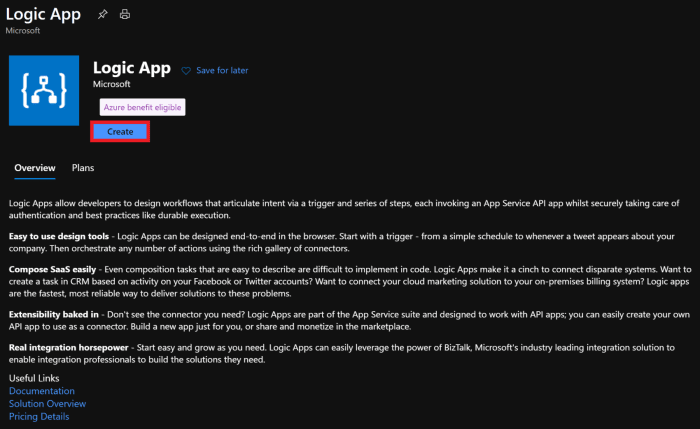
I am super excited since Microsoft Graph To Do APIs are introduced at Microsoft Build 2020. We finally have APIs available in public preview on the beta endpoint of Graph.
Just a brief introduction, Microsoft To Do and Planner are the essence of tasks in Microsoft 365. To-Do helps you create a list for anything, from work assignments to school projects to groceries. It is a great tool for your personal use. On the other hand, Planner is the best place to collaborate as a team and keep your team tasks. Tasks come from everywhere, you can keep track of deadlines by adding reminders, due dates, and notes.
Wouldn't it be nice to receive your list of assigned tasks every morning on Microsoft Teams?
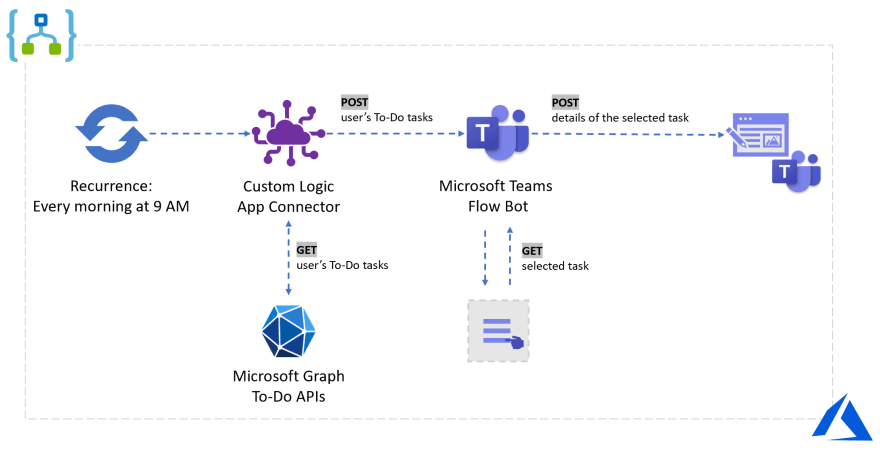
Today, we will build a flow using Azure Logic Apps to automate Microsoft Teams Flow bot for sending To-Do tasks every morning at 9 AM. Here is the steps we will follow:
- Learn the queries and responses about Microsoft Graph To-Do APIs in Graph Explorer
- Register your app in Azure Active Directory
- Build Azure Logic Apps Custom Connector to consume Graph To-Do API and get the tasks
- Create Logic Apps flow to automate sending tasks from Microsoft Teams Flow bot every morning
Microsoft Graph To-Do APIs in Graph Explorer
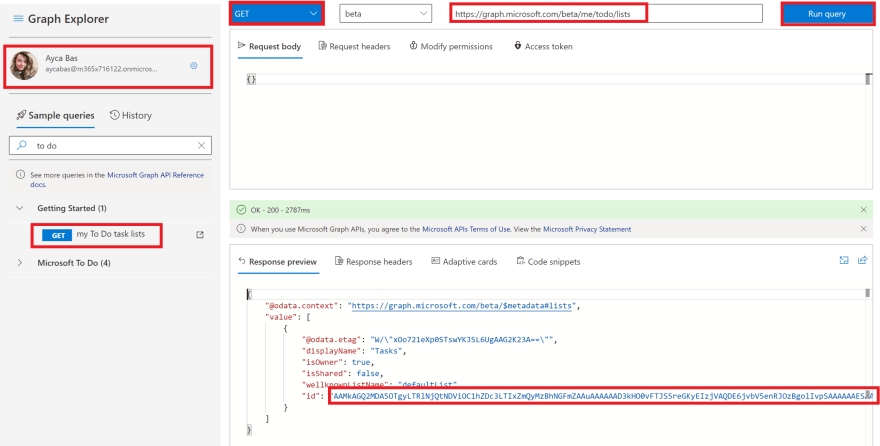
To be able to review Microsoft Graph To-Do API queries and responses with your own data, go to Microsoft Graph Explorer and login with your account from the top left corner by clicking Sign in to Graph Explorer.
Then, search for "to do" under Sample queries and select Get my to do task list. This will run the query https://graph.microsoft.com/beta/me/todo/lists and will get all the task lists as a response. Copy one of your preferred task list Id from the response.
Let's try to get all the tasks under your preferred task list. Change the query with the following: https://graph.microsoft.com/beta/me/todo/lists/{taskListId}/tasks. Make sure the request is GET and hit Run query. You should be able to see all tasks under the selected list as a response.
Copy this query and save somewhere, we will use this later while creating a custom connector.

Register your app in Azure Active Directory
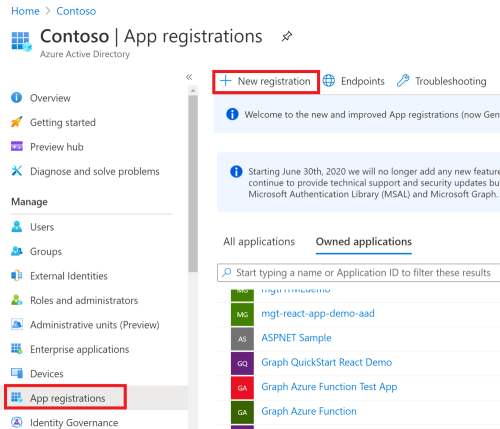
Go to Azure Active Directory in Azure Portal. Select App Registrations and choose New registation.
Enter To-do-flow-app in the Name field. In the Supported account types section, select Accounts in any organizational directory and personal Microsoft accounts. Leave Redirect URI blank and choose Register to continue.

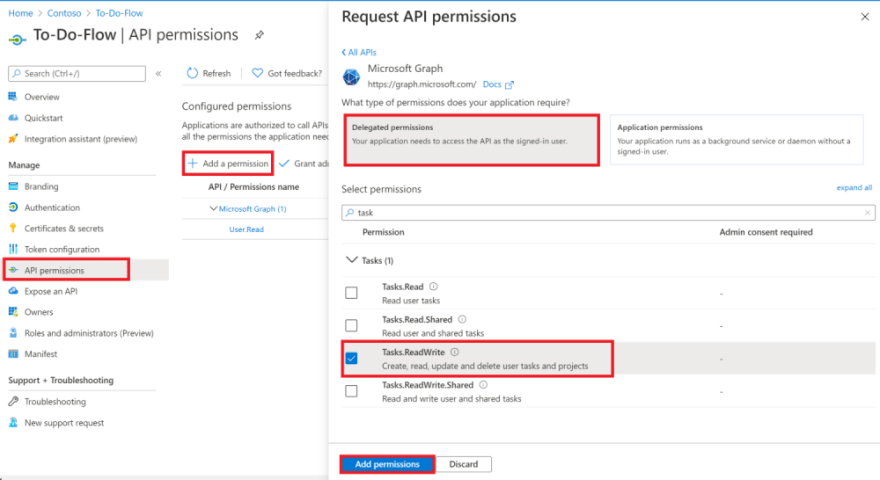
Go to API permissions from the left hand side menu and select add a permission. Choose Microsoft Graph and Delegated Permissions. Select Task.ReadWrite and click Add permission button.
Go to Certificates & secrets from the left hand side menu and select New client secret under the Client secrets. Choose expiry time and Add.
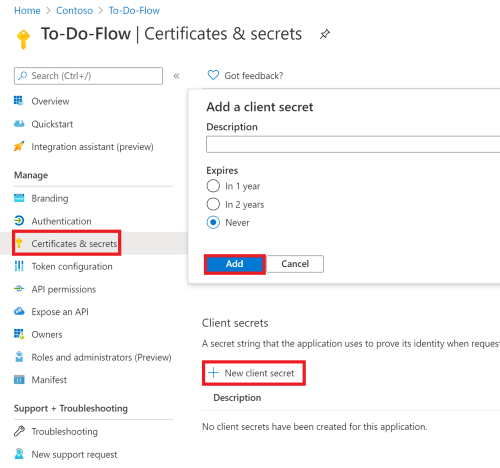
Copy the secret you created and Application Id under the Overview page. Save them somewhere, we will use them while creating a custom connector.
Build Azure Logic Apps Custom Connector to consume To-Do APIs in a flow
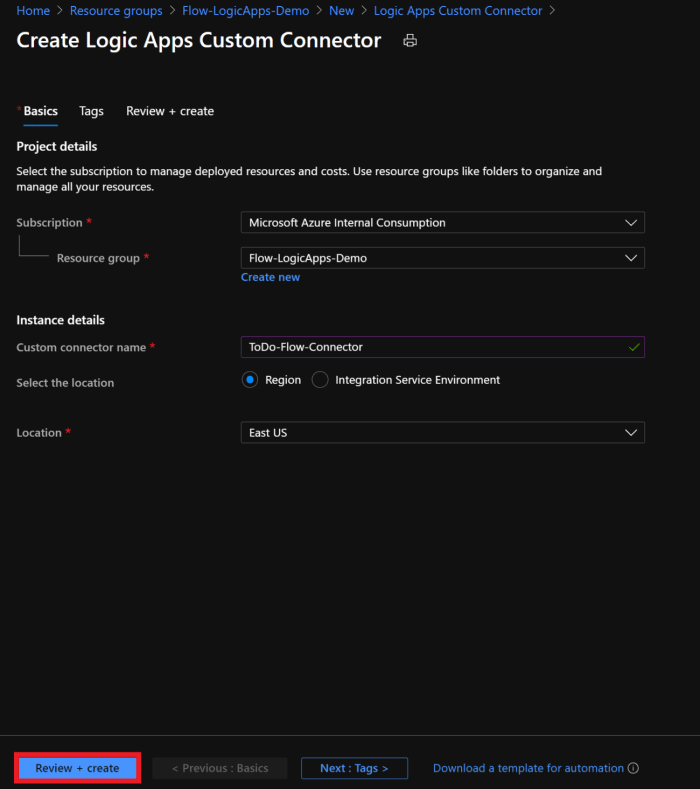
Go to Azure Portal and create Logic Apps Custom Connector.

On the connector configuration, fill the fields as follows:
- Subscription: Select an Azure subscription
- Resource Group: Create new resource group
- Custom connector name: give a name for your custom connector
-
Select the location:
Region - Location: Select the preferred location
Choose Review + create button to continue.
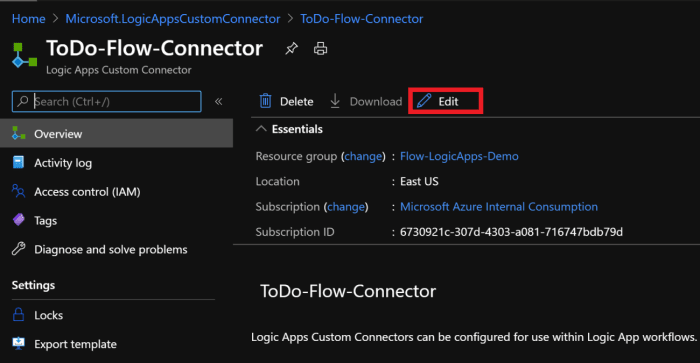
When your custom connector is successfully created, select Edit to configure your connector.
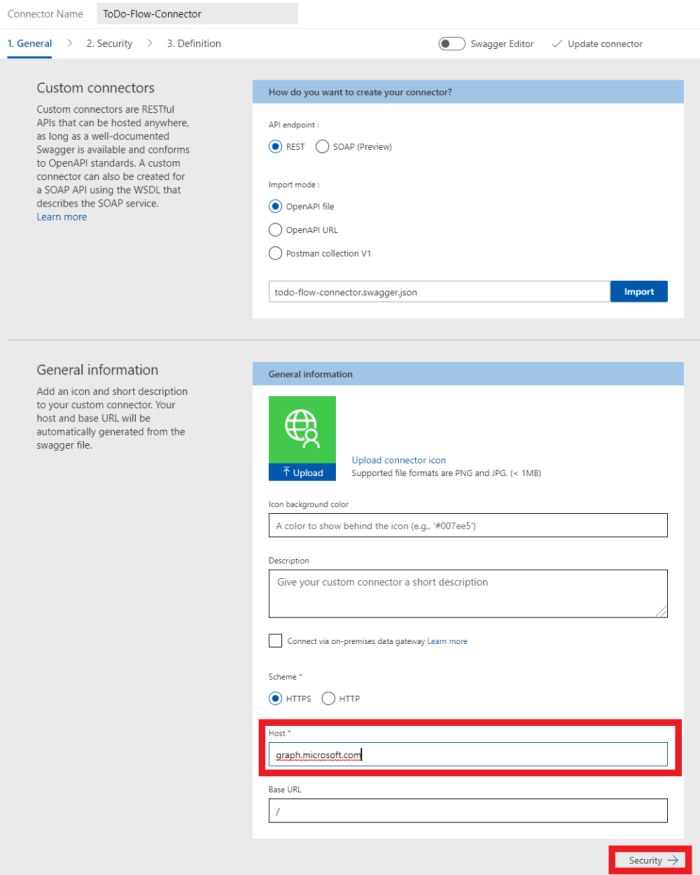
On the connector configuration General page, fill in the fields as follows.
- Scheme: HTTPS
-
Host:
graph.microsoft.com -
Base URL:
/
Choose Security button to continue.
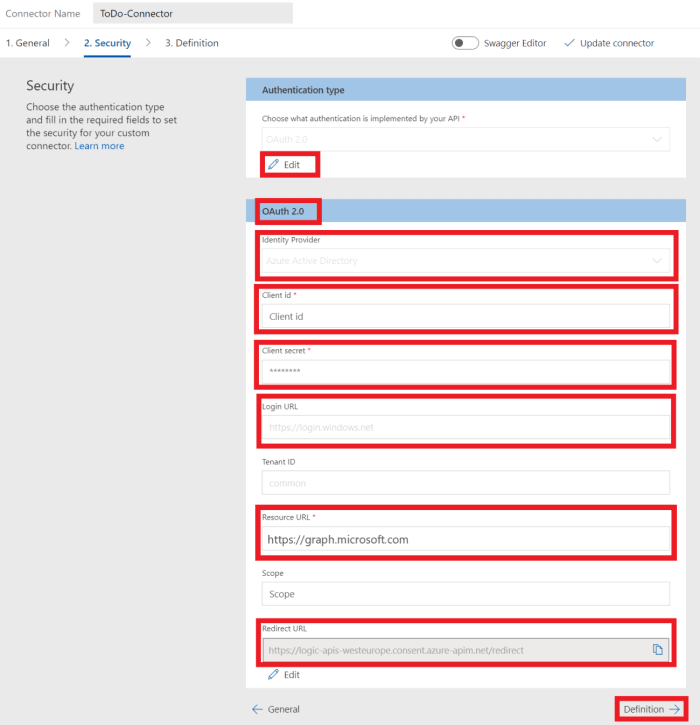
On the Security page, fill in the fields as follows.
-
Choose what authentication is implemented by your API:
OAuth 2.0 -
Identity Provider:
Azure Active Directory - Client id: the application ID you created in the previous exercise
- Client secret: the key you created in the previous exercise
-
Login url:
https://login.windows.net -
Tenant ID:
common -
Resource URL:
https://graph.microsoft.com(no trailing /) - Scope: Leave blank
Choose Definition button to continue.
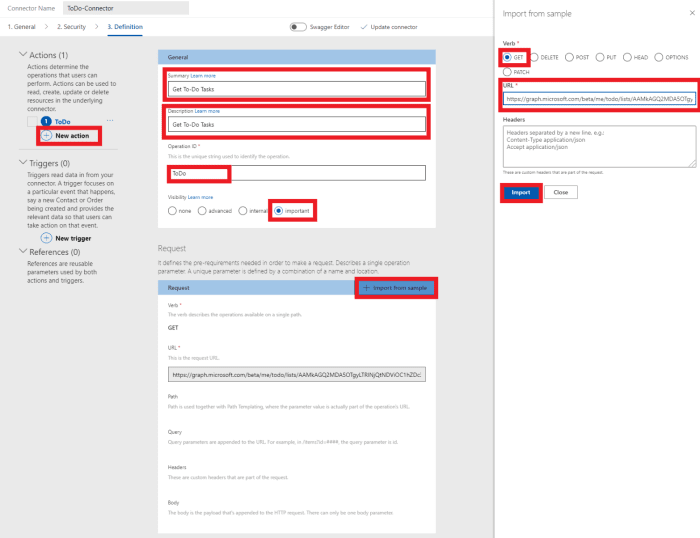
On the Definition page, select New Action and fill in the fields as follows.
-
Summary:
Get To-Do Tasks -
Description:
Get To-Do Tasks -
Operation ID:
ToDo -
Visibility:
important
Create Request by selecting Import from Sample and fill in the fields as follows.
-
Verb:
GET -
URL: (paste the query you copied from the Graph Explorer)
https://graph.microsoft.com/beta/me/todo/lists/{taskListId}/tasks - Headers: Leave blank
- Body: leave blank
Select Import.
Choose Create Connector on the top-right. After the connector has been created, copy the generated Redirect URL from Security page.

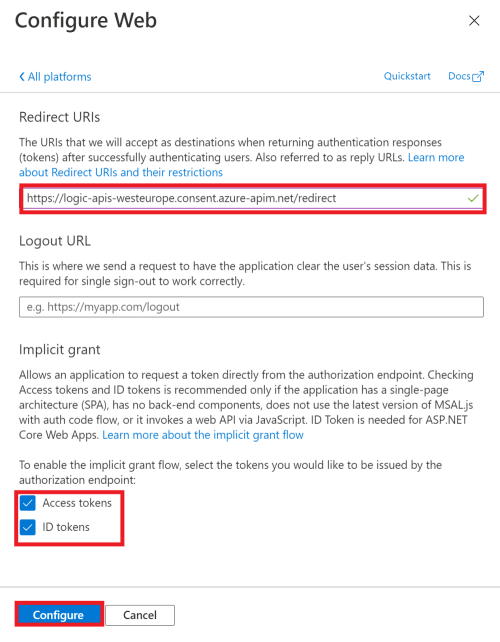
Go back to Azure Active Directory registered app, go to Authentication tab and select Add platform, choose Web.
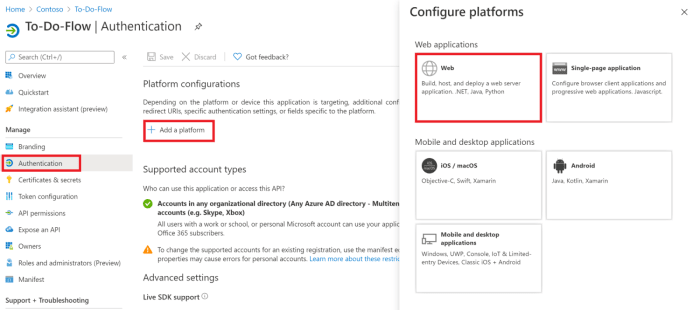
Paste the Redirect URI you copied from the custom connector under the Redirect URIs. Select Access tokens and Id tokens. Click Configure to continue.
Create Logic Apps flow to automate receiving To-Do tasks
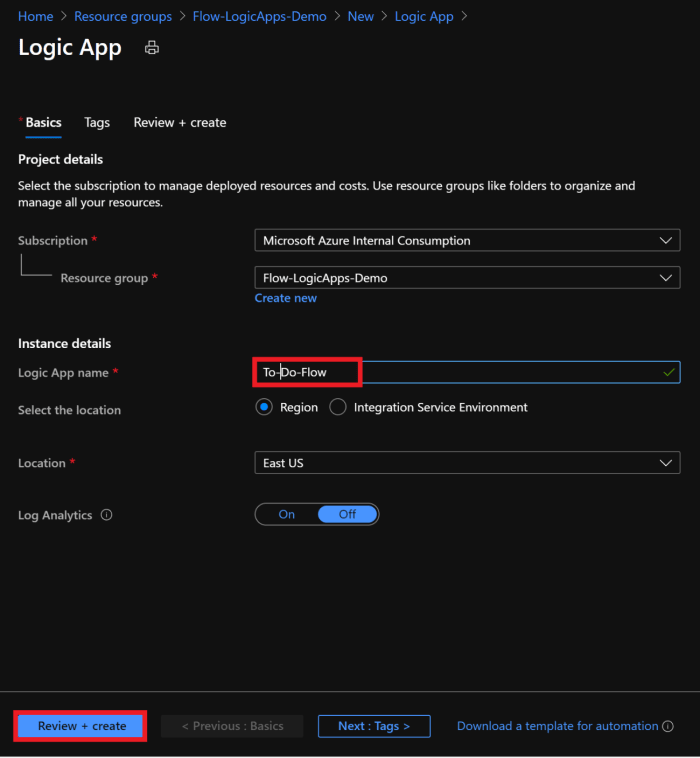
Go to Azure Portal and create Logic App.
On the configuration page, fill the fields as follows:
- Subscription: Select an Azure subscription
- Resource Group: Create new resource group
- Custom connector name: give a name for your logic app
-
Select the location:
Region - Location: Select the preferred location
Choose Review + create button to continue.
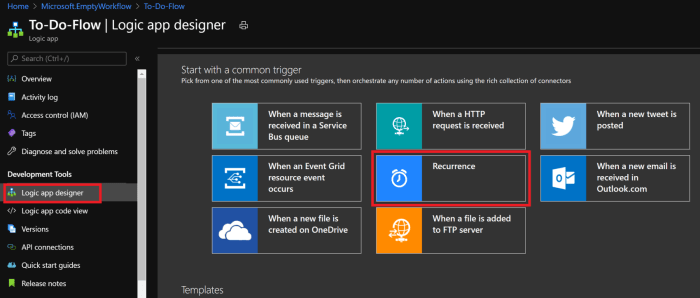
When your Logic app is successfully created, go to your Logic app and choose Logic app designer. Select Recurrence as a trigger.
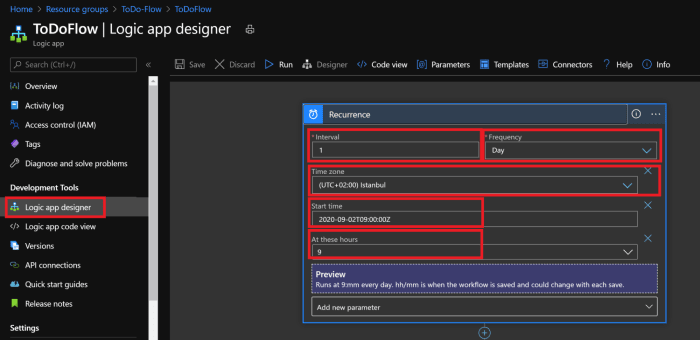
Configure the recurrence as follows:
-
Interval:
1 -
Frequecy:
Day - Timezone: Select the timezone you prefer
-
Start time:
YYYY-MM-DDTHH:MM:SSZ -
At these hours:
9
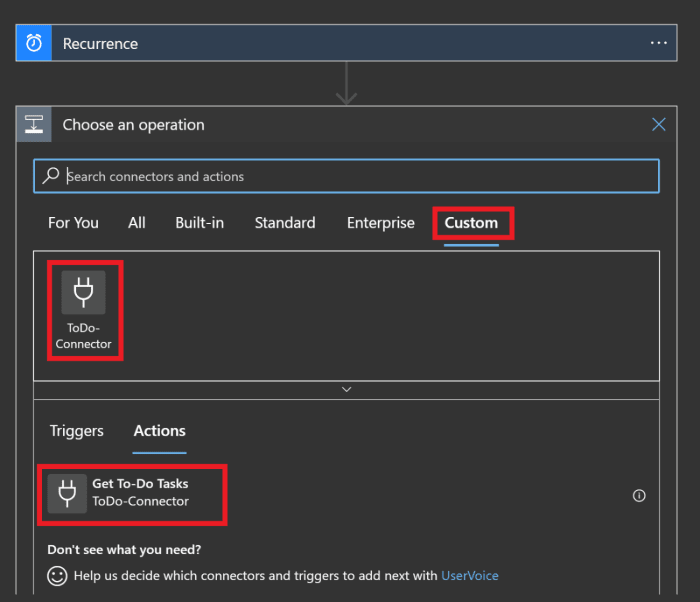
Click plus button, go to Custom and choose To-Do Connector as a next step and select Get To-Do Tasks as an action.
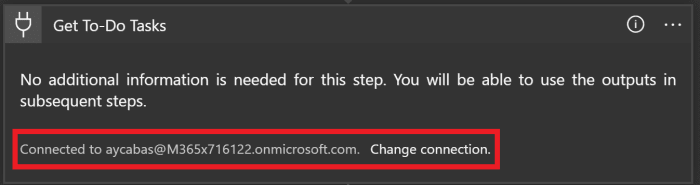
Sign in with the same account you practiced To-Do APIs in the Graph Explorer.
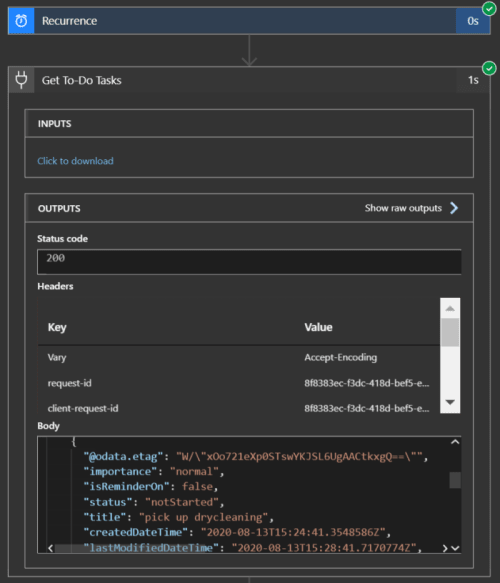
Run the flow and see if you successfully get to-do tasks by using your Get To-Do Tasks. Copy the outputs body, we will use it in the next step.
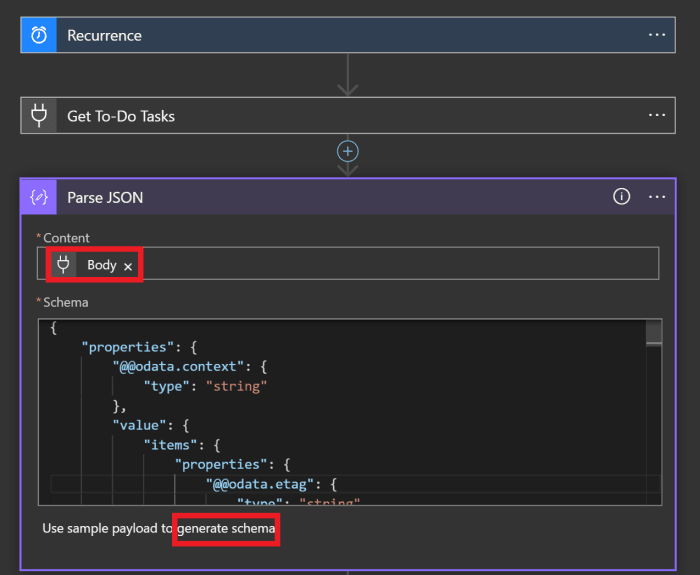
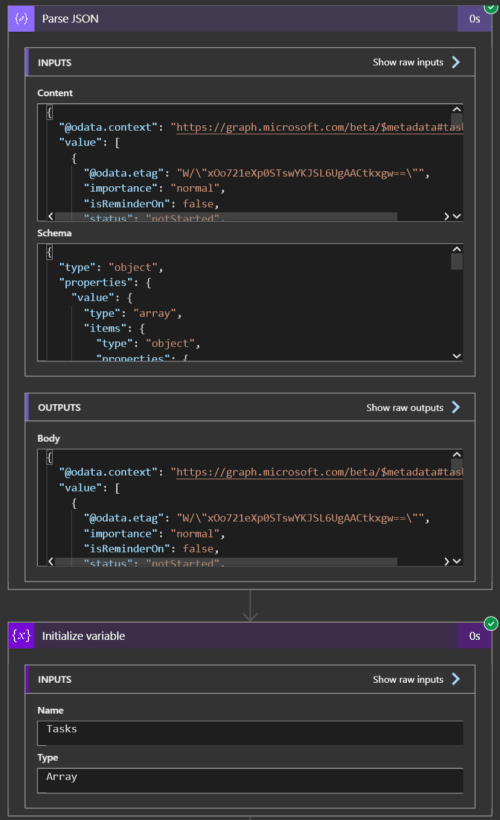
Add Parse JSON as a next step. Place Get To-Do Tasks body under the Context. Select generate schema, paste the response body you are receiving from the Get To-Do Tasks and save.
Add Initialize variable as a next step. Fill the field as follows:
-
Name:
Tasks -
Type:
Array - Value: leave blank
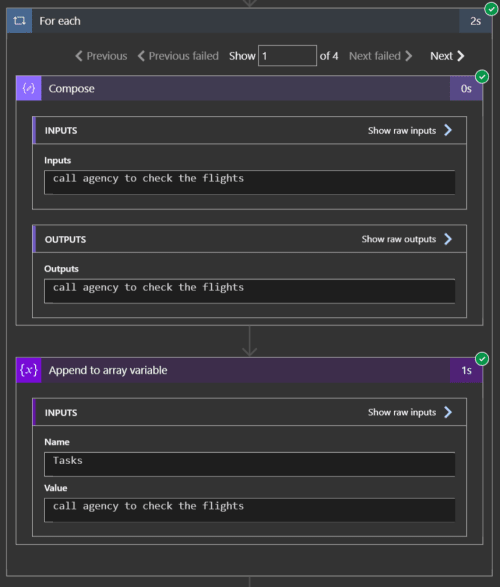
Add For each as a next step and fill the fields as follows:
-
output from previous steps:
valuefrom the Parse JSON step
Add Compose in For each and fill the fields as follows:
-
inputs:
titlefrom the Parse JSON step
Add Append to array variable in For each, and fill the fields as follows:
-
Name:
Tasks -
Value:
Outputsfrom the Compose step.

Run the flow and see if To-Do Json response is successfully parsed and all task titles are added in the Tasks array.
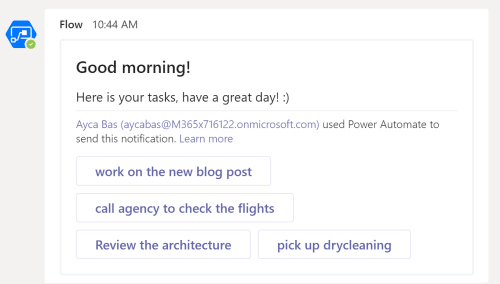
As a next step after For each, add Post a choice of options as the Flow bot to a user and fill the fields as follows:
-
Options:
Tasksfrom the Variables step -
Headline:
Good morning! - Receipent: The same account you consumed the custom connector
-
Message:
Here is your tasks, have a great day! :) -
IsAlert:
Yes

Run the flow and see check Microsoft Teams for the related account if Flow bot is sending a message. Select one of the tasks to see the results in the Logic app flow.
Note: If you didn't add Flow in your Microsoft Teams yet, here is the steps to enable Flow in your Teams account: https://cda.ms/1BB
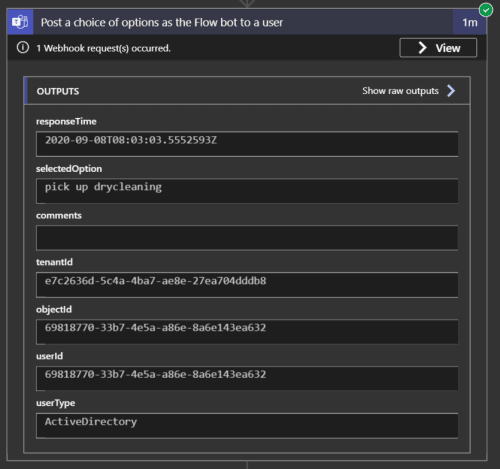
Finally, after user selected any of the tasks to see more details, we will post another card to share more details about the selected option.
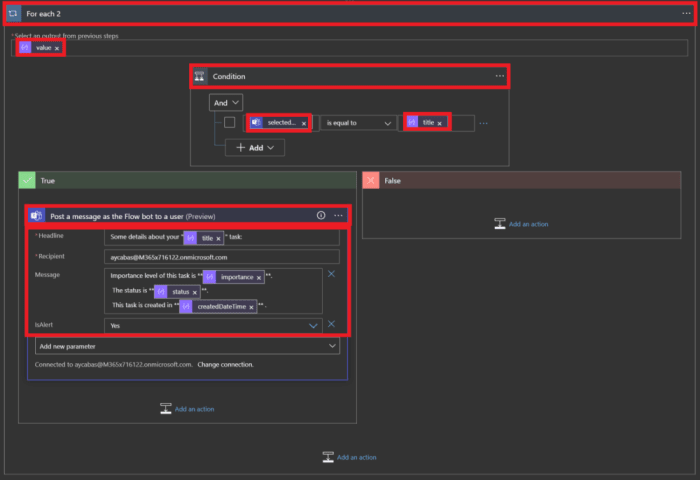
Add For each after Post a choice of options as the Flow bot to a user and fill the fields as follows:
-
Output from previous steps:
valuefrom Parse JSON step
Add Condition in For each and fill the fields as follows:
-
Condition:
And -
Choose a value:
SelectedOptionfrom the Post a choice of options as the Flow bot to a user step -
Operation:
equal to -
Choose a value:
titlefrom Parse JSON step-
If true:
Add Post message as a Flow bot to a user in true
-
Headline:
titlefrom Parse JSON step - Receipent: The same account you consumed the custom connector
-
Message:
importance.status,createdDateTimefrom ParseJSON step -
IsAlert:
Yes
-
Headline:
- If false: leave blank
-
If true:
Add Post message as a Flow bot to a user in true
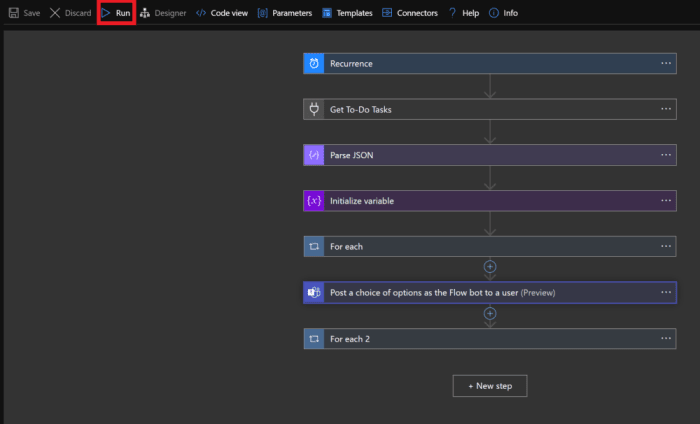
Here is the complete flow. Run the entire flow for testing.
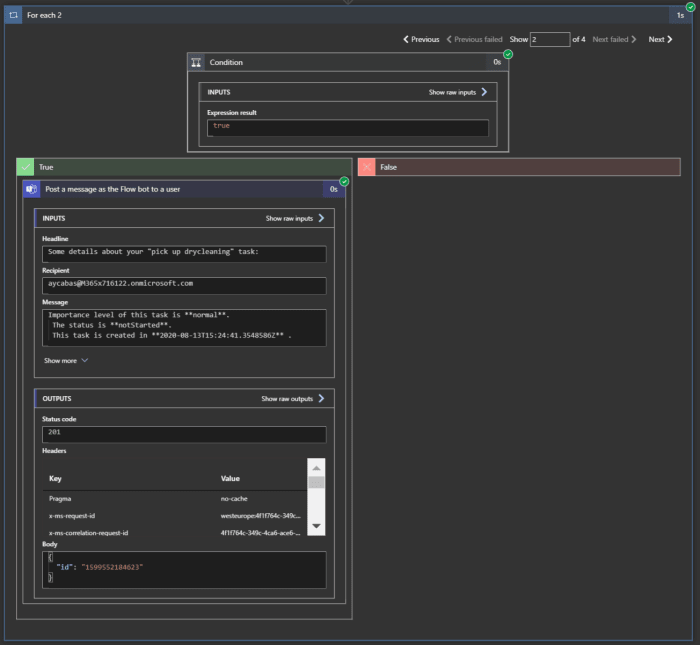
And, the following is going to be the results after selecting one of the tasks to see the details:

Our flow is completed! You can find the source code below:
GitHub repository: https://aka.ms/ToDoFlow


Top comments (3)
Nice article. Thanks for Sharing.
Nice tutorial 😄, Tutorial with screenshots is best easy to follow. But to make Tutorial with screenshots is lengthy task, in this scenario video tutorial is also good.
Personally, I cannot consume video tutorials very well, I will always pick an article like this over a video tutorial.
Also it is much easier to update a post like this if needed (say if content is out of date) rather than needing to record it again.