Integrating with Amazon Timestream in your Apache Airflow DAGs
Amazon Timestream is a fast, scalable, and serverless time series database service perfect for use cases that generate huge amounts of events per day, optimised to make it faster and more cost effective that using relational databases.
I have been playing around with Amazon Timestream to prepare for a talk I am doing with some colleagues, and wanted to see how I could integrate it with other AWS services in the context of leveraging some of the key capabilities of Amazon Timestream. For example, you might have a use case where you want to benefit from some of the powerful capabilities of the Timestream query engine to create/export data that you want to store within a data lake. Maybe you need just a subset of the data within a data warehouse such as Amazon Redshift, or perhaps you need to make the data available within Timestream to other systems and applications.
Interacting with Timestream to run queries is easy and you have several options, but how do you scale this and automate the process so that you do not need to rely on ad hoc queries? This is where data orchestration tools like Apache Airflow are super helpful, allowing you to create workflows that automate those steps and providing the orchestration features that all you to address many different use cases.
In this post I will explore setting up Amazon Timestream and integrating this with Amazon Managed Workflows for Apache Airflow (MWAA). I will walk you through the setup, creating some example workflows, and then use some of the Amazon Timestream sample tools to generate some load and see it all working. Specifically we are going to:
- simulate some Timestream data being ingested in real time over a period of time
- create a workflow where we want to run a query against the Timestream data and obtain a subset of that data and then export it to our data lake on Amazon S3
- orchestrate this workflow so that it runs hourly, and stores the exported data in csv format in folders that match when the timestream data was ingested
- simulate some real life situations such as workflows failing and how they recover and updating and re-running queries
Costs
When I ran through this and checked my AWS bill, it cost around $37 to run this over 24 hours. Please make sure you remember to remove/delete all the resources after you go through this so you do not incur further costs.
Where can I find the code
All the source code in this blog post can be found in this GitHub repository.
Getting started
What will you need
- An AWS account with the right level of privileges
- An environment with the AWS CLI tools configured and running
- AWS CDK set up an installed
- Access to an AWS region where both Managed Workflows for Apache Airflow and Amazon Timestream are supported - for this walkthrough, I will be using eu-west-1
- An environment of Amazon Managed Workflows for Apache Airflow already setup - you can follow my previous link here or check out the instructions in the GitHub repo which will walk you setting up an environment
Setting up the Amazon Timestream
Setting up the Amazon Timestream database and tables
First we need to set up our Amazon Timestream database. Let's use AWS CDK to do this.
I have AWS CDK installed on my machine, if you do not, then follow this workshop or the documentation here to help you get this installed.
I have also updated CDK to the latest version - at the time of writing, my version was 1.124.0. (I had used an earlier version, but it generated an error about unsupported CLI versions, and updating this resolved the issue for me)
We create a directory where we will create our Timestream stack, and then run the CDK init command to create the skeleton outline of our application.
mkdir amazon-timestream-airflow
cd amazon-timestream-airflow
cdk init sample-app --language python
This will create something similar to what I have here
├── README.md
├── amazon_timestream_airflow
│   ├── __init__.py
│   └── amazon_timestream_airflow_stack.py
├── app.py
├── cdk.json
├── requirements.txt
├── setup.py
├── source.bat
└── tests
    ├── __init__.py
    └── unit
        ├── __init__.py
        └── test_amazon_timestream_airflow_stack.py
The key files we are going to work on is the app.py and the corresponding stack, amazon_timestream_airflow_stack.py.
I update the app.py file as follows, which is a standard baseline file I use and allows me to try and templatise this as much as possible to make it re-usable.
#!/usr/bin/env python3

from aws_cdk import core
from amazon_timestream_airflow.amazon_timestream_airflow_stack import AmazonTimestreamAirflowStack

env_EU=core.Environment(region="eu-west-1", account="xxxxxxxx")
ts_props = {'timestream_db': 'airflow-db','timestream_table' : 'airflow-table' , 's3_export' : 'demo-airflow-ts-output'}

app = core.App()

timestream = AmazonTimestreamAirflowStack(
    scope=app,
    construct_id="timestream",
    env=env_EU,
    ts_props=ts_props
)

app.synth()
I set up a few properties, one for the AWS account this will run in, and then the other to hold the values I want to use when creating my Amazon Timestream resources (so in this instance, the Timestream database and tables, as well as the S3 bucket where my exported data will be copied). I then call the stack, passing in these two properties to the Timestream stack (AmazonTimestreamAirflowStack)
The AmazonTimestreamAirflowStack stack that is initially created now need to be updated to create our resources. We need to do a couple of things. First, we need to create the actual resources. The second, is as we are planning to integrate this with MWAA, we need to create an IAM policy that will allow the MWAA workers to have the right level of access to these resources, and no more.
The first thing we need to do is import the Timestream construct library using
aws_timestream as timestream,
As I do not have this construct installed, I need to install it via pip
pip install aws-cdk.aws-timestream
We can now modify the amazon_timestream_airflow_stack.py file, which is just the default file that gets created.
First, we need to pass in the parameters from the main python file that gets executed (app.py) so we modify this to include ts_props as follows:
class AmazonTimestreamAirflowStack(core.Stack):

    def __init__(self, scope: core.Construct, construct_id: str, ts_props, **kwargs) -> None:
        super().__init__(scope, construct_id, **kwargs)
Next we need to create our Timestream database, which when we look at the documentation leads to creating this:
        timedb = timestream.CfnDatabase(
            self,
            "TimestreamDB",
            database_name=f"{ts_props['timestream_db'].lower()}"
            #kms_key_id={string of kms_key_id if you want to use this}
            )
We pass in the value of the database_name from the properties file. This construct will create the Timestream database, now we need to add our table, which looking at the same documentation link, we do with this:
        tstable = timestream.CfnTable(
            self,
            "TimestreamDBTable",
            database_name=f"{ts_props['timestream_db'].lower()}",
            table_name=f"{ts_props['timestream_table'].lower()}",
            retention_properties= {"MemoryStoreRetentionPeriodInHours": "24","MagneticStoreRetentionPeriodInDays": "1"}
        )
Here we are passing in both the database name (which we just created) and the table we want to create. We also define here some additional properties around the memory and long term storage for the Timestream data.
This looks good, so we do a 'cdk ls' and we see that we have our timestream stack ready to go. We deploy it using
cdk deploy timestream
And after a few minutes we see red and failures. What is up, why did this not work? It turns out that we need to make sure that the database is created before the table is, so we need to add a dependency in the CDK application. We can do this easily enough by adding
tstable.node.add_dependency(timedb)
We end up with the stack that looks like this.
class AmazonTimestreamAirflowStack(core.Stack):

    def __init__(self, scope: core.Construct, construct_id: str, ts_props, **kwargs) -> None:
        super().__init__(scope, construct_id, **kwargs)

        timedb = timestream.CfnDatabase(
            self,
            "TimestreamDB",
            database_name=f"{ts_props['timestream_db'].lower()}"
            #kms_key_id={string of kms_key_id if you want to use this}
            )

        tstable = timestream.CfnTable(
            self,
            "TimestreamDBTable",
            database_name=f"{ts_props['timestream_db'].lower()}",
            table_name=f"{ts_props['timestream_table'].lower()}",
            retention_properties= {"MemoryStoreRetentionPeriodInHours": "24","MagneticStoreRetentionPeriodInDays": "1"}
        )

        tstable.node.add_dependency(timedb)
We re-run the cdk deploy timestream, and this time we have everything up and running. We can check my looking in the AWS console
timestream: deploying...
timestream: creating CloudFormation changeset...

 ✅  timestream

Stack ARN:
arn:aws:cloudformation:eu-west-1:704533066374:stack/timestream/a39735c0-1bb1-11ec-b3da-0a4cd6193fe1

Running the load generator
Now that I have my Timestream database up, I want to try and generate some load and test this out. Luckily for me, the team has put some tools in the GitHub repository to help me out.
The load writer
This is a simple demo application called the flink_connector is used to take sample load data and then stream it into the Timestream database. This project uses Amazon Kinesis to stream that data, so we need to create a stream which we can do using the following command:
aws kinesis create-stream --stream-name airflow-timestream --shard-count 1 --region=eu-west-1
When you run this, it does not return anything but if you go to the Amazon Kinesis console, you should now see your new data stream listed.
Next you need to build this application using Apache Maven, so you will need to have this and a minimum of Java 11 (I am using Amazon Corretto 11). Once I have checked out the repo (using the link above) I can run this using the following command:
mvn clean compile
mvn exec:java -Dexec.mainClass="com.amazonaws.services.kinesisanalytics.StreamingJob" -Dexec.args="--InputStreamName airflow-timestream --Region eu-west-1 --TimestreamDbName airflow-db --TimestreamTableName airflow-table"
This will generate a load of output, but the last few lines should be similar-ish to
16:04:50,957 INFO  org.apache.flink.streaming.connectors.kinesis.FlinkKinesisConsumer  - Subtask 7 will be seeded with initial shard StreamShardHandle{streamName='airflow-timestream', shard='{ShardId: shardId-000000000000,HashKeyRange: {StartingHashKey: 0,EndingHashKey: 340282366920938463463374607431768211455},SequenceNumberRange: {StartingSequenceNumber: 49622289611231482257551931446968748664912850071167434754,}}'}, starting state set as sequence number LATEST_SEQUENCE_NUM
16:04:50,957 INFO  org.apache.flink.streaming.connectors.kinesis.internals.KinesisDataFetcher  - Subtask 7 will start consuming seeded shard StreamShardHandle{streamName='airflow-timestream', shard='{ShardId: shardId-000000000000,HashKeyRange: {StartingHashKey: 0,EndingHashKey: 340282366920938463463374607431768211455},SequenceNumberRange: {StartingSequenceNumber: 49622289611231482257551931446968748664912850071167434754,}}'} from sequence number LATEST_SEQUENCE_NUM with ShardConsumer 0
16:04:50,960 INFO  org.apache.flink.streaming.connectors.kinesis.internals.KinesisDataFetcher  - Subtask 1 has no active shards to read on startup; marking the subtask as temporarily idle ...
16:04:50,986 INFO  org.apache.flink.streaming.connectors.kinesis.internals.KinesisDataFetcher  -
Keep this terminal window open, as you need to leave this running when we generate load (the next step). Any time you want to exit, you can just CTRL + C to break out and back into the shell.
In the real world, you would package this up as an Apache Flink application and then run this via Amazon Kinesis analytics applications
The load generator
The kinesis_ingestor is a python script that creates random timestream data (server event info such as storage, cpu, memory, etc). It is super easy to run, all I need to do is supply the name of the Kinesis stream, which I created in the previous step.
In a new, different terminal shell (you will have the previous and this one running side by side)
python3 timestream_kinesis_data_gen.py --stream airflow-timestream --region eu-west-1
Which will give you output similar to the following:
Namespace(hostScale=1, late_time=0, percent_late=0, profile=None, region='eu-west-1', sleep_time=0, stream='airflow-timestream')
zaZswmJk
Dimensions for metrics: 1000
Dimensions for events: 1200
Wrote 20 records to Kinesis Stream 'demo-airflow'
Wrote 20 records to Kinesis Stream 'demo-airflow'
Wrote 20 records to Kinesis Stream 'demo-airflow'
Wrote 20 records to Kinesis Stream 'demo-airflow'
Wrote 20 records to Kinesis Stream 'demo-airflow'
Wrote 20 records to Kinesis Stream 'demo-airflow'
Leave this running for a few minutes. To exit, you can do CTRL+C, to return back to the shell.
Testing the setup
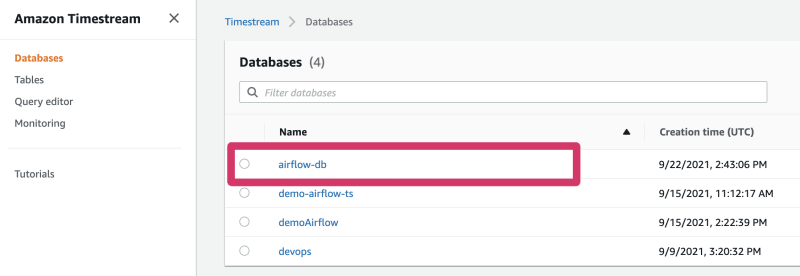
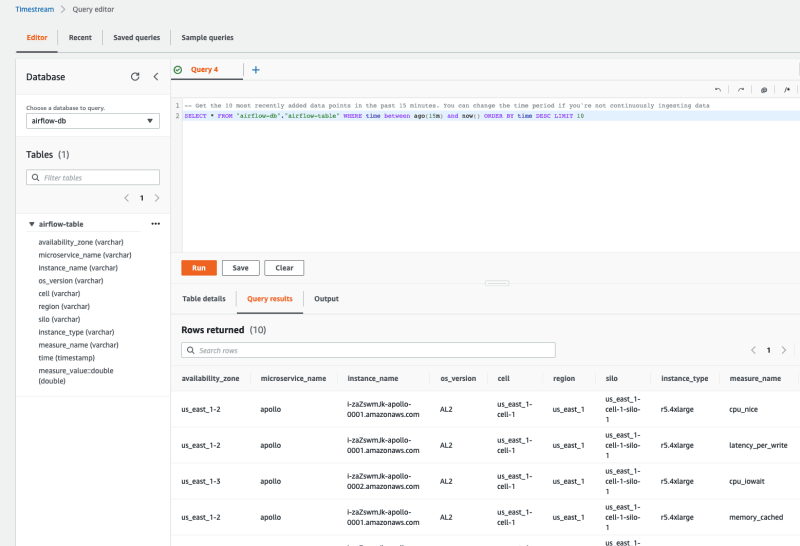
We can now go to the Amazon Timestream console in the AWS console, and take a quick look at the test load data we have just ingested.
From the Amazon Timestream hamburger menu, select Query Editor. Select airflow-db in the pull down for database, and you should see the airflow-table appear below.
If you click on the three dots, an option to "Preview Data" will appear. Select this, and then click on the RUN button (in orange) which will then execute a query, and you should see output.
Note! If this is longer than 15 min from when you ran the load generator, you may get nothing. Either re-run the load generator and try again, or change the query in the editor, to increase the time - by default, it looks for the last 15 mins "WHERE time between ago(15m) and now()"
We can now move to integrating this with Apache Airflow. Let's take a look now at what we need to do.
Setting up MWAA
You should already have an MWAA environment up and running. You can follow my previous link here which uses AWS CDK to build up an environment, or if you prefer, you can use the console to create one quickly using the online wizard.
Remember, this needs to be in the same AWS region as the Amazon Timestream database - I am using eu-west-1
Permissions for MWAA
One of the first thing we need to think about when we integrate MWAA with any AWS service is what permissions the MWAA workers will need. We do not want to provide blanket access, and we want to follow current practices around least privilege where we can.
In our example, we are accessing a Timestream database and then exporting csv outputs to Amazon S3, so we need two new permissions
Timestream
We have created our Timestream database and table resources, so our IAM policy needs to look something like this. This will provide just READ access to the table we have created, and will not provide access to any other Timestream resources.
{
    "Version": "2012-10-17",
    "Statement": [
        {
            "Effect": "Allow",
            "Action": [
                "timestream:Select",
                "timestream:DescribeTable",
                "timestream:ListTables"
            ],
            "Resource": "arn:aws:timestream:eu-west-1:704533066374:database/airflow-db/table/airflow-table*"
        },
        {
            "Effect": "Allow",
            "Action": [
                "timestream:DescribeEndpoints",
                "timestream:SelectValues",
                "timestream:CancelQuery"
            ],
            "Resource": "*"
        }
    ]
}
Amazon S3
We need to make sure that the Apache Airflow workers have access to write to a nominated folder in our data lake, and no more. We defined this as a property in our app.py ('s3_export' : 'demo-airflow-ts-output'). This is the policy needed.
{
    "Version": "2012-10-17",
    "Statement": [
        {
            "Effect": "Allow",
            "Action": [
                "s3:GetBucket*",
                "s3:GetObject*",
                "s3:PutObject",
                "s3:List*"
            ],
            "Resource": [
                    "arn:aws:s3:::demo-airflow-ts-output/*",
                    "arn:aws:s3:::demo-airflow-ts-output"
        }
    ]
}
To make this simple, we modify our CDK application to create this new policy document, and then attach it to our MWAA environment. Here is the code:
        s3_export_bucket = s3.Bucket.from_bucket_name(self,"DataLakeExport",bucket_name=f"{ts_props['s3_export']}")
        s3_export_arn = s3_export_bucket.bucket_arn

        timestream_mwaa_policy = iam.ManagedPolicy(
            self,
            "TimeStreamPolicy",
            managed_policy_name="TimeStreamPolicyforMWAAIntegration",
            statements=[
                iam.PolicyStatement(
                    actions=[
                        "s3:GetBucket*",
                        "s3:PutObject",
                        "s3:List*",
                        "s3:GetObject*"
                    ],
                    effect=iam.Effect.ALLOW,
                    resources=[
                        f"{s3_export_arn}/*",
                        f"{s3_export_arn}"
                        ],
                ),
                iam.PolicyStatement(
                    actions=[
                        "timestream:Select",
                        "timestream:DescribeTable",
                        "timestream:ListTables"
                    ],
                    effect=iam.Effect.ALLOW,
                    resources=[f"arn:aws:timestream:{self.region}:{self.account}:database/{ts_props['timestream_db']}/table/{ts_props['timestream_table']}*"],
                ),
                iam.PolicyStatement(
                    actions=[
                        "timestream:DescribeEndpoints",
                        "timestream:SelectValues",
                        "timestream:CancelQuery"
                    ],
                    effect=iam.Effect.ALLOW,
                    resources=["*"],
                ),
            ]
        )

        core.CfnOutput(
            self,
            id="MWAATimestreamIAMPolicy",
            value=timestream_mwaa_policy.managed_policy_arn,
            description="MWAA to Timestream IAM policy arn"
        )
We can then run cdk deploy timestream which will create the new IAM policy (managed_policy_name="TimeStreamPolicyforMWAAIntegration") ready for the next steps.
cdk deploy timestream
If successful, you should see output that looks like:
timestream: deploying...
timestream: creating CloudFormation changeset...

 ✅  timestream

Outputs:
timestream.MWAATimestreamIAMPolicy = arn:aws:iam::704533066374:policy/TimeStreamPolicyforMWAAIntegration

Stack ARN:
arn:aws:cloudformation:eu-west-1:704533066374:stack/timestream/5aecb140-1bb3-11ec-8bc1-0287e85bdc49
You can check to see this has been created by going to the IAM console, reviewing Policies by the creation date or searching for "TimeStreamPolicyforMWAAIntegration"
We are going to need that arn output (in the above example, mine is arn:aws:iam::704533066374:policy/TimeStreamPolicyforMWAAIntegration) in the next step.
Attaching new policy to your MWAA execution role
We have our policy, but we need to attach it to the execution role of our MWAA environment. To do this, we can run a few commands.
First, lets find the current execution role our MWAA environment is using. My MWAA environment is called "airflow-timestream" so I run this command:
I am using jq here, but if you do not have this installed, you can run the command and just search the output for the ExecutionRoleArn value
aws mwaa get-environment --name airflow-timestream --region=eu-west-1 | jq -r '.Environment.ExecutionRoleArn'
This will return a value which is your execution role.
arn:aws:iam::704533066374:role/service-role/AmazonMWAA-airflow-timestream-KGRJPE
From this we can see our role is called "AmazonMWAA-airflow-timestream-KGRJPE".
Using this, together with the output from the CDK application which has our IAM policy, we can now attach that to the MWAA execution role using this command:
aws iam attach-role-policy --policy-arn arn:aws:iam::704533066374:policy/TimeStreamPolicyforMWAAIntegration --role-name AmazonMWAA-airflow-timestream-KGRJPE
This will not generate output if successful, but you can check this has worked by running the following command:
aws iam list-attached-role-policies --role-name AmazonMWAA-airflow-timestream-KGRJPE
And we should see something like this (your output will be different depending on how many other policies you may have added to your MWAA environment)
{
    "AttachedPolicies": [
        {
            "PolicyName": "TimeStreamPolicyforMWAAIntegration",
            "PolicyArn": "arn:aws:iam::704533066374:policy/TimeStreamPolicyforMWAAIntegration"
        },
        {
            "PolicyName": "MWAA-Execution-Policy-47773cc3-79b2-40c8-8622-61314788983a",
            "PolicyArn": "arn:aws:iam::704533066374:policy/service-role/MWAA-Execution-Policy-47773cc3-79b2-40c8-8622-61314788983a"
        }
    ]
}
We now have our MWAA environment set with the additional privileges to access our Amazon Timestream database and table as well as access to a specific bucket we can export the files to. We are ready for the next step.
Integrating with Amazon Timestream
Hello AWS Data Wrangler
We now have all the pieces we need at an infrastructure level, and now we just need to write our workflow in Python. Within Apache Airflow, we typically look for existing operators that make it easy to work with systems and hundreds have been written by the Apache Airflow community. Currently there are no operators for Amazon Timestream (at least, not that I know about) and so that leaves writing in Python. We have a couple of options.
First, we could write the code in Python using boto3. The Timestream documentation provides some coding examples to help you, and this provides you with lots of fine grain access to what you can do.
The second option is to use a rather great open source project called AWS Data Wrangler, which abstracts a lot of the complexity of working with AWS data services, and it supports Amazon Timestream. In fact, it makes working with Amazon Timestream REALLY easy - what is not to like! Here is a sample line of code to do a query
wr.timestream.query('{your timestream query here}')
For this example, I am going to use AWS Data Wrangler.
When working with AWS Data Wrangler, it is as simple as installing the required Python libraries, including the correct import statement and away you go. Currently, the MWAA worker nodes do not have AWS Data Wrangler installed, and so if we want to write any workflows that can run on those worker nodes, we are going to have to fix that.
The way we do this in MWAA is to create a requirements.txt file that is stored on an Amazon S3 bucket and is referred to by the MWAA environment. The worker nodes will then use this during their provisioning lifecycle phase, which will ensure that our code will have all the dependencies met.
Here is our requirements.txt file
cython==0.29.21
pyarrow==2.0.0
awswrangler==2.4.0
You will have to update your MWAA environment in order to make these become active. I wrote an earlier blog post if you want to know more on how to do this (go down to the section called Requirements).
Once your MWAA environment has restarted, you are good to go.
Creating the workflow
Creating our workflow
Now that we have all the pieces, we can work on our workflow. This is just going to be a simple, single task workflow that runs a query and then exports the results of that query to an Amazon S3 bucket. I will set this query to run every hour, and we will export our data in separate folders in that S3 bucket by date and hour.
When we design this workflow, I want to make sure that the workflow is idempotent. Every time it runs, it should generate the same output, either when run as part of a schedule, or when being run as part of a backfill and manual invocation.
I start my workflow by importing the libraries I am going to use - pretty standard stuff, and the only thing to point out here is the use of AWS Data Wrangler. I then set up some defaults for the DAG itself, and you will notice that the start_date is set to yesterday. I have used this to demonstrate the way the queries work with some of the Apache Airflow date macros that you can use to ensure idempotent queries.
import os
from airflow import DAG
from datetime import datetime, timedelta
from airflow.operators.python import PythonOperator
import awswrangler as wr
from airflow.utils.dates import days_ago

default_args = {
    "owner": "airflow",
    "depends_on_past": False,
    "start_date" : days_ago(1),
    "email": ["airflow@airflow.com"],
    "email_on_failure": False,
    "email_on_retry": False,
    "retries": 0,
    "retry_delay": timedelta(minutes=5)
}
Next we define a function that will run our query and then export the data to an S3 bucket. This function does a few things:
- grab the date parameters and assign these to two variables (start and finish) which will be used within the query to only select the timestream data between these two times. These two times are the previous hour that the workflow is scheduled.
- get a name for the S3 bucket that matches when this workflow is executed - this uses the value "execution_date" which will be the same when run via the scheduler or as part of a backfill or catchup run
- create a variable which contains the query, passing in the value of the dates we configured earlier (the {start} and {finish} values)
- use AWS Data Wrangler to then run the query and export to S3 using wr.s3.to_csv - this will generate a csv file, but we could use one of the other methods supported by AWS Data Wrangler if we wanted.
- the call to AWS Data Wrangler is managed between a try: catch: block, as we may have situations where no data is returned which we want to handle gracefully
def ts_query(**kwargs):
    start = str(kwargs['execution_date']).replace("T", " ")
    finish = str(kwargs['next_execution_date']).replace("T", " ")
    execution_time = str(kwargs['execution_date']).replace("T", "-")
    s3folder = execution_time[0:13]
    print ("Data will be uploaded to {target}".format(target=s3folder))
    query = "SELECT instance_name, BIN(time, 15s) AS binned_timestamp, ROUND(AVG(measure_value::double), 2) AS avg_cpu_utilization, ROUND(APPROX_PERCENTILE(measure_value::double, 0.9), 2) AS p90_cpu_utilization, ROUND(APPROX_PERCENTILE(measure_value::double, 0.95), 2) AS p95_cpu_utilization, ROUND(APPROX_PERCENTILE(measure_value::double, 0.99), 2) AS p99_cpu_utilization FROM \"airflow-db\".\"airflow-table\" WHERE measure_name = 'cpu_nice' AND time BETWEEN '{start}' AND '{end}' GROUP BY region, instance_name, availability_zone, BIN(time, 15s) ORDER BY binned_timestamp ASC ".format(start=start,end=finish)
    print("Query to be run: {query}".format(query=query))
    try:
        wr.s3.to_csv(df=wr.timestream.query(query), path='s3://demo-airflow-ts-output/{s3folder}/my_file.csv'.format(s3folder=s3folder,))
        print ("Timestream query processed successfully and copied to {s3folder}".format(s3folder=s3folder))
    except ValueError:
        print("Query returned no values - no data uploaded")
    except wr.exceptions.EmptyDataFrame:
        print("Query returned nothing - no data uploaded")
One of the things I did was the test the query I was going to use within the Amazon Timestream query editor to make sure that the query returned what I expected. For example in the query editor, I enter the following query (if you do this, make sure that you use the timestamp values that are correct for you)
SELECT instance_name, BIN(time, 15s) AS binned_timestamp, ROUND(AVG(measure_value::double), 2) AS avg_cpu_utilization, ROUND(APPROX_PERCENTILE(measure_value::double, 0.9), 2) AS p90_cpu_utilization, ROUND(APPROX_PERCENTILE(measure_value::double, 0.95), 2) AS p95_cpu_utilization, ROUND(APPROX_PERCENTILE(measure_value::double, 0.99), 2) AS p99_cpu_utilization FROM "airflow-db"."airflow-table" WHERE measure_name = 'cpu_nice' AND time BETWEEN '2021-09-22 13:00:00+00:00' AND '2021-09-22 16:00:00+00:00' GROUP BY region, instance_name, availability_zone, BIN(time, 15s) ORDER BY binned_timestamp ASC
and in the Timestream console I can see the following output. I would expect to see this when I start to run these via Apache Airflow in my S3 bucket.

The final part of our workflow now creates the DAG within Apache Airflow (using the filename as the name that will appear within the UI), passes in the default arguments and then sets up a schedule to run this every hour.
with DAG(
        dag_id=os.path.basename(__file__).replace(".py", ""),
        default_args=default_args,
        dagrun_timeout=timedelta(hours=2),
        # set to every 10 mins for demo
        #schedule_interval="*/10 * * * *"
        # set to every 2 hours for demo
        #schedule_interval="0 */2 * * *"
        # set to every hour
        schedule_interval="0 */1 * * *"

) as dag:

    ts_query=PythonOperator(task_id='ts_query', python_callable=ts_query, dag=dag)
    ts_query
You can view the whole DAG here in the GitHub repo.
Deploying and running the workflow
In my setup, I am using a simple CI/CD system to deploy DAGs, but if you wanted to you can just copy this to your MWAA Dags folder using the cli (change these values to your own)
aws s3 cp timestream-airflow-demo.py s3://airflow-timestream-demo/dags/
And after about 2-3 minutes, you should see your new DAG in the Apache Airflow UI

To run our workflow, all we need to do is enable it - unpause it. Once you unpause you should begin to see that the workflow quickly spawn and schedule tasks to execute the queries for the past 24 hours. This is because within our workflow, we have set the "start_date" : days_ago(1)," and so it uses this as the starting point, and then works out how many missed scheduled slots the task needs to complete. As the workflow is set to run every hour, you should have 24 scheduled tasks begin to appear in your Apache Airflow UI. They should be all green (complete) if everything has gone ok.

If we look at the logs of one of the first scheduled tasks, we can see the following:
[2021-09-23 08:00:03,630] {{logging_mixin.py:104}} INFO - Data will be uploaded to 2021-09-23-07
[2021-09-23 08:00:03,654] {{logging_mixin.py:104}} INFO - Query to be run: SELECT instance_name, BIN(time, 15s) AS binned_timestamp, ROUND(AVG(measure_value::double), 2) AS avg_cpu_utilization, ROUND(APPROX_PERCENTILE(measure_value::double, 0.9), 2) AS p90_cpu_utilization, ROUND(APPROX_PERCENTILE(measure_value::double, 0.95), 2) AS p95_cpu_utilization, ROUND(APPROX_PERCENTILE(measure_value::double, 0.99), 2) AS p99_cpu_utilization FROM demoAirflow.kinesisdata1 WHERE measure_name = 'cpu_nice' AND time BETWEEN '2021-09-23 07:00:00+00:00' AND '2021-09-23 08:00:00+00:00' GROUP BY region, instance_name, availability_zone, BIN(time, 15s) ORDER BY binned_timestamp ASC
[2021-09-23 08:00:05,035] {{logging_mixin.py:104}} INFO - Query returned nothing - no data uploaded
[2021-09-23 08:00:05,060] {{python.py:118}} INFO - Done. Returned value was: None
This is as expected as we did not have a Timestream database setup then, so it returned this message.
If you leave this running for a few hours, with the load generator generating load in the back ground (the previous steps), what you will eventually see is the following in the task logs:
[2021-09-22 14:00:02,930] {{logging_mixin.py:104}} INFO - Data will be uploaded to 2021-09-22-13
[2021-09-22 14:00:02,947] {{logging_mixin.py:104}} INFO - Query to be run: SELECT instance_name, BIN(time, 15s) AS binned_timestamp, ROUND(AVG(measure_value::double), 2) AS avg_cpu_utilization, ROUND(APPROX_PERCENTILE(measure_value::double, 0.9), 2) AS p90_cpu_utilization, ROUND(APPROX_PERCENTILE(measure_value::double, 0.95), 2) AS p95_cpu_utilization, ROUND(APPROX_PERCENTILE(measure_value::double, 0.99), 2) AS p99_cpu_utilization FROM demoAirflow.kinesisdata1 WHERE measure_name = 'cpu_nice' AND time BETWEEN '2021-09-22 13:00:00+00:00' AND '2021-09-22 14:00:00+00:00' GROUP BY region, instance_name, availability_zone, BIN(time, 15s) ORDER BY binned_timestamp ASC
[2021-09-22 14:00:06,688] {{logging_mixin.py:104}} INFO - Timestream query processed successfully and copied to 2021-09-22-13
We can see here that the output shows the name of the S3 bucket that will be created, and if we look we can see
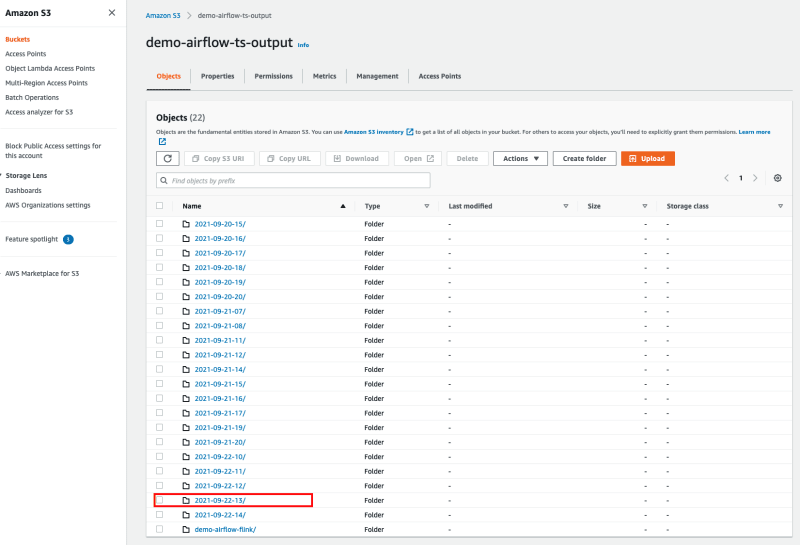
As you can see from this screen shot, I have been running this over the past few days. I have run the load generator intermittently, which is why there are gaps in the folder names.
If we take a look at the contents of the folder, we can see we have our query export (a file called my_file.csv) which when we take a look at matches the query.
,instance_name,binned_timestamp,avg_cpu_utilization,p90_cpu_utilization,p95_cpu_utilization,p99_cpu_utilization
0,i-zaZswmJk-zeus-0002.amazonaws.com,2021-09-22 13:03:15,0.54,0.89,0.91,0.95
1,i-zaZswmJk-apollo-0000.amazonaws.com,2021-09-22 13:03:15,0.58,0.96,0.96,0.96
2,i-zaZswmJk-demeter-0000.amazonaws.com,2021-09-22 13:03:15,0.48,0.93,0.94,0.94
3,i-zaZswmJk-zeus-0000.amazonaws.com,2021-09-22 13:03:15,0.45,0.76,0.82,0.98
4,i-zaZswmJk-hercules-0000.amazonaws.com,2021-09-22 13:03:15,0.52,0.84,0.85,0.93
...
...
Backfill
Backfill is a really nice feature of Apache Airflow that allows you to run your workflow for a specific historical time period. You in effect pass in a "start_date" and "end_date" and the scheduler will use that in the context of the workflow to figure out how many scheduled slots that your workflow would have run, and then execute those tasks passing in the time/date details as if it was running during those times.
This is great if you need to re-run your workflow because of a number of different reasons. Maybe your Apache Airflow environment was in maintenance mode and you missed some of your scheduled task runs, or perhaps you want to make a change to a query and re-run against all your source data. There are lots of ways that backfill is useful.
Within Apache Airflow, you can execute backfill for your workflow by using this command:
airflow dags backfill --start-date START_DATE --end-date END_DATE dag_id
where the START_DATE and END_DATE are timestamps, and the dag_id is the name of your workflow.
Within MWAA we do not have access to the Apache Airflow cli, so in order to run backfill we need to do this via another workflow.
# when running this DAG make sure you select the backfill command
# {"command": "backfill -s 2021-09-10 -e 2021-10-10 timestream-airflow-demo"} #mwaa 1.x
# {"command": "dags backfill -s 2021-09-10 -e 2021-10-10 timestream-airflow-demo"} #mwaa 2.x

from airflow import DAG

from airflow.operators.bash_operator import BashOperator

from datetime import timedelta,time,datetime
import os

DAG_ID = os.path.basename(__file__).replace(".py", "")

default_args = {
            "owner": "airflow",
            "start_date": datetime(2020, 9, 9),
            "depends_on_past": False,
            "email_on_failure": False,
            "email_on_retry": False,
            "email": "youremail@host.com",
            "retries": 0,
            "retry_delay": timedelta(minutes=5)
        }

from time import sleep
from datetime import datetime
from random import random

with DAG(dag_id=DAG_ID, schedule_interval=None, default_args=default_args, catchup=False) as dag:
    bash_task_1 = BashOperator(
        task_id="cli_command",
        bash_command="airflow {{ dag_run.conf['command'] }}"
    )
    bash_task_1
When we deploy and then enable this workflow within our MWAA environment, this will allow us to trigger a backfill task. When triggering the workflow, you pass into it a configuration file of the start, end and workflow name, as follows:
{"command": "dags backfill -s 2021-09-10 -e 2021-10-10 timestream-airflow-demo"}
In this example, I am asking MWAA to re-run these tasks between these two dates. When I fire it off, you should see those tasks start to run.
This is what I see in the log file after I have submitted a backfill command:
[2021-09-23 09:20:41,813] {{bash.py:158}} INFO - Running command: airflow dags backfill -s 2021-09-21 -e 2021-09-22 timestream-airflow-demo
[2021-09-23 09:20:41,836] {{bash.py:169}} INFO - Output:
[2021-09-23 09:20:43,524] {{bash.py:173}} INFO - /usr/local/lib/python3.7/site-packages/airflow/cli/commands/dag_command.py:62 PendingDeprecationWarning: --ignore-first-depends-on-past is deprecated as the value is always set to True
[2021-09-23 09:20:43,544] {{bash.py:173}} INFO - [[34m2021-09-23 09:20:43,524[0m] {{[34mdagbag.py:[0m451}} INFO[0m - Filling up the DagBag from /usr/local/airflow/dags[0m
[2021-09-23 09:20:43,566] {{bash.py:173}} INFO - /usr/local/lib/python3.7/site-packages/airflow/utils/decorators.py:94 DeprecationWarning: provide_context is deprecated as of 2.0 and is no longer required
[2021-09-23 09:20:49,003] {{bash.py:173}} INFO - 202109230920
[2021-09-23 09:20:49,036] {{bash.py:173}} INFO - [[34m2021-09-23 09:20:48,994[0m] {{[34mdagrun.py:[0m445}} INFO[0m - Marking run <DagRun timestream-airflow-demo @ 2021-09-21 00:00:00+00:00: backfill__2021-09-21T00:00:00+00:00, externally triggered: False> successful[0m
[2021-09-23 09:20:49,053] {{bash.py:173}} INFO - [[34m2021-09-23 09:20:49,008[0m] {{[34mdagrun.py:[0m445}} INFO[0m - Marking run <DagRun timestream-airflow-demo @ 2021-09-21 01:00:00+00:00: backfill__2021-09-21T01:00:00+00:00, externally triggered: False> successful[0m
[2021-09-23 09:20:49,105] {{bash.py:173}} INFO - [[34m2021-09-23 09:20:49,021[0m] {{[34mdagrun.py:[0m445}} INFO[0m - Marking run <DagRun timestream-airflow-demo @ 2021-09-21 02:00:00+00:00: backfill__2021-09-21T02:00:00+00:00, externally triggered: False> successful[0m
[2021-09-23 09:20:49,133] {{bash.py:173}} INFO - [[34m2021-09-23 09:20:49,032[0m] {{[34mdagrun.py:[0m445}} INFO[0m - Marking run <DagRun timestream-airflow-demo @ 2021-09-21 03:00:00+00:00: backfill__2021-09-21T03:00:00+00:00, externally triggered: False> successful[0m
[2021-09-23 09:20:49,205] {{bash.py:173}} INFO - [[34m2021-09-23 09:20:49,048[0m] {{[34mdagrun.py:[0m445}} INFO[0m - Marking run <DagRun timestream-airflow-demo @ 2021-09-21 04:00:00+00:00: backfill__2021-09-21T04:00:00+00:00, externally triggered: False> successful[0m
[2021-09-23 09:20:49,228] {{bash.py:173}} INFO - [[34m2021-09-23 09:20:49,113[0m] {{[34mdagrun.py:[0m445}} INFO[0m - Marking run <DagRun timestream-airflow-demo @ 2021-09-21 05:00:00+00:00: backfill__2021-09-21T05:00:00+00:00, externally triggered: False> successful[0m
[2021-09-23 09:20:49,247] {{bash.py:173}} INFO - [[34m2021-09-23 09:20:49,125[0m] {{[34mdagrun.py:[0m445}} INFO[0m - Marking run <DagRun timestream-airflow-demo @ 2021-09-21 06:00:00+00:00: backfill__2021-09-21T06:00:00+00:00, externally triggered: False> successful[0m
[2021-09-23 09:20:49,305] {{bash.py:173}} INFO - [[34m2021-09-23 09:20:49,140[0m] {{[34mdagrun.py:[0m445}} INFO[0m - Marking run <DagRun timestream-airflow-demo @ 2021-09-21 07:00:00+00:00: backfill__2021-09-21T07:00:00+00:00, externally triggered: False> successful[0m
[2021-09-23 09:20:49,326] {{bash.py:173}} INFO - [[34m2021-09-23 09:20:49,152[0m] {{[34mdagrun.py:[0m445}} INFO[0m - Marking run <DagRun timestream-airflow-demo @ 2021-09-21 08:00:00+00:00: backfill__2021-09-21T08:00:00+00:00, externally triggered: False> successful[0m
[2021-09-23 09:20:49,347] {{bash.py:173}} INFO - [[34m2021-09-23 09:20:49,218[0m] {{[34mdagrun.py:[0m445}} INFO[0m - Marking run <DagRun timestream-airflow-demo @ 2021-09-21 09:00:00+00:00: backfill__2021-09-21T09:00:00+00:00, externally triggered: False> successful[0m
[2021-09-23 09:20:49,404] {{bash.py:173}} INFO - [[34m2021-09-23 09:20:49,234[0m] {{[34mdagrun.py:[0m445}} INFO[0m - Marking run <DagRun timestream-airflow-demo @ 2021-09-21 10:00:00+00:00: backfill__2021-09-21T10:00:00+00:00, externally triggered: False> successful[0m
[2021-09-23 09:20:49,424] {{bash.py:173}} INFO - [[34m2021-09-23 09:20:49,250[0m] {{[34mdagrun.py:[0m445}} INFO[0m - Marking run <DagRun timestream-airflow-demo @ 2021-09-21 11:00:00+00:00: backfill__2021-09-21T11:00:00+00:00, externally triggered: False> successful[0m
[2021-09-23 09:20:49,863] {{bash.py:173}} INFO - [[34m2021-09-23 09:20:49,315[0m] {{[34mdagrun.py:[0m445}} INFO[0m - Marking run <DagRun timestream-airflow-demo @ 2021-09-21 12:00:00+00:00: backfill__2021-09-21T12:00:00+00:00, externally triggered: False> successful[0m
[2021-09-23 09:20:49,877] {{bash.py:173}} INFO - [[34m2021-09-23 09:20:49,332[0m] {{[34mdagrun.py:[0m445}} INFO[0m - Marking run <DagRun timestream-airflow-demo @ 2021-09-21 13:00:00+00:00: backfill__2021-09-21T13:00:00+00:00, externally triggered: False> successful[0m
[2021-09-23 09:20:49,897] {{bash.py:173}} INFO - [[34m2021-09-23 09:20:49,344[0m] {{[34mdagrun.py:[0m445}} INFO[0m - Marking run <DagRun timestream-airflow-demo @ 2021-09-21 14:00:00+00:00: backfill__2021-09-21T14:00:00+00:00, externally triggered: False> successful[0m
[2021-09-23 09:20:49,915] {{bash.py:173}} INFO - [[34m2021-09-23 09:20:49,355[0m] {{[34mdagrun.py:[0m445}} INFO[0m - Marking run <DagRun timestream-airflow-demo @ 2021-09-21 15:00:00+00:00: backfill__2021-09-21T15:00:00+00:00, externally triggered: False> successful[0m
[2021-09-23 09:20:49,935] {{bash.py:173}} INFO - [[34m2021-09-23 09:20:49,407[0m] {{[34mbackfill_job.py:[0m388}} INFO[0m - [backfill progress] | finished run 16 of 25 | tasks waiting: 0 | succeeded: 16 | running: 0 | failed: 0 | skipped: 0 | deadlocked: 0 | not ready: 0[0m
[2021-09-23 09:20:49,952] {{bash.py:173}} INFO - [[34m2021-09-23 09:20:49,408[0m] {{[34mbackfill_job.py:[0m818}} INFO[0m - max_active_runs limit for dag timestream-airflow-demo has been reached  - waiting for other dag runs to finish[0m
[2021-09-23 09:20:54,001] {{bash.py:173}} INFO - [[34m2021-09-23 09:20:54,001[0m] {{[34mdagrun.py:[0m445}} INFO[0m - Marking run <DagRun timestream-airflow-demo @ 2021-09-21 17:00:00+00:00: backfill__2021-09-21T17:00:00+00:00, externally triggered: False> successful[0m
[2021-09-23 09:20:54,024] {{bash.py:173}} INFO - [[34m2021-09-23 09:20:54,010[0m] {{[34mdagrun.py:[0m445}} INFO[0m - Marking run <DagRun timestream-airflow-demo @ 2021-09-21 18:00:00+00:00: backfill__2021-09-21T18:00:00+00:00, externally triggered: False> successful[0m
[2021-09-23 09:20:54,045] {{bash.py:173}} INFO - [[34m2021-09-23 09:20:54,017[0m] {{[34mdagrun.py:[0m445}} INFO[0m - Marking run <DagRun timestream-airflow-demo @ 2021-09-21 19:00:00+00:00: backfill__2021-09-21T19:00:00+00:00, externally triggered: False> successful[0m
[2021-09-23 09:20:54,063] {{bash.py:173}} INFO - [[34m2021-09-23 09:20:54,024[0m] {{[34mdagrun.py:[0m445}} INFO[0m - Marking run <DagRun timestream-airflow-demo @ 2021-09-21 20:00:00+00:00: backfill__2021-09-21T20:00:00+00:00, externally triggered: False> successful[0m
[2021-09-23 09:20:54,079] {{bash.py:173}} INFO - [[34m2021-09-23 09:20:54,032[0m] {{[34mdagrun.py:[0m445}} INFO[0m - Marking run <DagRun timestream-airflow-demo @ 2021-09-21 21:00:00+00:00: backfill__2021-09-21T21:00:00+00:00, externally triggered: False> successful[0m
[2021-09-23 09:20:54,114] {{bash.py:173}} INFO - [[34m2021-09-23 09:20:54,039[0m] {{[34mdagrun.py:[0m445}} INFO[0m - Marking run <DagRun timestream-airflow-demo @ 2021-09-21 22:00:00+00:00: backfill__2021-09-21T22:00:00+00:00, externally triggered: False> successful[0m
[2021-09-23 09:20:54,136] {{bash.py:173}} INFO - [[34m2021-09-23 09:20:54,046[0m] {{[34mdagrun.py:[0m445}} INFO[0m - Marking run <DagRun timestream-airflow-demo @ 2021-09-21 23:00:00+00:00: backfill__2021-09-21T23:00:00+00:00, externally triggered: False> successful[0m
[2021-09-23 09:20:54,156] {{bash.py:173}} INFO - [[34m2021-09-23 09:20:54,054[0m] {{[34mdagrun.py:[0m445}} INFO[0m - Marking run <DagRun timestream-airflow-demo @ 2021-09-22 00:00:00+00:00: backfill__2021-09-22T00:00:00+00:00, externally triggered: False> successful[0m
[2021-09-23 09:20:54,176] {{bash.py:173}} INFO - [[34m2021-09-23 09:20:54,058[0m] {{[34mbackfill_job.py:[0m388}} INFO[0m - [backfill progress] | finished run 24 of 25 | tasks waiting: 0 | succeeded: 24 | running: 0 | failed: 0 | skipped: 0 | deadlocked: 0 | not ready: 0[0m
[2021-09-23 09:20:54,192] {{bash.py:173}} INFO - [[34m2021-09-23 09:20:54,058[0m] {{[34mbackfill_job.py:[0m818}} INFO[0m - max_active_runs limit for dag timestream-airflow-demo has been reached  - waiting for other dag runs to finish[0m
[2021-09-23 09:20:59,013] {{bash.py:173}} INFO - [[34m2021-09-23 09:20:59,013[0m] {{[34mdagrun.py:[0m445}} INFO[0m - Marking run <DagRun timestream-airflow-demo @ 2021-09-21 16:00:00+00:00: backfill__2021-09-21T16:00:00+00:00, externally triggered: False> successful[0m
[2021-09-23 09:20:59,040] {{bash.py:173}} INFO - [[34m2021-09-23 09:20:59,019[0m] {{[34mbackfill_job.py:[0m388}} INFO[0m - [backfill progress] | finished run 25 of 25 | tasks waiting: 0 | succeeded: 25 | running: 0 | failed: 0 | skipped: 0 | deadlocked: 0 | not ready: 0[0m
[2021-09-23 09:20:59,069] {{bash.py:173}} INFO - [[34m2021-09-23 09:20:59,023[0m] {{[34mbackfill_job.py:[0m831}} INFO[0m - Backfill done. Exiting.[0m
[2021-09-23 09:20:59,326] {{bash.py:177}} INFO - Command exited with return code 0
[2021-09-23 09:20:59,370] {{taskinstance.py:1192}} INFO - Marking task as SUCCESS. dag_id=timestream-backfill, task_id=cli_command, execution_date=20210923T092039, start_date=20210923T092040, end_date=20210923T092059
[2021-09-23 09:20:59,420] {{taskinstance.py:1246}} INFO - 0 downstream tasks scheduled from follow-on schedule check
[2021-09-23 09:20:59,476] {{logging_mixin.py:104}} INFO - [2021-09-23 09:20:59,476] {{local_task_job.py:146}} INFO - Task exited with return code 0
When I look at the historical view of my workflow, when I hover over the tasks during this time frame, I can see that they were run via backfill

Clean up
Once you have finished walking through this, then make sure you clean up all the resources.
- you can run "cdk destroy timestream" to remove all the resources provisioned (the Timestream database and tables as well as the policy)
- remove any of the data that was export to your Amazon S3 bucket
- remove any of the DAGs you deployed into your MWAA environment
- (optional) update your requirements.txt to remove the additional Python libraries we added and then restart your MWAA environment (after uploading your updated requirements file)
Conclusion
In this post I showed you how you can integrate and orchestrate Amazon Timestream data using Amazon's Managed Workflows for Apache Airflow. I walked you through how you can set this up, how you can use a great open source project called AWS Data Wrangler to interact with Amazon Timestream, and then use some of Apache Airflow's powerful capabilities such as backfill.
What next?
I had some ideas of how you could improve on this setup, which I ran out of time. The one I wanted to do (and may return back to complete) was to package up the code as a plugin so that it can be more easily deployed/shared. I could use other Apache Airflow operators such as the ECS and EKS operators, running the same Timeseries queries. I also want to experiment and explore some of the Timestream features such as interpolation. Hopefully this blog post will provide the foundation for that exploration and make it easier for you to experiment.
Please let me know via the comments of any additional questions or comments you have on this post.


Top comments (0)