In this blog post, I'm going to try out AWS IAM Roles Anywhere by setting it up for use inside GitHub Codespaces.
The [offical documentation for IAM Roles Anywhere is okay, however, it is written to only provide two options for users who are getting started:
- Create your private CA - and we're (AWS) not going to show you how to do that.
- Use ACM PCA - a service that costs $400 a month upfront the moment you click the create button.
If you're a beginner, you'll probably just give up here... This is what I nearly did until I stumbled on Aidan Steele's open-source client for interacting with IAM Roles Anywhere is a much friendlier way.
I also came across Björn Wenzel's example of using the offical
aws_signing_helperalong with HashiCorp'svaultto manage a certificate authority. This process could also be used to generate the certificates.
Codespaces .devcontainer
By far the easiest way to get started with a custom environment in GitHub Codespaces is to define a .devcontainer/ directory and populate it with a Development Container configuration. I won't go into heaps of detail in this post on the inner workings of the configuration, but at the very least I'll get you started with a configuration that will work for setting up a Codespace environment with IAM Roles Anywhere.
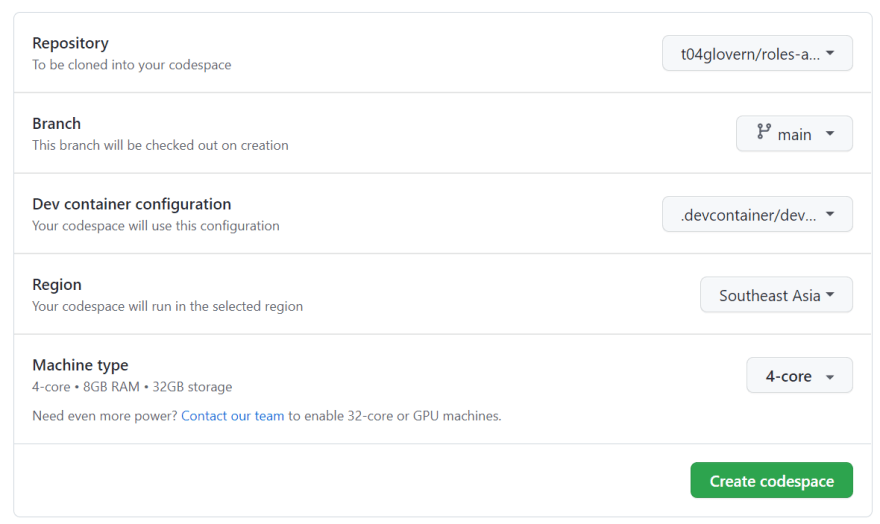
In the repository that you want to use with GitHub Codespaces, create the following files.
.devcontainer/Dockerfile
# [Choice] Ubuntu version (use ubuntu-22.04 or ubuntu-18.04 on local arm64/Apple Silicon): ubuntu-22.04, ubuntu-20.04, ubuntu-18.04
ARG VARIANT="jammy"
FROM mcr.microsoft.com/vscode/devcontainers/base:0-${VARIANT}
.devcontainer/devcontainer.json
// For format details, see https://aka.ms/devcontainer.json. For config options, see the README at:
// https://github.com/microsoft/vscode-dev-containers/tree/v0.241.1/containers/ubuntu
{
    "name": "Ubuntu",
    "build": {
        "dockerfile": "Dockerfile",
        "args": { "VARIANT": "ubuntu-22.04" }
    },
    "postStartCommand": ".devcontainer/env.sh",
    "remoteUser": "vscode",
    "features": {
        "git": "os-provided",
        "aws-cli": "latest",
        "golang": "latest",
        "sshd": "latest"
    }
}
.devcontainer/env.sh
#!/bin/bash

set -x
set -e

# Install openrolesanywhere client
if [ -e /tmp/openrolesanywhere ];
  then rm -rf /tmp/openrolesanywhere;
fi
git clone https://github.com/aidansteele/openrolesanywhere.git /tmp/openrolesanywhere
cd /tmp/openrolesanywhere/cmd/openrolesanywhere
go install .
Create Codespace
Commit the changes above to your selected repository then open it up in GitHub Codespaces.
Within the example .devcontainer above I've done the hard work of installing the AWS CLI and dependencies needed to run the openrolesanywhere client.
Roles Anywhere Configuration
Authenticate with AWS manually (one last time)
I know the whole point of this exercise was to remove the need to get temporary credentials/access tokens, but for the last time (hopefully ever), you'll need to set up your AWS CLI credentials within this Codespace just so we're able to deploy all the resources needed.
Follow the quick configuration guide and ensure that whatever user you are deploying this with has at least permissions to interact fully with KMS and IAM.
For this guide, we'll be deploying to us-east-1 as well, so I've added the following line to my ~/.aws/config file as well just to ensure I'm consistent.
[default]
region = us-east-1
Certificate Authority & KMS Key
Start by deploying a KMS key that will be used as the private key for our certificate authority. An example KMS key can be deployed through the kms.yml template by running the following:
aws cloudformation deploy \
    --region us-east-1 \
    --template-file ./kms.yml \
    --stack-name openrolesanywhere-kms
Output from this stack is the KMS Key ID that will be needed when creating the certificate authority with the openrolesanywhere CLI. Go ahead now and create the certificate authority and pass it to the KMS Key ID output. This can be done all in one step with the following
Feel free to tweak other CA options by referencing Aidan Steele's project directly.
KMS_KEY_ID=$(aws cloudformation describe-stacks \
    --stack-name "openrolesanywhere-kms" \
    --region us-east-1 \
    --query 'Stacks[0].Outputs[?OutputKey==`KeyId`].OutputValue' \
    --output text)

openrolesanywhere admin create-ca \
    --name openrolesanywhere-trust \
    --kms-key-id $KMS_KEY_ID \
    --validity-duration 8760h \
    --serial-number 1 \
    --common-name Codespaces \
    --organization DevOpStar
The above creates whats called an IAM Roles Anywhere trust anchor and sets it up to use our certificate authority all in one step.
Roles Anywhere Profile
A Roles Anywhere profile now has to be created which maps the trust anchor created prior and a given role that will be assumed by this Codespace eventually.
You can see an example in the role.yml template which provides basic S3 access to a bucket called roles-anywhere-codespaces-example. I recommend changing this role template to contain a different set of resources based on your requirements before deploying.
Deploy by running the following commands:
aws cloudformation deploy \
    --region us-east-1 \
    --template-file ./role.yml \
    --stack-name openrolesanywhere-role \
    --capabilities CAPABILITY_NAMED_IAM

# arn:aws:iam::012345678912:role/roles-anywhere-codespaces-example
S3_EXAMPLE_ROLE=$(aws cloudformation describe-stacks \
    --region us-east-1 \
    --stack-name "openrolesanywhere-role" \
    --query 'Stacks[0].Outputs[?OutputKey==`RoleArn`].OutputValue' \
    --output text)

openrolesanywhere admin create-profile \
    --name codespaces-example \
    --session-duration 3600s \
    --role-arn $S3_EXAMPLE_ROLE
Backup CA
IMPORTANT: At this point you have a CA configured within your codespaces that should be backed up and stored somewhere safe/offline. Copy the following files to a safe location for when you want to generate other certificates using the same CA:
- ~/.config/openrolesanywhere/ca.pem
- ~/.config/openrolesanywhere/profile-arn.txt
- ~/.config/openrolesanywhere/trust-anchor-arn.txt
The ca.pem is a very important file as it cannot be recovered if you lose it. The profile-arn.txt and trust-anchor-arn.txt files are just mappings to ARNs of resources that can be retrieved from the AWS console if needed.
Private Key for signing
Next, we must create a private key that will be used to sign our requests to AWS IAM Roles Anywhere.
Ideally this key should only be used for this Codespace instances and shouldn't be shared across devices (even if it is possible to).
Create a new SSH private key to use for this example
ssh-keygen -t rsa -b 4096 -f ~/.ssh/id_rsa_codespaces -C "your_email@example.com"
# Press ENTER a bunch
ssh-add ~/.ssh/id_rsa_codespaces
Run ssh-add -l to get a list of fingerprints for the keys stored in your SSH agent. In my example, I have this output.
$ ssh-add -l
# 4096 SHA256:dxzQKbZvcaQkOpJ55YbZ+1/aWENrgBb8zZIkxl5BRGE your_email@example.com (RSA)
Now we need to generate a certificate request using the openrolesanywhere client. This is done by running the following command:
openrolesanywhere request-certificate \
    --ssh-fingerprint SHA256:dxzQKbZvcaQkOpJ55YbZ+1/aWENrgBb8zZIkxl5BRGE > ./key.csr
Next, the CSR has to be accepted, and a certificate generated by running the following command:
openrolesanywhere admin accept-request \
    --request-file ./key.csr \
    --validity-duration 8760h \
    --serial-number 2 \
    --common-name Codespaces \
    --organization DevOpStar > codespaces.pem
This creates a file called codespaces.pem, which is our certificate used alongside our private key to make calls to AWS IAM Roles Anywhere.
Testing Certificates
Copy the contents of the codespaces.pem file to a new file in ~/.config/openrolesanywhere/codespaces.pem.
Retrieve the output ARN from our role.yml stack by running the following command again:
aws cloudformation describe-stacks \
    --region us-east-1 \
    --stack-name "openrolesanywhere-role" \
    --query 'Stacks[0].Outputs[?OutputKey==`RoleArn`].OutputValue' \
    --output text
Then using this role ARN, update your ~/.aws/config:
[profile default]
credential_process = openrolesanywhere credential-process --name codespaces --role-arn arn:aws:iam::012345678912:role/roles-anywhere-codespaces-example
region = us-east-1
Test that the Roles Anywhere profile works by running the following command; the output should look similar.
aws sts get-caller-identity
# {
#     "UserId": "AROAUBLxxxxxxxxxxxxx:02",
#     "Account": "012345678901",
#     "Arn": "arn:aws:sts::012345678901:assumed-role/roles-anywhere-codespaces-example/02"
# }
Configuring Codespaces Secrets
Create the following GitHub repository secrets by navigating to:
https://github.com/{GithubUser}/{RepoName}/settings/secrets/codespaces
The following secrets are required:
-
ROLES_ANYWHERE_CERTIFICATE: The contents of the
codespaces.pemfile. -
ROLES_ANYWHERE_ROLE: The role output from the
role.ymlstack -
SSH_PRIVATE_SIGNING_KEY: Private key contents from the
~/.ssh/id_rsa_codespacesfile
Once those secrets are created, clear out all the ancillary files that were created during this setup process that might be in your repository structure .pem, .csr, and possibly the .yml files (safe to delete).
Modify .devcontainer/env.sh
Finally, we can modify the .devcontainer/env.sh file to now contain the following script that is also available at https://github.com/t04glovern/roles-anywhere-codespaces/blob/main/.devcontainer/env.sh
The script does the following:
- Installed openrolesanywhere client
- Imports private key for signing from GitHub secrets into codespaces
- Imports the
codespaces.pemcertificate into theopenrolesanywhereclient directory - Configures AWS CLI to use the
openrolesanywhereclient for the credentials_process
#!/bin/bash

set -x
set -e

# Install openrolesanywhere client
if [ -e /tmp/openrolesanywhere ];
  then rm -rf /tmp/openrolesanywhere;
fi
git clone https://github.com/aidansteele/openrolesanywhere.git /tmp/openrolesanywhere
cd /tmp/openrolesanywhere/cmd/openrolesanywhere
go install .

if ([ -z "${ROLES_ANYWHERE_CERTIFICATE}" ] && [ -z "${ROLES_ANYWHERE_ROLE}" ] && [ -z "${SSH_PRIVATE_SIGNING_KEY}" ]); then
  echo "ROLES_ANYWHERE_CERTIFICATE, ROLES_ANYWHERE_ROLE or SSH_PRIVATE_SIGNING_KEY are undefined - skipping AWS auth setup within Codespaces"
else
  # Setup SSH Signing key
  mkdir -p ~/.ssh
  if [ -e ~/.ssh/id_rsa_codespaces ];
    then rm -rf ~/.ssh/id_rsa_codespaces;
  fi
  printenv 'SSH_PRIVATE_SIGNING_KEY' > ~/.ssh/id_rsa_codespaces
  chmod 400 ~/.ssh/id_rsa_codespaces
  ssh-keygen -y -f ~/.ssh/id_rsa_codespaces > ~/.ssh/id_rsa_codespaces.pub

  # Setup openrolesanywhere config
  mkdir -p ~/.config/openrolesanywhere
  printenv 'ROLES_ANYWHERE_CERTIFICATE' > ~/.config/openrolesanywhere/codespaces.pem

  # Create credential handler for AWS credential_process
  sudo tee /opt/roles-anywhere-handler << END
#!/bin/bash
eval "\$(ssh-agent -s)" > /dev/null
ssh-add ~/.ssh/id_rsa_codespaces > /dev/null
openrolesanywhere credential-process --name codespaces --role-arn $ROLES_ANYWHERE_ROLE
END

  # Setup AWS config
  mkdir -p ~/.aws
  tee ~/.aws/config << END
[profile default]
credential_process = /opt/roles-anywhere-handler
region = us-east-1
END
fi
Commit the changes above to your repository and give it a try by rebuilding your Codespace from scratch - Delete it from https://github.com/codespaces and re-create!
Once booted up you should find that running the following command still returns an authenticated response
aws sts get-caller-identity
# {
#     "UserId": "AROAUBLxxxxxxxxxxxxx:02",
#     "Account": "012345678901",
#     "Arn": "arn:aws:sts::012345678901:assumed-role/roles-anywhere-codespaces-example/02"
# }
Cleanup
To remove all the resources we've created, you'll need to delete:
- The Trust anchor and profile from the Roles Anywhere console: https://us-east-1.console.aws.amazon.com/rolesanywhere/home?region=us-east-1#
- The CloudFormation stacks
openrolesanywhere-roleandopenrolesanywhere-kmsfrom https://us-east-1.console.aws.amazon.com/cloudformation/home?region=us-east-1 - GitHub Secrets for your codespace.
Summary
GitHub Codespaces and AWS IAM Roles Anywhere are now configured to work together, but not without some fairly complex configuration. Ultimately I'm hoping to one day see GitHub Codespaces surfacing OIDC/JWT authentication that can be used with how GitHub actions currently work with Identity providers to deploy into accounts.
For now, this is a fairly Ok solution.
I'm interested to hear your thoughts on this, and I suppose how it could be improved. Please reach out to me on Twitter if you have any further queries or if you have other ways of dealing with this process!


Latest comments (0)