Publish a Machine Learning API to the Internet in like…15 Minutes
You’ve been working on your ML app and a live demo is coming up fast. You wanted to push it to Github, add Docker, and refactor the code but you spent all day yesterday on some stupid pickle error you still don’t really understand. Now you only have 1 hour before the presentation and your ML app needs to be available on the internet. You just need to be able to reach your model via browser for 15 seconds to show some executives.
 on [Unsplash](https://unsplash.com?utm_source=medium&utm_medium=referral)](https://res.cloudinary.com/practicaldev/image/fetch/s--tuO9NDaQ--/c_limit%2Cf_auto%2Cfl_progressive%2Cq_auto%2Cw_880/https://cdn-images-1.medium.com/max/6962/0%2AIcd0CYpJwheyXAFJ)
This tutorial is the “zero best practices” way to create a public endpoint for your model on AWS. In my opinion, this is one of the shortest paths to creating a model endpoint assuming you don’t have any other tooling setup (SCM, Docker, SageMaker) and have written a small application in Python.
You’ll need:
The AWS console
A terminal
Your ML app
If you don’t have an ML app and just want to follow along, here’s the one I wrote this morning. My app was built with FastAPI because it was….fast…but this will work for any Flask/Dash/Django/Streamlit/whatever app.
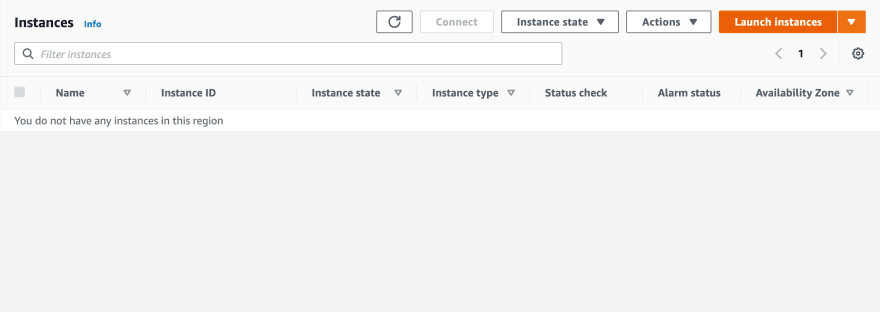
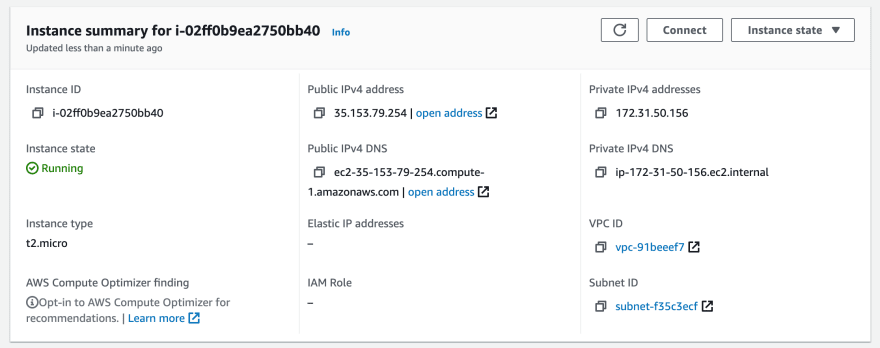
Create an EC2 Instance
Log into the console, search “EC2” and navigate to the instances page.
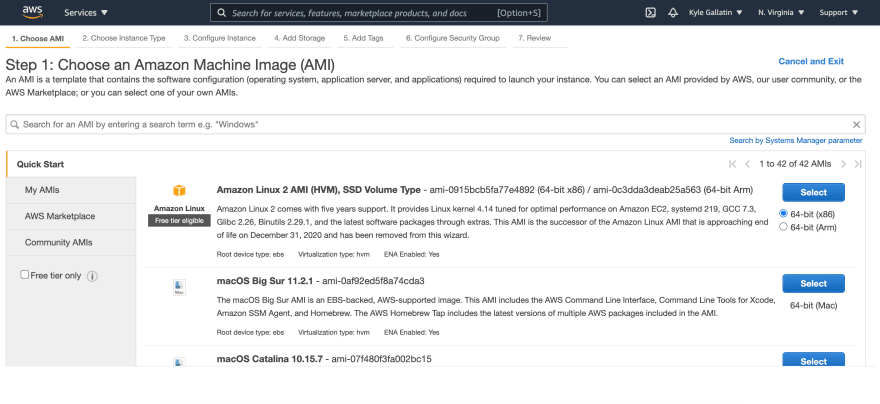
Click “launch instance”. Now you have to select a machine type. You’re in a rush, so you just click the first eligible one you see (Amazon Linux 2 AMI).
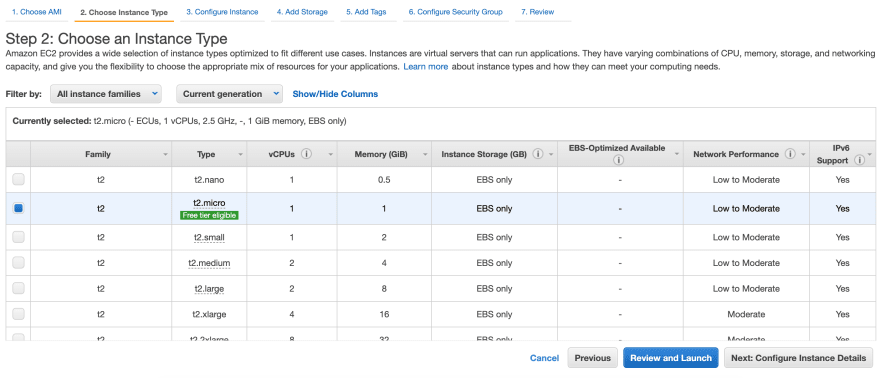
You decide to keep the default settings (leave it a t2.micro) and click “Review and Launch”.
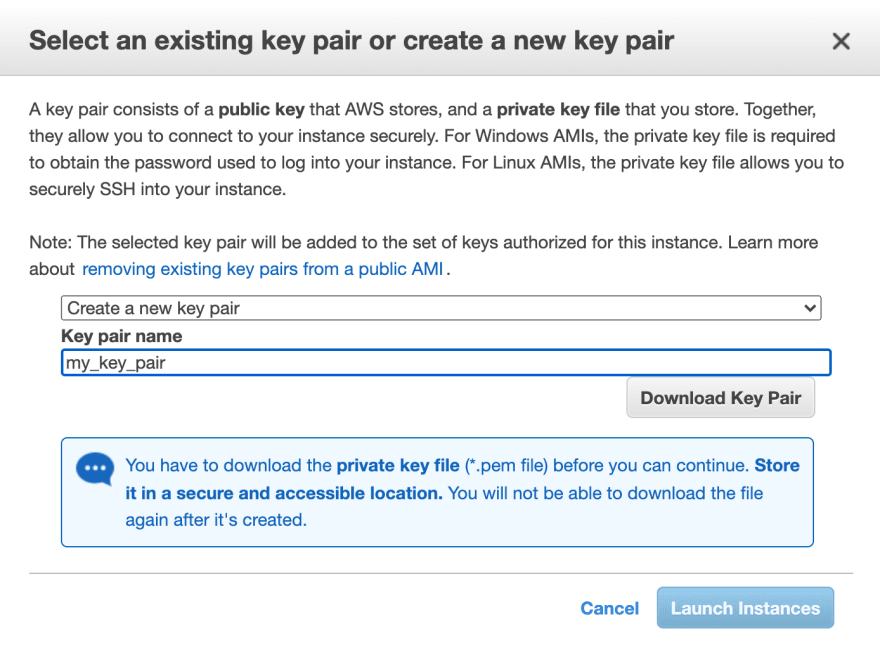
Create a new key pair, click “Download Key Pair” and then launch the instance.
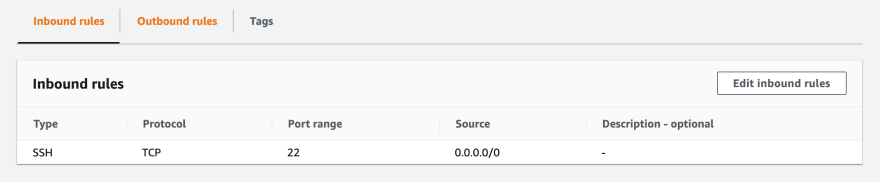
Open Port 80
While we’re here in the console, let’s open port 80 to web traffic. Navigate back to instances page and click on your instance.
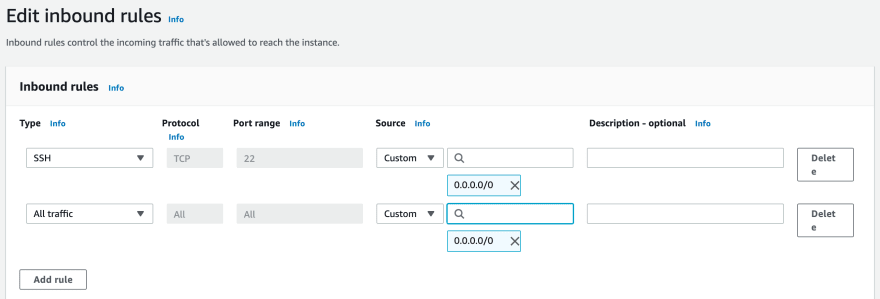
Go the the “Security” tab, and under security groups click there should be a link you can click on that looks like sg-randomletters (launch-wizard-3). On the next page scroll to the bottom where and go to “Edit Inbound Rules”.
Add an all traffic rule with 0.0.0.0/0 CIDR block and then save.
Copy Your Files to the Instance
Now our instance is ready to go, so let’s get our files over. To make it easy we can set 2 environment variables. KEY is just the path to the .pem file you downloaded earlier, and HOST is the Public IPv4 DNS name you can view on the instances page.
Edit the example below to contain your information. These commands assume macOS/Linux, for Windows check out PuTTY.
export HOST=ec2-35-153-79-254.compute-1.amazonaws.com
export KEY=/PATH/TO/MY/KEY.pem
Now we can copy our files over. Again if you don’t have an ML app, clone my slapdash one, and cd into the directory.
git clone [https://github.com/kylegallatin/fast-bad-ml.git](https://github.com/kylegallatin/fast-bad-ml.git)
cd fast-bad-ml
Now change key perms and copy everything.
chmod 700 $KEY
scp -i $KEY -r $(pwd) ec2-user@$HOST:/home/ec2-user
Type yes and you’ll see files copying over.
Setup Your Instance
Now it’s time to ssh in and start a session so we can run our app.
ssh -i $KEY ec2-user@$HOST
Running pwd && ls will show you that you’re in /home/ec2-user and the contents of a previous directory have been copied. Now cd into that directory and setup Python (this assumes you have a requirements.txt).
cd fast-bad-ml
sudo yum install python3
sudo python3 -m pip install -r requirements.txt
Run and Test Your App
Now that everything is installed, start your application on port 80 (default web traffic) using host 0.0.0.0 (binds to all addresses — 127.0.0.1 won’t work).
The command below is the uvicorn command for my FastAPI app, but you can replace that part to suit your app as long as host/port are the same.
sudo /usr/local/bin/uvicorn app:app --reload --port 80 --host 0.0.0.0 &
The & runs the process in the background so it doesn’t stop when you exit the session and remains available. Add nohup to redirect logs for later perusal.
You can now reach the app from the internet. Use the same Public IPv4 DNS as earlier and just copy it into a browser. I’ve configured the / route to return a simple message.

If you’ve exposed a /predict method that takes query parameters, you can pass those in with the URL too to get your prediction. The format is $HOST/$ROUTE/?$PARAM1=X&$PARAM2=Y....

Conclusion
Just want to caveat this is nothing close to production. Even if we introduced Docker and the scale of Kubernetes, true “production” requires tests, automated CI/CD, monitoring, and much more. But for getting you to the demo on time? There’s nothing better. Good luck!


Top comments (0)