
Typesense is a completely free and open-source typo-tolerant search engine designed for programmers and developers who want to drastically reduce the time it takes to conduct effective and efficient searches. Learn more about Typesense and why it's so valuable to modern developers. Headless CMS, on the other hand, is a form of the content management system (mostly focused on the backend stack) in which the content or the main body is isolated from the presentation layer also known as head.Content and data which are stored in a headless CMS are provided or parsed via. APIs. some traditional and classic CMS platforms also included these headless API features that let users submit content and data to a different presentation layer. The main reason it is named as headless because the presentation layer is separated from the body itself, hence the name Headless CMS (CMS without a head)
In this article, we'll learn how to integrate Typesense with any type of headless CMS. We'll start first, by configuring and installing the Typesense server, then move on to learning how to get started with any type of headless CMS and how to index the data and content provided by the CMS via API and populate it inside our Typesense server. We'll do everything from scratch, so don't forget to follow along.
Configuring Headless CMS
There are numerous Headless CMS options available on the market, and you are free to choose any type of Headless CMS that provides content and data via REST API. The UI and installation of each CMS may differ, but the essential structure of practically every CMS is the same.
Check out the link below for a list of Headless CMS that are currently available on the market, and learn how to use each one by visiting their official Documentation site and Github repository(only those whose source codes have been made public).
Note: Not every Headless CMS on the market is open sourced; in fact, the majority of them are closed sourced, so choose deliberately and carefully. Make sure you know what you're doing and how you're implementing it.
Setting up Client/Storefront
Now that we've learned what headless is and how to configure it, let's set up the client-side for our application because headless means no presentation layer, we'll need to set up and built our own custom client side storefront for it, so without further ado, let's get started configuring and setting up our client side application. To do so, create a folder and named it as client or storefront
mkdir storefront

Head over to that storefront directory that you just created.
cd storefront

Let’s begin by creating our frontend stack with the help of create-react-app toolchain. We will guide you through the designing part of the user interface(UI) and its functionalities from the ground up. Let us get started on building our application from absolute scratch.
Configuring our react application
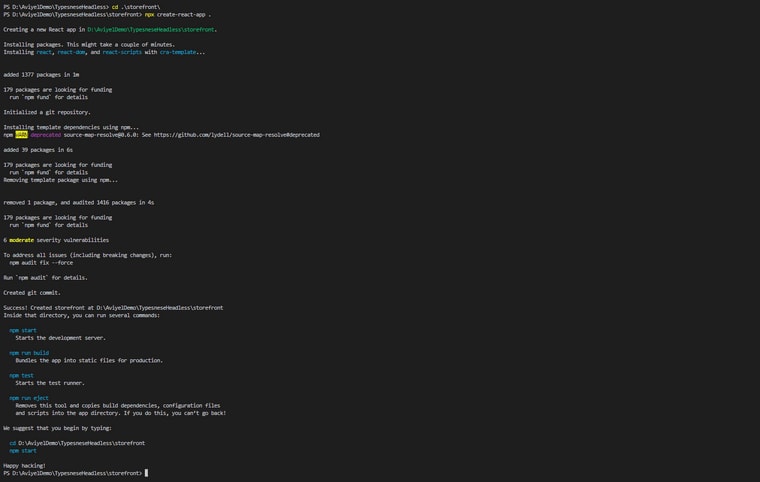
Let's start with the storefront, which we'll construct with the help of reactjs. So, if Node.js isn't already installed on your PC, that should be your first step. So, go to the official Node.js website and install the correct and appropriate version, but I'm hoping you've already done so because we couldn't install and configure our Headless CMS server without it. Open your favorite code editor and navigate to the client folder. For this tutorial, I used VScode. Next, launch the integrated terminal by hitting ctrl+' and entering npx create-react-app . This command will create an app called storefront inside the current directory.

It usually only takes a few minutes to get started and install the react application. Normally, we would use npm to get packages into the project, but in this case, we're using npx, the package runner, which will download and configure everything for us so that we can get started with a great boilerplate react template.
npx create-react-app .

Boilerplate cleanup.
To begin, we must clean up our projects by removing and deleting some of the files provided by the create-react-app boilerplate template. Your src files and folder structure should look like this once you are done with it.

Installing some third-party packages
Depending on the Headless CMS that you are integrating, this project may demand the implementation of a few third-party packages. so install few packages that might be helpful.
Axios
Axios is a promise-based HTTP client for the browser and node.js. It is isomorphic, which means it can run from the same source in both the browser and nodejs. On the server, it employs the native Node.js http module, while on the client-side, it employs XMLHttpRequests.
npm install axios

Installing Typesense
We'll be installing Typesense after Axios, which is a Javascript client library for using the Typesense HTTP API. This library can be used on both the client and server sides.
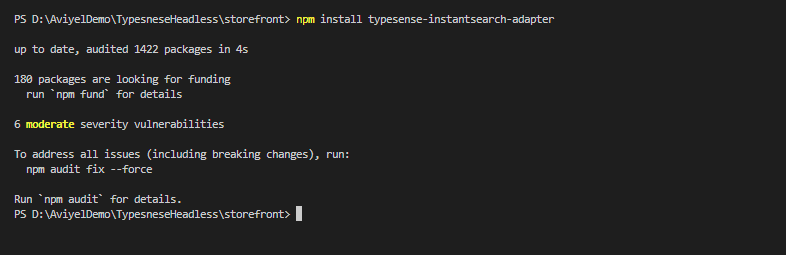
Installing typesense-instantsearch-adapter
Install typesense-instantsearch-adapter so that we may use it inside our project, this adapter simply uses the power of Instantsearch.js package to generate sophisticated search interfaces in conjunction with a Typesense Search Server.
npm install typesense-instantsearch-adapter
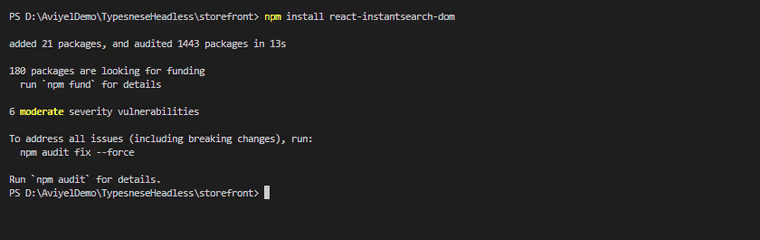
Installing react-instantsearch-dom
Let’s set up and configure the react-instantsearch-dom package, which is a React wrapper for Algolia's instantsearch library. To put it simply, react instantsearch is a fully open-source React UI toolkit that enables you to quickly construct a search experience in your front-end application. InstantSearch's mission is to make developing amazing search experiences as simple as possible for developers by providing a complete search experience. InstantSearch addresses a significant portion of this broad goal by providing front-end widgets that can be assembled into a flexible as well as highly-customizable search experience.
npm install react-instantsearch-dom
Finally, your package.jsonfile should look like this once you've installed all of your project's dependencies.

Starting up Typesense Server
Once our project and dependencies have been properly installed, we can continue to next step. Let's get started and index all of our Headless CMS content and data. To begin building our Typesense index, we must first set up and start our Typesense server. There's one awesome method that you can use fairly easily, which is very easy and known to work, so let’s create a script/command from which we can configure our docker image and run the docker container that will basically bind and give it a volume that will connect to where we will be storing the data.
Let's begin by generating a new script in the scripts folder, because we'll have a few scripts loaded in here that will allow us to index the data and start the typesense server, or the docker container, so you can basically put it inside the script run tag inside the package.json So that whenever you want to start the server, you simply open a command prompt and run the npm command to fire up the entire script.

Setting up Server run script
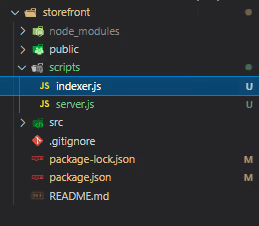
Create a new file called server.js inside the scripts folder. So, while this script will simply run the docker command, we must first configure it. This is what the folder structure should look like.

The first step is to run and import exec commands from within the node.js child process library.
//scripts/typesenseServer.js
const { exec } = require("child_process");
...
...
...
Let's start our typesense server with our custom script command. We'll use the docker -run and detach commands to run the docker in the background, and then specify the port we want it to run on. The most important part of this command is the volume section; what we're doing here is binding the volume, which is essentially a way for storing the typesense's data, which is generally saved inside the container. As a result, typesense will save the data in the container's /data folder, and it will expose and connect this data folder to the system location we specify, in this case the temporary directory.
After that, we need to provide the image we want to run inside our docker container, and once that's done, we'll specify the data directory and the api key, which you can fill with whatever you want, and finally the listen port, as well as enable cors to avoid any CORS issues.
const command = `docker run -d -p 8108:8108 -v/tmp/typesense-server-data/:/data \ typesense/typesense:0.22.2 --data-dir /data --api-key=headlessCMSTypesense--listen-port 8108 --enable-cors`;
Finally, execute the application and add an error handler just in case something goes wrong. As a result, your server.js code should look like this:
// scripts/server.js
const { exec } = require("child_process");
const command = `docker run -d -p 8108:8108 -v/tmp/typesense-server-data/:/data \ typesense/typesense:0.22.2 --data-dir /data --api-key=headlessCMSTypesense--listen-port 8108 --enable-cors`;

exec(command, (err) => {
  if (!err) console.log("✨✨✨ Typesense Server is up and running ✨✨✨");

  if (err) {
    console.log("Error running server: ", err);
  }
});
Now, we can simply update the script tag in our package.json file now that we have our server.js script ready to go.
"start-typesnese": "node scripts/typesenseServer.js"
After you've configured the script tag, your script tag inside package.json file should look like this.
 "scripts": {
    "start": "react-scripts start",
    "build": "react-scripts build",
    "test": "react-scripts test",
    "eject": "react-scripts eject",
    "start-typesense":"node scripts/server.js"
  },
Alternative method to run typesense server
Instead of writing a separate script to launch the server, you may run it manually with just one command. To do so, go to the project terminal and make sure your Docker desktop is running, then copy and paste the following command into the terminal.
docker run -d -p 8108:8108 -v/tmp/typesense-server-data/:/data \ typesense/typesense:0.22.2 --data-dir /data --api-key=headlessCMSTypesense--listen-port 8108 --enable-cors


Running the Typesense server via. custom script
Before we run our script to start the typesense server, make sure your Docker desktop is up and running.

Finally, initialize and start the server by typing npm run start-typesense, and your docker will start running automatically, then you can proceed to the next step of indexing the data/collection.
npm run start-typesense

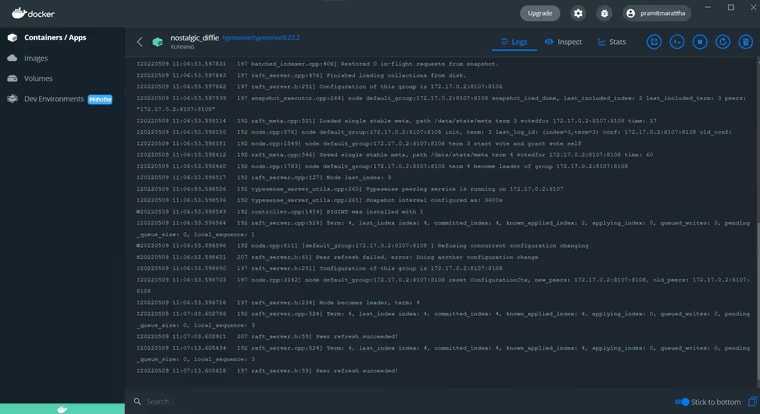
Whenever you start the typesense server, you should see something like this inside the Docker desktop application.
Indexing data on Typesense
Now that both our Headless CMSs and Typesense server are up and running, the next step is to populate and index the data from our Headless CMS within the Typesense server so that we can query that typesense server and conduct immediate search in our UI. Let's get started with the data indexer script. We'll begin by creating an indexer.js file in the scripts folder.
Index data on typesense
The Typesense library must first be imported into our project.
// scripts/indexer.js
const Typesense = require("typesense");
...
...
...
Create a self-executing function that runs whenever the indexer script is fired, and make it asynchronous so we can use the async await feature. Simply create module.export and make the self-executing function inside it asynchronous so that we can write a script that reads the data, creates a collection, then manages the typesense server before indexing it. So, the first step is to configure the typesense client, which will enable us to connect to the server and begin managing, indexing, and retrieving data.
// scripts/indexer.js
const Typesense = require("typesense");

module.exports = (async () => {
  const TYPESENSE_CONFIG = {
    nodes: [
      {
        host: "localhost",
        port: "8108",
        protocol: "http",
      },
    ],
    apiKey: "headlessCMSTypesense",
  };
})();
As shown in the code above, we established a typesense configuration variable and supplied the node properties to it.
Note: A client can connect to multiple nodes for a single server, and since nodes are simply servers, these specific nodes are actually an array that holds the actual configuration for each server that you want to connect to and that you want the client to access, and since we only have one server running, we will only use one node.
Finally, we specified the host, typesense port, and protocol, as well as the api key, inside the nodes array.
Let's utilize the Typesense configuration to create a Typesense client.
// scripts/indexer.js
const Typesense = require("typesense");

module.exports = (async () => {
  const TYPESENSE_CONFIG = {
    nodes: [
      {
        host: "localhost",
        port: "8108",
        protocol: "http",
      },
    ],
    apiKey: "headlessCMSTypesense",
  };

  console.log("Config: ", TYPESENSE_CONFIG);

  const typesense = new Typesense.Client(TYPESENSE_CONFIG);
})();
Let's go on to the following stage, which is crucial because it's here that we offer the schema that will be utilized to index our data into the typesense database.
Let's pretend this is the response we'll get from our Headless CMSs API endpoint.

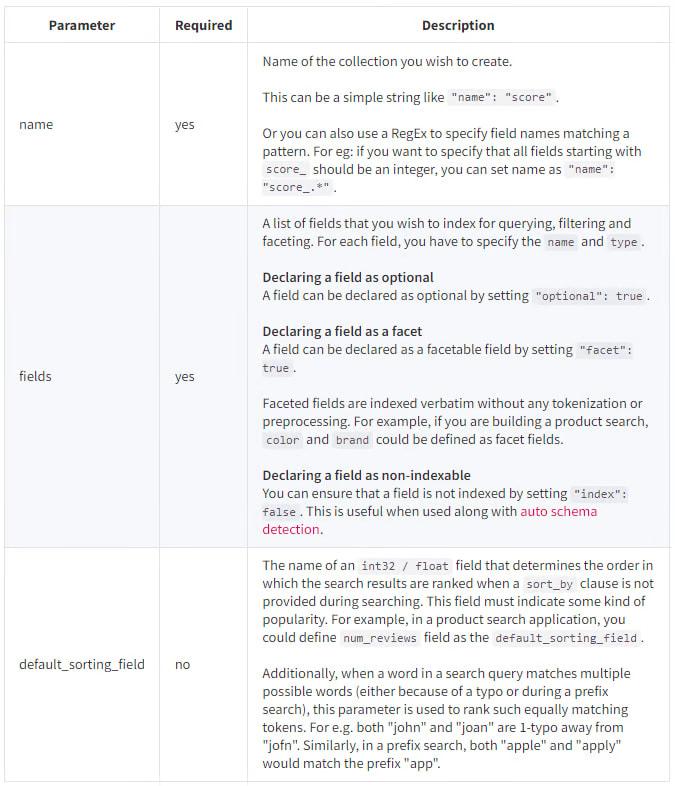
Typesense Schema has a straightforward syntax and is simple to use. A schema is a description of how your data will be stored. As a result, the schema should only contain the fields you want to index. You'll see that this technique is heavily influenced by noSQL databases, particularly mongodb, if you're familiar with them. After that, give the schema a name and specify that the num_documents is zero.
Next, supply the name, type, and facet for the fields, which will be an array of objects containing every single field that we want to index and save in our database. If you're wondering what a facet is, it's a feature that allows you to create categories based on a subset of qualities so that users may refine their search results.
This is how your indexer file, collection and schema should appear for now.
 // scripts/indexer.js
const Typesense = require("typesense");

module.exports = (async () => {
  const TYPESENSE_CONFIG = {
    nodes: [
      {
        host: "localhost",
        port: "8108",
        protocol: "http",
      },
    ],
    apiKey: "headlessCMSTypesense",
  };

  console.log("Config: ", TYPESENSE_CONFIG);

  const typesense = new Typesense.Client(TYPESENSE_CONFIG);

  const schema = {
    name: "<----Schema_Name---->",
    num_documents: 0,
    fields: [
      {
        name: "<----Field_Name---->",
        type: "string",
        facet: true,
      },
      {
        name: "<----Field_Name---->",
        type: "string",
        facet: true,
      },
      {
        name: "<----Field_Name---->",
        type: "string",
        facet: false,
      },
    ],
  };
})();
Let's start by fetching data from a Headless CMS API endpoint, which we'll do by importing and using the Axios package we installed earlier, and then mapping that field and filtering out the data to index it on the Typesense server.
 const rawData = await axios.get("http://localhost:4000/<--Some_endpoint--->");

    const dataToIndex = rawData.data.products.map((someData) => {
        return {
            id: someData.id,
            title: someData.title,
            image: someData.image,
            description: someData.description,
        };
    });
Once that's done, it's time to call the Typesense client and establish a connection with a schema within it. As a result, your indexer file should resemble the following.
// scripts/indexer.js
const Typesense = require("typesense");
const axios = require("axios");

module.exports = (async () => {
  const TYPESENSE_CONFIG = {
    nodes: [
      {
        host: "localhost",
        port: "8108",
        protocol: "http",
      },
    ],
    apiKey: "headlessCMSTypesense",
  };

  console.log("Config: ", TYPESENSE_CONFIG);

  const typesense = new Typesense.Client(TYPESENSE_CONFIG);

const schema = {
    name: "<----Schema_Name---->",
    num_documents: 0,
    fields: [
      {
        name: "<----Field_Name---->",
        type: "string",
        facet: true,
      },
      {
        name: "<----Field_Name---->",
        type: "string",
        facet: true,
      },
      {
        name: "<----Field_Name---->",
        type: "string",
        facet: false,
      },
    ],
  };

 const rawData = await axios.get("http://localhost:4000/<--Some_endpoint--->");

    const dataToIndex = rawData.data.products.map((someData) => {
        return {
            id: someData.id,
            title: someData.title,
            image: someData.image,
            description: someData.description,
        };
    });
  try {
    const collection = await typesense.collections("<----Schema_Name---->").retrieve();
  } catch (err) {
    console.error(err);
  }
})();
If data duplication occurs during importing the data, simply add the following code to the indexer file before generating the schema, since it will simply erase the existing data and replace it with new data.
 if (collection.num_documents !== dataToIndex.length) {
        console.log("Deleting collection");
        await typesense.collections("<--Schema_Name-->").delete();
      }
Your indexer script should now look something like this.
// scripts/indexer.js
const Typesense = require("typesense");
const axios = require("axios");

module.exports = (async () => {
  const TYPESENSE_CONFIG = {
    nodes: [
      {
        host: "localhost",
        port: "8108",
        protocol: "http",
      },
    ],
    apiKey: "headlessCMSTypesense",
  };

  console.log("Config: ", TYPESENSE_CONFIG);

  const typesense = new Typesense.Client(TYPESENSE_CONFIG);

const schema = {
    name: "<----Schema_Name---->",
    num_documents: 0,
    fields: [
      {
        name: "<----Field_Name---->",
        type: "string",
        facet: true,
      },
      {
        name: "<----Field_Name---->",
        type: "string",
        facet: true,
      },
      {
        name: "<----Field_Name---->",
        type: "string",
        facet: false,
      },
    ],
  };

 const rawData = await axios.get("http://localhost:4000/<--Some_endpoint--->");

    const dataToIndex = rawData.data.products.map((someData) => {
        return {
            id: someData.id,
            title: someData.title,
            image: someData.image,
            description: someData.description,
        };
    });
  try {
const collection = await typesense.collections("<----Schema_Name---->").retrieve();
    if (collection.num_documents !== dataToIndex.length) {
        console.log("Deleting collection");
        await typesense.collections("<--Schema_Name-->").delete();
      }
  } catch (err) {
    console.error(err);
  }
})();
Finally, create a collection called and specify your schema name. When we establish a collection, we give it a name and specify the fields that will be indexed when a document is added to it.
A Collection in Typesense is a group of connected Documents that works like a table in a relational database.
This is what your finished code should look like inside the indexer.js file.
// scripts/indexer.js
const Typesense = require("typesense");
const axios = require("axios");

module.exports = (async () => {
  const TYPESENSE_CONFIG = {
    nodes: [
      {
        host: "localhost",
        port: "8108",
        protocol: "http",
      },
    ],
    apiKey: "headlessCMSTypesense",
  };

  console.log("Config: ", TYPESENSE_CONFIG);

  const typesense = new Typesense.Client(TYPESENSE_CONFIG);

const schema = {
    name: "<----Schema_Name---->",
    num_documents: 0,
    fields: [
      {
        name: "<----Field_Name---->",
        type: "string",
        facet: true,
      },
      {
        name: "<----Field_Name---->",
        type: "string",
        facet: true,
      },
      {
        name: "<----Field_Name---->",
        type: "string",
        facet: false,
      },
    ],
  };
 const rawData = await axios.get("http://localhost:4000/<--Some_endpoint--->");

    const dataToIndex = rawData.data.products.map((someData) => {
        return {
            id: someData.id,
            title: someData.title,
            image: someData.image,
            description: someData.description,
        };
    });
  try {
const collection = await typesense.collections("<----Schema_Name---->").retrieve();
    if (collection.num_documents !== dataToIndex.length) {
        console.log("Deleting collection");
        await typesense.collections("<--Schema_Name-->").delete();
      }
  } catch (err) {
    console.error(err);
  }

  console.log("Creating schema...");

  await typesense.collections().create(schema);

  console.log("Populating collection data...");

  try {
    const returnData = await typesense
      .collections("<----Schema_Name---->")
      .documents()
      .import(dataToIndex);
    console.log("Return data: ", returnData);
  } catch (err) {
    console.error(err);
  }
})();
We can simply update the script tag in our package.json file now that we have our indexer.js script is ready.
"scripts": {
    "start": "react-scripts start",
    "build": "react-scripts build",
    "test": "react-scripts test",
    "eject": "react-scripts eject",
    "start-typesense":"node scripts/server.js",
    "indexer": "node scripts/indexer.js"
  },
Finally, your package.json file should look like this once you've updated the script.

Finally, type npm run indexer to start indexing the data in typesense server, and your data will begin to populate inside the typesense server. Before starting the script, make sure both of your Headless CMS and Typesense servers are up and running.
npm run indexer
you should see the following response.

Once you get this response that means, you've successfully indexed all of your data on your Typesense server.
Testing the indexed data using Hoppscotch
Both our Medusa and Typesense servers are up and running, and we've successfully indexed all of our dummy product data(provided by Medusa) inside Typesense. Now it's time to see if we've successfully indexed our data or not, so open your API testing tool, enter the following URL and send GET request:
localhost:8108/collections/<collection_name>/documents/export
Now, send a GET request with the header x-typesense-api-key and your Typesense server apikey as Key, and once you've done that, you should see a response something similar to this.
{
  "id": "1",
  "title": "Awesome Title",
  "description": "Awesone Description"
  "image": "https://some_image_link1.png",
},
{
  "id": "2",
  "title": "Some Awesome Title",
  "description": "Another Awesone Description"
  "image": "https://some_image_link2.png",
},
{
  "id": "3",
  "title": "Another Awesome Title",
  "description": "Another Awesone Description"
  "image": "https://some_image_link3.png",
},
...
...
...
Configuring the Storefront and retrieving data
Finally, the project can be adjusted to use Typesense. In the background, we've got our typesense instance running. Create a connection in src/App.js to have react.js use the Typesense adapter. Create a TypesenseInstantsearchAdapter object within that and set server as a key. Pass the apiKey and nodes inside that, and provide the host, port, and protocol inside the nodes. Finally, supply the query and queryByWeight that you wish to display the indexed document/data to it as an additional search parameter.
Note: These parameters are passed directly to the Typesense search API endpoint.
The following is an example of what your code should look like within App.js file.
//src/App.js
import React, { useState } from "react";
import TypesenseInstantSearchAdapter from "typesense-instantsearch-adapter";

const typesenseInstantsearchAdapter = new TypesenseInstantSearchAdapter({
  server: {
    apiKey: 'headlessCMSTypesense',
    nodes: [
      {
        host: 'localhost',
        port: '8108',
        protocol: 'http',
      },
    ],
    cacheSearchResultsForSeconds: 2 * 60,
  },
  additionalSearchParameters: {
    queryBy: '<--Field_Name-->',
  },
});

const App = () => {
  return (
    <>
      <div>App</div>
    </>
  );
};

export default App;
Let's go on to creating an interface for our application now that we've finished configuring it. To do so, first import the react-instantsearch-dom library's InstantSearch component and supply indexName and searchClient as props to it.
const searchClient = typesenseInstantsearchAdapter.searchClient;
const App = () => {
  return (
    <>
        <InstantSearch indexName="<--Schema_Name-->" searchClient={searchClient}>
        <SearchBox />
    </>
  );
};
Now let’s add the SearchBox and Hits components from the react-instantsearch-dom library, so we can directly incorporate those components inside our application.
//src/App.js
import React, { useState } from "react";
import TypesenseInstantSearchAdapter from "typesense-instantsearch-adapter";

const typesenseInstantsearchAdapter = new TypesenseInstantSearchAdapter({
  server: {
    apiKey: 'headlessCMSTypesense',
    nodes: [
      {
        host: 'localhost',
        port: '8108',
        protocol: 'http',
      },
    ],
    cacheSearchResultsForSeconds: 2 * 60,
  },
  additionalSearchParameters: {
    queryBy: '<--Field_Name-->',
  },
});

const searchClient = typesenseInstantsearchAdapter.searchClient;
const App = () => {
  return (
    <>
        <InstantSearch indexName="<--Schema_Name-->" searchClient={searchClient}>
        <SearchBox />
       <Hits />
        </InstantSearch>
    </>
  );
};

export default App;
Simply re-run the application after you've done that, and your react application should display all of the responses provided by Typesense server. The response you will receive is in simple JSON format. Now you may decorate your application by utilizing the array of widgets provided by the instantsearch.js package, such as filtering data/content, refining data, sorting data, and much more, to create a really attractive and wonderful application.
Conclusion
Congrats! Now that we've concluded the Typesense and Headless CMS integration article, let's take a quick sneak peek at what we accomplished. First, we briefly covered the Typesense and Headless CMS use cases, followed by instructions on how to set up the Headless CMS server, and then, we proceed to install the React application using the create-react-app toolchain. Finally, we configured our Typesense server, indexed all of the data provided by Headless CMS into Typesense, and tested whether our data/response was working or not. Ultimately, we configured our application's basic UI part and developed the storefront using react and the instantsearch library, and fetched all of the data from the Typesense server, and performed blazing fast search operations with it.


Latest comments (2)
thanks for this great article, ludi from desetoilespourtous
`
How do I build a website with a headless CMS? For wordle 2 content producers, the best digital publishing solution
Some comments have been hidden by the post's author - find out more