
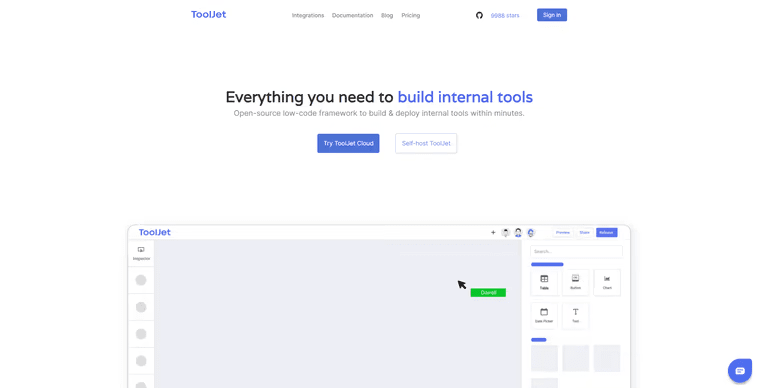
ToolJet is a fully open-source no-code framework for quickly building and deploying internal tools without putting in a lot of effort. Users can connect to data sources such as databases like PostgreSQL, MongoDB, and many others, as well as API endpoints and external services like Stripe, Slack, Google Sheets and more, and not only that users can also use the pre-built UI widgets provided by Tooljet to build internal tools.
In this article, we'll leverage the Tooljet to learn how to create an app with it. First, we'll get started with how to use the Tooljet cloud and login and register to it, and we will proceed to self-host Tooljet, we'll be self-hosting Tooljet locally using Docker inside our local system, and then we'll go through the step-by-step process of how to create an app within it. Following that, we'll learn how to import data sources into it, as well as querying, widgets, and actions, among other things. So, without further ado, let's get started.
Creating app in Tooljet
Tooljet is a no-code tool, which means you don't have to write code to build your application. You may use Tooljet cloud, self-host your Tooljet and run it locally using Docker or host it in multiple Cloud provider platforms / VPC(Virtual Private Cloud).
To begin, consider the Tooljet cloud platform. To do so, go to the official Tooljet website and click on the register or login icon near the top of the page. You will then be redirected to another page.
Once you've arrived at the Tooljet dashboard, you'll need to sign in. If you already have an account, you may sign in to the Tooljet cloud right away; if you don't, move on to the next step.

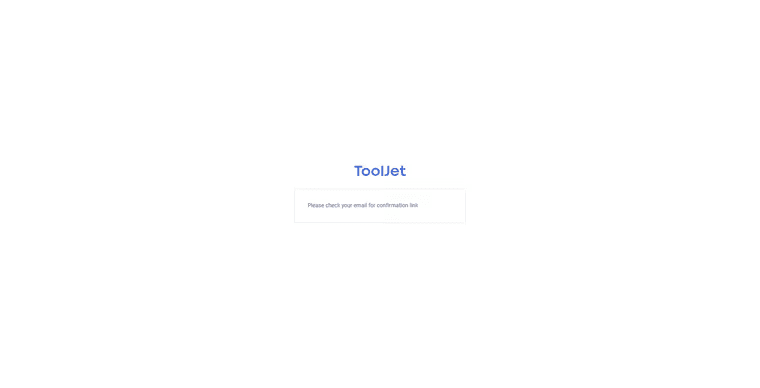
It's now time to create a Tooljet cloud account, so simply input your email address inside the form.

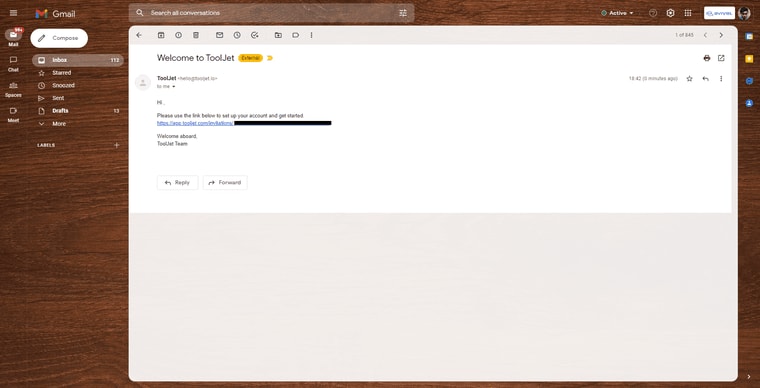
Now, head over to your email inbox, where you'll get the final activation code of your account.
You'll get your final activation code in your email, as displayed in the screenshot below.
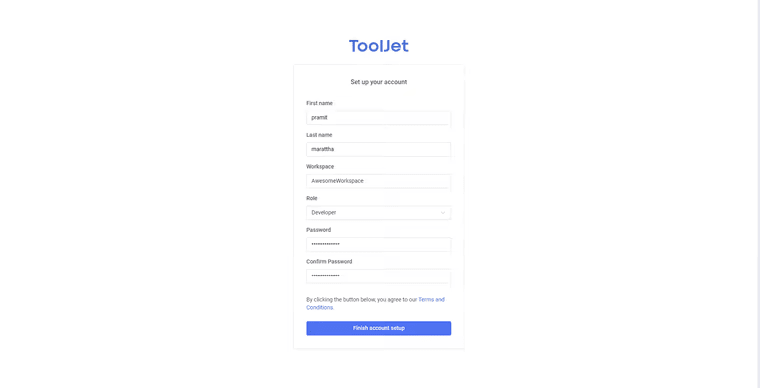
Once you click on that email, you will be taken to your final account setup page, where you must provide your complete name, workspace name, and password before moving on to the next stage.
Finally, you've created your Tooljet account, and all you need to do now is login inside that account using the credentials you used to create it.

Self Hosting Tooljet
Deploying Tooljet using Docker
To install ToolJet on a server using docker-compose, carefully follow the procedures indicated below. This procedure will not only install the ToolJet server, but also the ToolJet client.
Before proceeding with the steps below, make sure the Docker desktop is installed and running on your local machine. After that, create a PostgreSQL database and ensure that it is up and running on your machine.
Finally, it's time to download and run the Tooljet-provided production-ready docker-compose file, so simply copy the command below and head over to your local machine, then create one folder, open that folder in VScode, press ctrl + j, and finally, paste that curl command into the integrated terminal and rn it.
curl -LO https://raw.githubusercontent.com/ToolJet/ToolJet/main/deploy/docker/docker-compose.yaml

The command above configures the managed PostgreSQL database, while the command below configures the PostgreSQL database with a persistent volume, which you can skip because it is optional.
curl -LO https://raw.githubusercontent.com/ToolJet/ToolJet/main/deploy/docker/.env.example

Once you've finished, configure and rename your .env.example file to .env. You can either rename it or copy the command listed below.
mv .env.example .env
After that, navigate to your .env file, which should look something like this.
TOOLJET_HOST=http://localhost:8082
LOCKBOX_MASTER_KEY=replace_with_lockbox_master_key
SECRET_KEY_BASE=replace_with_secret_key_base

# DATABASE CONFIG
ORM_LOGGING=all
PG_DB=tooljet_production
PG_USER=postgres
PG_HOST=postgres
PG_PASS=postgres

GOOGLE_CLIENT_ID=
GOOGLE_CLIENT_SECRET=

# EMAIL CONFIGURATION
DEFAULT_FROM_EMAIL=hello@tooljet.io
SMTP_USERNAME=
SMTP_PASSWORD=
SMTP_DOMAIN=
SMTP_PORT=

# DISABLE USER SIGNUPS (true or false). Default: true
DISABLE_SIGNUPS=

# OBSERVABILITY
APM_VENDOR=
SENTRY_DNS=
SENTRY_DEBUG=

# FEATURE TOGGLE
COMMENT_FEATURE_ENABLE=
ENABLE_MULTIPLAYER_EDITING=true

#SSO
SSO_DISABLE_SIGNUP=
SSO_RESTRICTED_DOMAIN=
SSO_GOOGLE_OAUTH2_CLIENT_ID=
SSO_GIT_OAUTH2_CLIENT_ID=
SSO_GIT_OAUTH2_CLIENT_SECRET=
For the time being, let the configuration as it is.
Starting the docker service
Once you’ve configured the .env file, it's time to set up and pull and compose all the services, so run the following command inside that particular project folder and go get a cup of coffee while you wait. (It might take around 10 - 15 minutes)
docker-compose up -d

After running the above command, your services should run like this on the Docker desktop environment.

Sedding the database with dummy data
Let's seed our database with some dummy data. To do so, run the command below in your terminal, and the credentials will be populated in your database.
docker-compose run server npm run db:seed

This creates a default user with the following credentials in the database.Now try logging in with the same email and password.
email: dev@tooljet.io
password: password

You will be routed to the last stage of the installation after logging in, where you must provide the name of your workspace, organization, and email address.

Creating an application in Tooljet
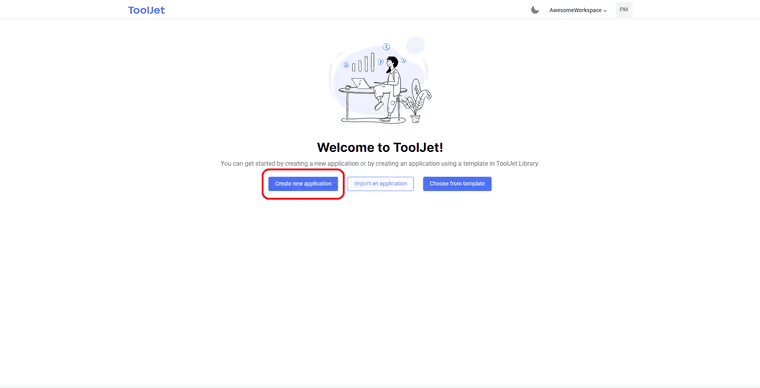
Now that you've logged into the Tooljet application, it's time to make your first application. On the ToolJet dashboard, select the Create new application button to start a new ToolJet app.
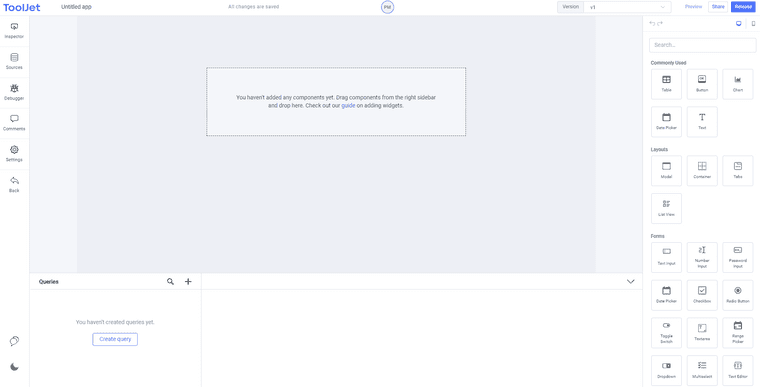
Once the app has been built, you will be routed to the visual app editor. Create the initial version of your app to get started, and remember that you can modify the name of the app later by clicking on the app name in the top-left corner of the app builder.

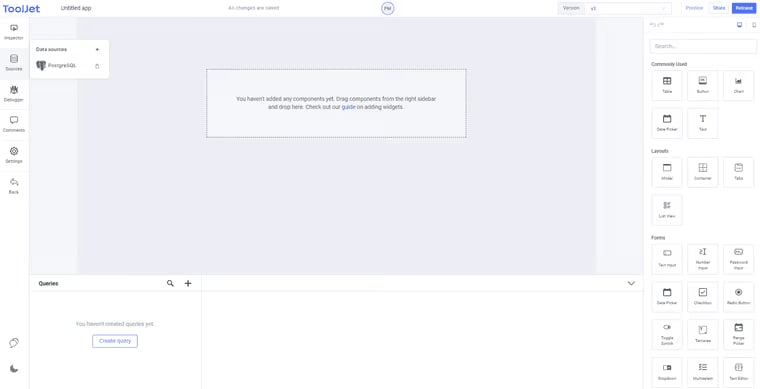
You are now ready to drag & drop widgets and draw your application, as shown in the screenshot below.
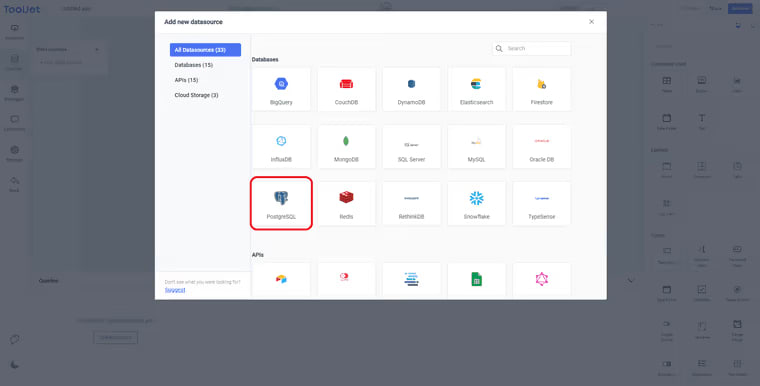
Let's start by adding one datasource. To do so, go to the Datasource manager tab located on the left side of the app builder. Click the Add datasource button to add a new data source.

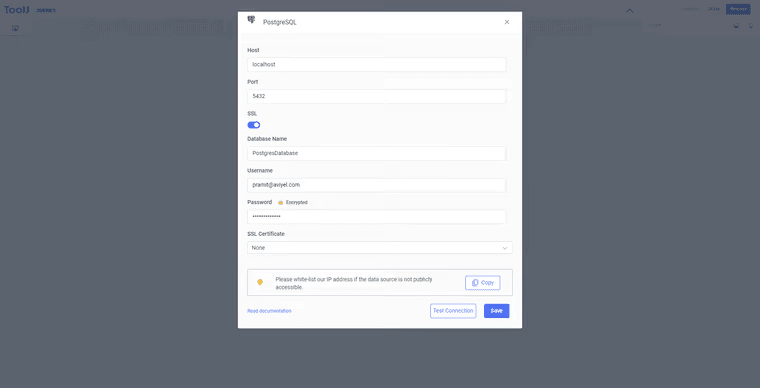
You'll be asked to choose the data source you want to use. We'll be using PostgreSQL. The credentials for your PostgreSQL database must then be provided.
The data source name must be unique and can also be modified by clicking on the data source name at the top of the prompt. Next, click the Test Connection button to verify the connection, which may take a few minutes. Once the process is done and your connection gets verified, save the data source and proceed to the next step.
You've successfully built your Postgres database connection, as shown in the screenshot below, and your Postgres data source is now available to use.
Playing with Queries.
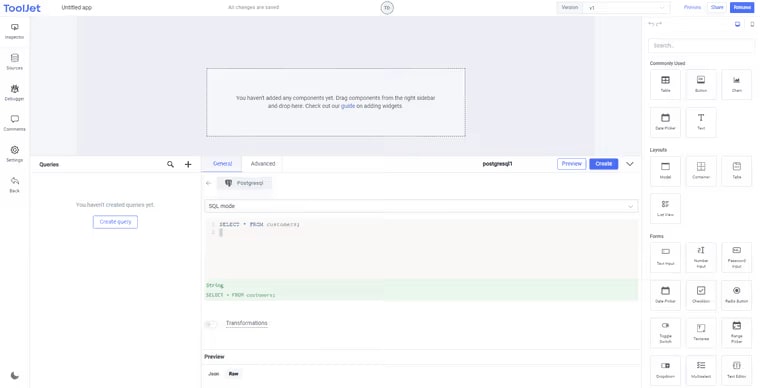
As you can see in the screenshot below, the query Editor is located at the bottom of the page and will be used to design a query for the PostgreSQL data source that we connected in the previous stage. Enlarge the query editor pane by clicking on the enlarge icon.

All you have to do now is use the query editor's + icon to create a new query, then pick the PostgreSQL data source you generated earlier, copy the query below, paste it into the query field, and select SQL mode. Once you have entered the query click on the preview button located on the left side of that panel to view the query result in real-time.
SELECT * FROM customers;
Advance Query options
To enable even more functions, select the tab named Advance located on the right side. You will be given a bunch of options to select.
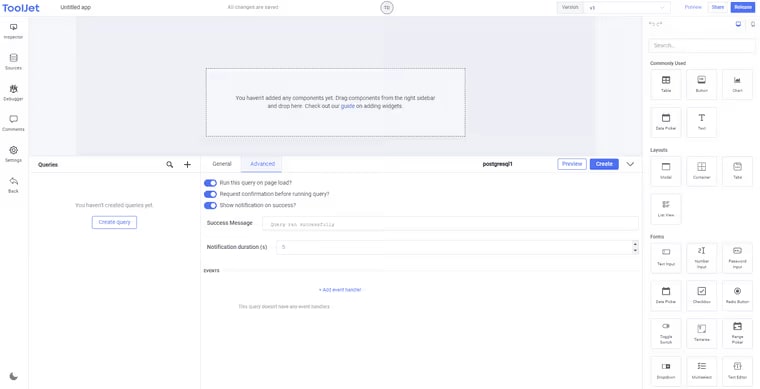
Run a query on page load: Once this option is enabled, the query will be executed the first time the app gets loaded. The same query can be triggered multiple times, via the click event of a button, the table's row selected event or any type of custom event.
Request confirmation before running query: Once this option is enabled, it will display a confirmation prompt before running a query. The confirmation prompt will appear something like this.

- Show notification on success: Once this option is enabled, a personalized message will be displayed when the query is completed, with the duration of the notification being adjustable.
Playing with Widgets
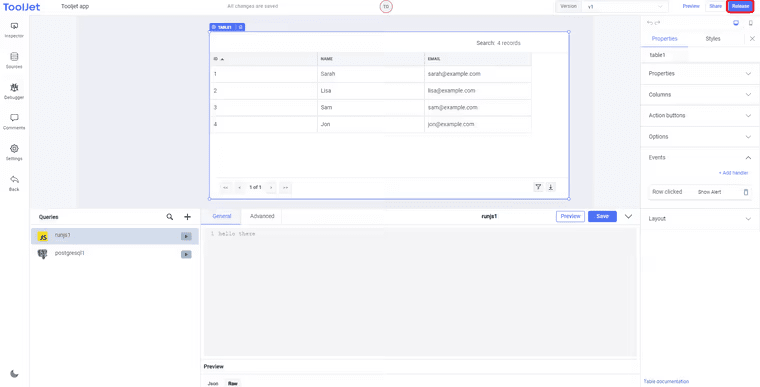
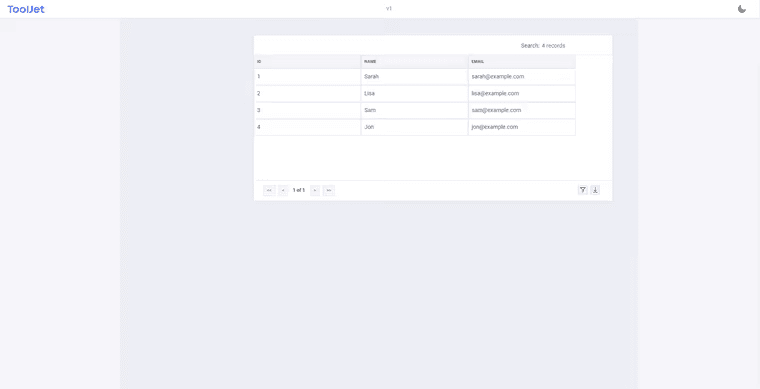
Navigate to the Widget Manager Tab section located on the right sidebar to add a simple widget. It will show you a list of pre-built and built-in widgets that you may add to the application itself. Let's add a table widget to the app to display the list of customer data from the query we created in the previous phases. To do so, click the table widget and your table will get loaded on your canvas.

To connect the data object of the retrieved customer info and display it on the table, open the inspector on the right sidebar by clicking on the table widget, as we can see the data property of the table has an empty array as the value. Within double brackets, the data field, like practically every other field on the editor, accepts single-line javascript code. Now, select the data object returned by the postgresql query and enter the following command inside it.
{{queries.postgresql1.data}}
Yopu should see all the data being automatically displayed on the table.
Adding the action
ToolJet provides a number of actions that can be used as the handler for any application event. Click on the settings icon of the widget, then proceed to click on that dropdown menu of Events and then click on Add handler button on the inspector panel on the right side, as seen in the screenshot below.

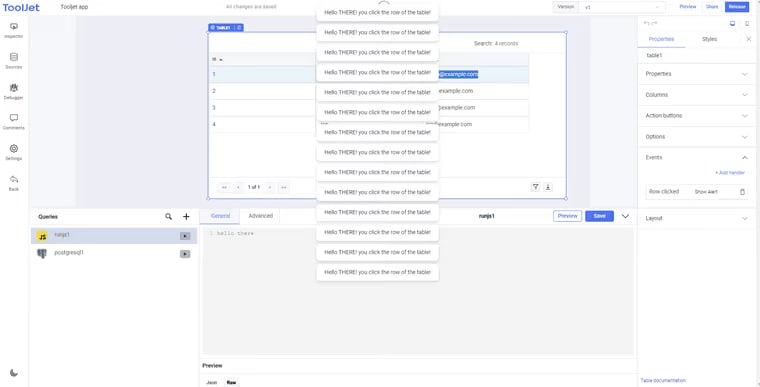
Now change the type of event you want to invoke; for this tutorial, I'll just invoke an alert message whenever a row is clicked and offer a custom alert message to it.
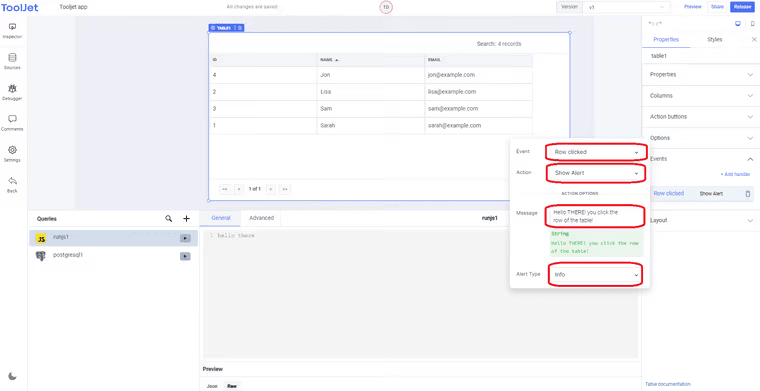
As you can see in the screenshot below, I pressed the table row many times, which caused the message/notification alert to appear multiple times.
Debugger section
The Debugger section on the left-hand sidebar catches and displays the errors that occur while running queries. The errors will be presented and shown on the debugger when a database query fails due to database unavailability. Along with the error message, the debugger also displays pertinent data relating to that particular error.
Adding the version to the app.
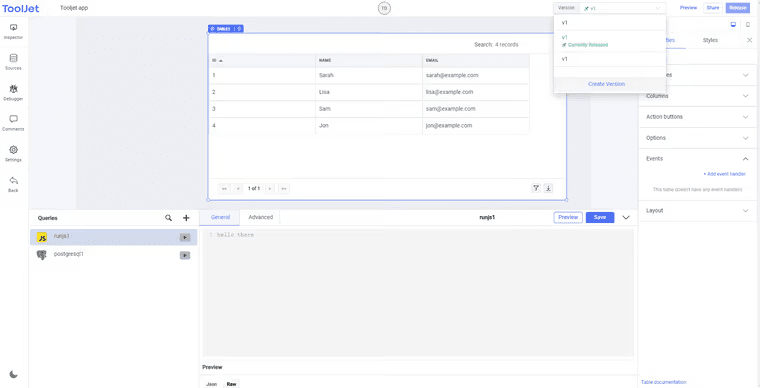
Versioning and Release allow you as a developer to keep track of your apps' versions and push out updates to users. When multiple developers are working on an app, versioning allows them to save their own version of the program, which prevents one developer from overwriting the work of another. From the App Version Manager in the top-right corner, you can build new versions. It shows which version of the app you're presently using and allows you to switch between them. Go to the App Version Manager and select the dropdown to create a new version. It will show all of the app's versions that have been developed.
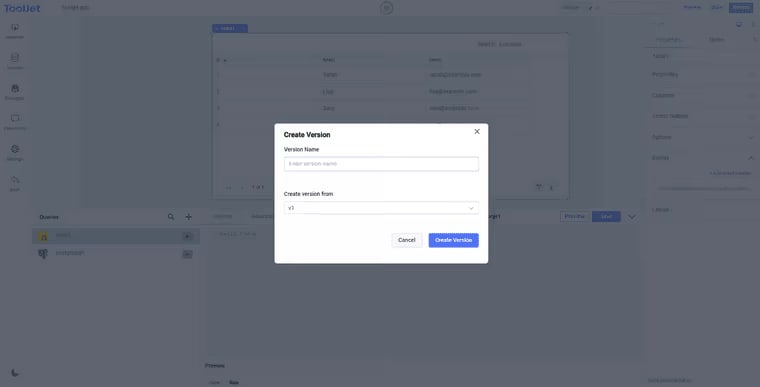
A popup will appear when you click Create Version. Enter a Version Name and then select Create Version from the dropdown menu, which will show all of the app's versions. Select the version you wish to use for your new version and then click Create Version.
You may publish the app and push the modifications to production by creating a release. To do so, go to the App Version Manager and select the version you want to release from the menu. In the top-right corner, press the Release button.
By selecting Preview, the currently open version of the program will be opened in a new tab it is a really very awesome feature if you want to test the app in production right away.
That's all, with the Toolject no-code tool, you've just produced and deployed a small and easy application.
Conclusion
Congratulations, you have successfully created an application using Tooljet. To recap, first we created a Tooljet cloud account, then we self-hosted our Tooljet and ran it in our docker-machine, and then we proceeded to create an application with it, and then we loaded one data source, in this case Postgres, and then we learned about the various features it provides, and finally we loaded all of our data from it. Finally, we loaded all of our data from it and displayed it on our table, and we built one little event and then we versioned and published our application.


Oldest comments (1)
That's all, with the Toolject no-code tool, you've lewdle just produced and deployed a small and easy application.