
Espresso logo image by Pro Android Dev
In the last part Hello, espresso! Part 4 Working with Idling resources 😴, We understood how to use espresso idling resources to achieve synchronization when the app is running background tasks that espresso is not aware of. Go ahead and have a read in case you missed it.
Automating Hybrid apps with WebViews
Switching gears to a different topic now, many android apps expose certain business logic in WebViews within Native apps. You can think of it as a mobile browser like chrome/firefox that is able to render web pages.
Its quite important to cover the interaction your native app has with these Web components to ensure there are no missed regressions in your app releases.
Some common examples when an app might have a WebView are:
- There may be help or support pages for your business that needs to be dynamic and change whenever a new page/option is added
- Or pages to host marketing content is launched
- Or even lengthy terms and conditions for a new feature
Having a WebView is great since its much faster to make changes and roll out web app changes to production and developers are not restricted with Google play store approvals and roll outs
What tests to cover and what not? 🤔
Espresso framework provides a library espresso-web that provides an “espresso like” API interface overSelenium WebDriver API
When should you write an espresso web test? ✅
If your app has user journeys between native app and webview, and you want to make sure these interactions work then it surely makes sense to cover this as part of an Espresso test
When you should not? ❌
However, if you only want to verify the WebView content or functionality without any native interaction checks, then its much better to write an automated Web Test instead using Selenium WebDriver or equivalent library as that would be much faster and easier to write, maintain and run
How does this work?
- Espresso web uses a Javascript bridge to interact with the WebDriver framework and usesatoms
- You can consider atoms as equivalent to
ViewMatcherandViewActionclasses - Espresso web wraps these atoms with
WebandWeb.WebInteractionclasses that makes writing an Espresso web test feel similar to writing a test for a native app
we use findElement() or getElement() methods with certain locators (like ID, XPATH, CSS, CLASS NAME etc) to find an element and then perform an action or assertion on top of it
Writing your first Web test
Let’s write a test to see this in action
Adding dependencies
We need to add espresso-web to our app/build.gradle file
androidTestImplementation 'androidx.test:core:' + rootProject.coreVersion;
androidTestImplementation 'androidx.test.ext:junit:' + rootProject.extJUnitVersion;
androidTestImplementation 'androidx.test:runner:' + rootProject.runnerVersion;
androidTestImplementation 'androidx.test:rules:' + rootProject.rulesVersion;
androidTestImplementation 'androidx.test.espresso:espresso-web:' + rootProject.espressoVersion;
And add below library versions in root build.gradle file
ext {
    buildToolsVersion = "31.0.0"
    androidxAnnotationVersion = "1.2.0"
    guavaVersion = "30.1.1-android"
    coreVersion = "1.4.1-alpha05"
    extJUnitVersion = "1.1.4-alpha05"
    runnerVersion = "1.5.0-alpha02"
    rulesVersion = "1.4.1-alpha05"
    espressoVersion = "3.5.0-alpha05"
}
Understanding app under test
Let’s understand the app flows that we would be automating before we jump into the code
Feature: Test WebView inside Native app using espresso
Scenario: When user enters text and taps on Change text
  GIVEN the user is on the home page of BasicEspressoWebSample
  WHEN the user enters a text in textbox
  AND the user taps on "Change Text" button
  THEN the label displays the entered test

Scenario: When user enters text and taps on Change text
  GIVEN the user is on the home page of BasicEspressoWebSample
  WHEN the user enters a text in textbox
  AND the user taps on "Change Text And Submit" button
  THEN the web page redirects to another page with a label displaying the entered test
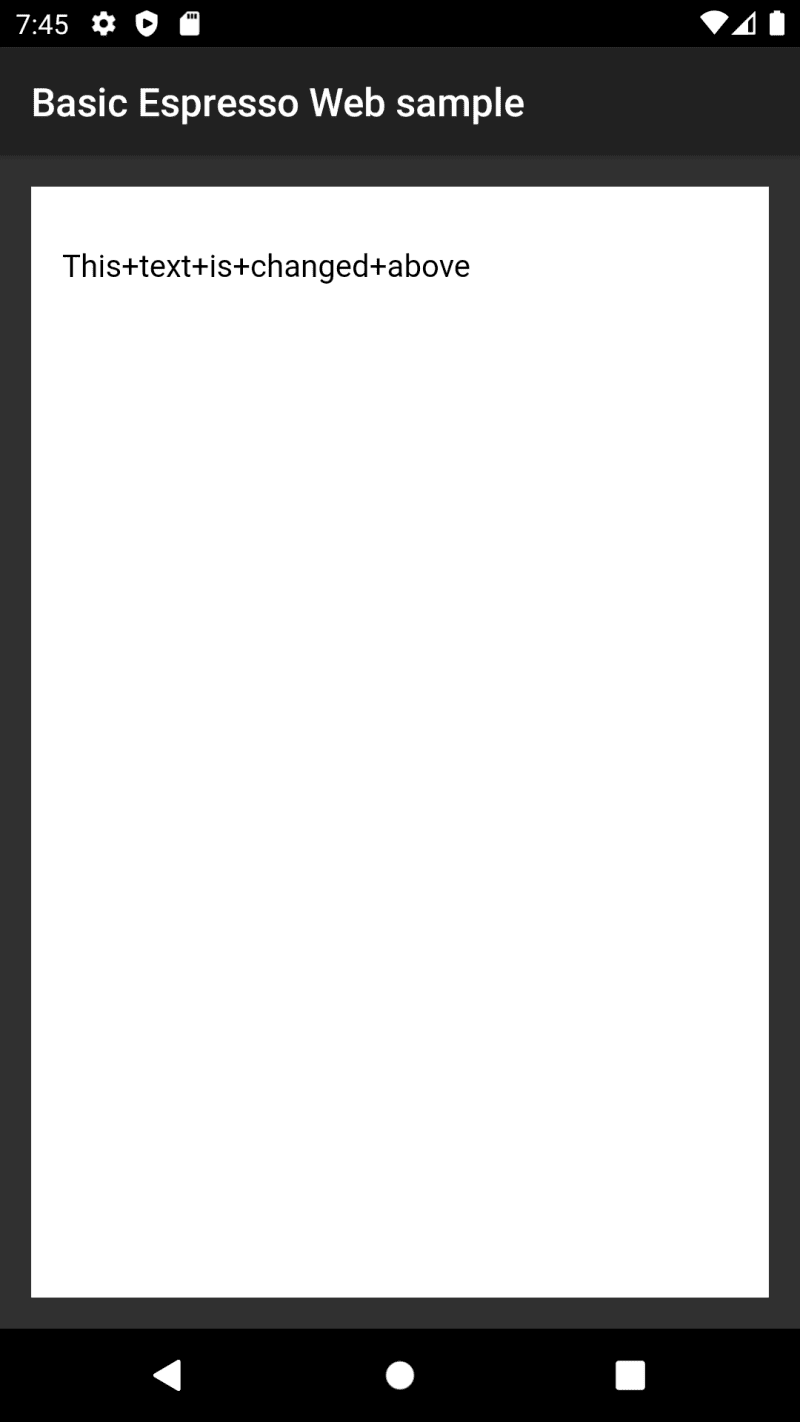
Below screens show the app for above scenarios:

Above Figure: WHEN the user enters a text in textbox

Above Figure: AND the user taps on “Change Text” button THEN the label displays the entered test
Above Figure: THEN the web page redirects to another page with a label displaying the entered test
Finding locators using Chrome debug tools
If you try to use the Android studio “Layout Inspector” , then you’ll be disappointed to see that it does not show the Component tree like native apps to enable us to find the desired locator, it only shows the containing WebView

Above Figure: Trying to use layout inspector
So, whats the solution?
We need to useChrome remote debugging toolto inspect our app.
Follow below steps:
- Connect your device or emulator via USB
- Ensure developer options are enabled
- Verify that USB debugging is enabled and the connected laptop trusts your android device
Once done, you can type chrome://inspect in your chrome browser tab and this would open chrome debugging tools like below, Tap on Inspect button

Above Figure: Chrome inspect devices screen
Once you tap on inspect it should bring up Chrome developer tools window and you can go to Elements tab and then use the inspect button to look at the HTML/CSS structure of the web page

Above Figure: Chrome dev tools showing the webview and its associated DOM for home page
Once you enter some text and tap on “Change text and submit” button, you’ll see a screen like below

Above Figure: Chrome dev tools showing the 2nd web page after user taps on “Change text and Submit”
Enabling Chrome debugging + JavaScript (JS) Execution on the app
We need to add few lines in our app source code to enable chrome debugging.
Please ensure you add the line:WebView.setWebContentsDebuggingEnabled(BuildConfig.DEBUG); in your MainActivity , this would enable Chrome debug tools to inspect your WebView only for debug versions of the app
This method was also added in Android Kit kat thus we need to add an annotation like @RequiresApi(api = Build.VERSION_CODES.KITKAT) to ouronCreate method as well
We also add additional logic to enable JS execution
mWebView.getSettings().setJavaScriptEnabled(true);
mWebView.loadUrl(urlFromIntent(getIntent()));
mWebView.requestFocus();
mWebView.setWebViewClient(new WebViewClient() {
    @Override
    public boolean shouldOverrideUrlLoading(WebView view, String url) {
        return false;
    }
});
Below you can see the complete onCreate() method
// setWebContentsDebuggingEnabled requires KITKAT version+, thus adding @RequiresApi annotation
    // Also suppressing warning about enabling Javascript execution that can cause XSS vulnerabilities
    @SuppressLint("SetJavaScriptEnabled")
    @RequiresApi(api = Build.VERSION_CODES.KITKAT)
    @Override
    protected void onCreate(Bundle savedInstanceState) {
        super.onCreate(savedInstanceState);
        setContentView(R.layout.activity_web_view);
        mWebView = (WebView) findViewById(R.id.web_view);

        // Enables chrome remote debugging:
        // https://stackoverflow.com/questions/21903934/how-to-debug-webview-remotely
        WebView.setWebContentsDebuggingEnabled(BuildConfig.DEBUG);

        mWebView.getSettings().setJavaScriptEnabled(true);
        mWebView.loadUrl(urlFromIntent(getIntent()));
        mWebView.requestFocus();
        mWebView.setWebViewClient(new WebViewClient() {
            @Override
            public boolean shouldOverrideUrlLoading(WebView view, String url) {
                return false;
            }
        });
    }

    private static String urlFromIntent(@NonNull Intent intent) {
        checkNotNull(intent, "Intent cannot be null!");
        String url = intent.getStringExtra(KEY_URL_TO_LOAD);
        return !TextUtils.isEmpty(url) ? url : WEB_FORM_URL;
    }
If you are not familiar with how to find web locators , search with keywords “locators xpath” or “locators css” in google and you should be able to find tons of resources.
Alternatively, You could refer toSelenium Tips: Better Locators in Seleniumpost from Sauce Labs as a starter
Let’s write our test
You can see the complete test below:
package com.example.android.testing.espresso.web.BasicSample;

import static androidx.test.espresso.matcher.ViewMatchers.withId;
import static androidx.test.espresso.web.assertion.WebViewAssertions.webMatches;
import static androidx.test.espresso.web.sugar.Web.onWebView;
import static androidx.test.espresso.web.webdriver.DriverAtoms.clearElement;
import static androidx.test.espresso.web.webdriver.DriverAtoms.findElement;
import static androidx.test.espresso.web.webdriver.DriverAtoms.getText;
import static androidx.test.espresso.web.webdriver.DriverAtoms.webClick;
import static androidx.test.espresso.web.webdriver.DriverAtoms.webKeys;
import static org.hamcrest.Matchers.containsString;

import androidx.test.espresso.web.webdriver.Locator;
import androidx.test.ext.junit.rules.ActivityScenarioRule;
import androidx.test.ext.junit.runners.AndroidJUnit4;

import org.junit.Before;
import org.junit.Rule;
import org.junit.Test;
import org.junit.runner.RunWith;

@RunWith(AndroidJUnit4.class)
public class WebViewPracticeTest {
    // Launch activity with ActivityScenarioRule
    @Rule
    public ActivityScenarioRule<WebViewActivity> mActivityScenarioRule = new ActivityScenarioRule<>(WebViewActivity.class);

    @Before
    public void enableJSOnWebView() {
        // We enable Javascript execution on the webview
        onWebView().forceJavascriptEnabled();
    }

    @Test
    public void whenUserEntersText_AndTapsOnChangeTextAndSubmit_ThenTextIsChangedInANewPage() {
        String text = "Peekaboo";
        // We start our test by finding the WebView we want to work with
        onWebView(withId(R.id.web_view))
                // Find the text box using id
                .withElement(findElement(Locator.ID, "text_input"))
                // Clear any existing text to ensure predictable result
                .perform(clearElement())
                // Type text
                .perform(webKeys(text))
                // Find submit button
                .withElement(findElement(Locator.ID, "submitBtn"))
                // Click on submit button
                .perform(webClick())
                // Find the element where the changed text is displayed
                .withElement(findElement(Locator.ID, "response"))
                // Verify the text for the element has our initially entered text
                .check(webMatches(getText(), containsString(text)));
    }

    /**
     * This test repeats steps as above, it just clicks on change text button and verifies the
     * result text is updated on the same page
     */
    @Test
    public void whenUserEntersText_AndTapsOnChange_ThenTextIsChangedInANewPage() {
        String text = "Peekaboo";
        onWebView(withId(R.id.web_view))
                .withElement(findElement(Locator.ID, "text_input"))
                .perform(clearElement())
                .perform(webKeys(text))
                .withElement(findElement(Locator.ID, "changeTextBtn"))
                .perform(webClick())
                .withElement(findElement(Locator.ID, "message"))
                .check(webMatches(getText(), containsString(text)));
    }
}
Let’s unpack this and understand in more detail
We start by launching our Activity using ActivityScenarioRule and specify it as a JUnit rule
// Launch activity with ActivityScenarioRule
@Rule
public ActivityScenarioRule<WebViewActivity> mActivityScenarioRule = new ActivityScenarioRule<>(WebViewActivity.class);
Since we are using Javascript to drive the browser, we need to enable it on the WebView, To do so, we’ll add a method to run before any test and annotate it with @Before
@Before
public void enableJSOnWebView() {
    // We enable Javascript execution on the webview
    onWebView().forceJavascriptEnabled();
}
To start our web test, we first specify the WebView we want to work with using the onWebView() method
If we had a single WebView on the activity then we could skip adding the
withId()method (Here we keep it to be specific), this method returns aWebInteractionobject that exposes the Web API actions to drive ourWebView
// We start our test by finding the WebView we want to work with
onWebView(withId(R.id.web_view))
Next, we want to be able to find our text box
- We do so by using
withElement()method that takes anAtom<ElementReference>as input to find an element, - We use
findElement()that takes first argument as the Locator, followed by the actual locator- In our test we have an
idavailable for these elements by looking in the DOM tree in Chrome debug tools, we mentiontext_input
- In our test we have an
We could use any of the below locators to identify our elements:
CLASS_NAME("className"),
CSS_SELECTOR("css"),
ID("id"),
LINK_TEXT("linkText"),
NAME("name"),
PARTIAL_LINK_TEXT("partialLinkText"),
TAG_NAME("tagName"),
XPATH("xpath");
The full statement looks like below:
// Find the text box using id
.withElement(findElement(Locator.ID, "text_input"))
We want to make sure we clear any existing text from the text box and type a desired text, we do so using clearElement() and webKeys(text) method:
// Clear any existing text to ensure predictable result
.perform(clearElement())
// Type text
.perform(webKeys(text))
We then use similar methods to find the button element and perform a click on it
// Find submit button
.withElement(findElement(Locator.ID, "submitBtn"))
// Click on submit button
.perform(webClick())
And finally, we check that the label has the desired text that we entered by adding:
// Find the element where the changed text is displayed
.withElement(findElement(Locator.ID, "response"))
// Verify the text for the element has our initially entered text
.check(webMatches(getText(), containsString(text)));
If you notice, most of the methods have a similar structure to native app espresso actions and assertions, most of our methods have “web” prefix, you could use this intuition to find the relevant methods using Android studio for your specific test cases
We can then easily write the 2nd test using similar commands (see the above)
If we run both these tests, we should see them launch our activity and drive ourWebView similar to a native app. Hopefully you understand the general structure well enough to go ahead and write your own tests.
Resources 📘
- You can find the app and test code for this post on Github under
automationhacks/testing-samples: - Please readEspresso Web on android developers for some more context
Conclusion ✅
Hopefully, this post gives you an idea of how to work with WebViews in espresso. Stay tuned for the next post where we’ll dive into how to automate and work with WebViews with espresso
As always, Do share this with your friends or colleagues and if you have thoughts or feedback, I’d be more than happy to chat over on Twitter or comments. Until next time. Happy Testing and learning.


Top comments (0)