
A detailed walkthrough on setting up a production-ready web server from scratch on the Amazon EC2 service.
This article is originally posted here.
Scope:
We will setup a full-stack(Node, Express, React) app with MySQL database. We will deploy the app to an AWS EC2 instance running Ubuntu Server 16.04 LTS. The setup uses NGINX as a reverse proxy and also to serve react static files, PM2 is used as a cluster manager. The MySQL database will be deployed to AWS RDS, phymyadmin will be setup too and connected to the rds to handle queries through GUI. And finally we will map the EC2 instance to a domain name.
Background
In the past, I had used Heroku for deploying node apps and Netlify for static web apps which provides with ready-to-use environments making the deployment process much faster and easier by hiding away all the complexities. However, setting up an AWS instance gives much more insights of what goes under the hood in making your website public.
The Setup:
Setting up VPC:
Virtual Private Cloud is basically a virtual location that contains our AWS services(example: web servers, databases, elastic cache, file servers, and messaging services).
- Go to Amazon VPC Dashboard by using the following link https://console.aws.amazon.com/vpc
-
Click on "Create VPC" button. The page looks like this:

-
The VPC has been named as react-node vpc.
CIDR, is an alternative to traditional subnetting which is used to specify the number of significant bits that make up the routing or networking portion.
CIDR Notation(10.10.0.0/16) indicates that the first two octet is for networking and the remaining 2 octet to define host.
Click on create VPC button to finish the VPC setup.
Subnet setup
A subnet or sub network is a way to divide the resources in the VPC. The web server(EC2) needs to be accessible by the internet while the RDS should only be accessed internally thus public and a private subnet is needed for security.
-
Creating a Public Subnet:

This subnet can have any address between 10.10.1.0 - 10.10.1.255.
-
Creating a Private Subnet:

This subnet can have any address between 10.10.2.0 - 10.10.2.255. Also, an availability zone is required to make this subnet work with our database. Moreover, deploying a database to AWS requires 2 subnets in different availability zones, so setup a second one with the same flow.
Security Groups setup
A security group acts as a virtual firewall for the instance to control inbound and outbound traffic.
-
Click on the security groups tab and click on create security group. Add a name ,description and attach the VPC which was created before. The page looks like this:

After creating the security groups edit the Inbound Rules as shown.

SSH is used to log in to the EC2 instance from a personal computer. Update your personal IP address in the source section every time unless a static IP is available.
Port 80 and port 443 allows normal traffic over the internet.
Creating a new Ubuntu Server on AWS EC2
- Go to the EC2 Service section and click the launch instance button
- Select the "Ubuntu Server 16.04 LTS" Amazon Machine Image (AMI).
-
Configure the instance details as shown:

Select the VPC which was created and add the public subnet. Storage and tags can be left as default.
Assign the existing security group to the instance which was created in previous steps.
Click Review and Launch to spin up the instance.
-
It will prompt to Create a new key pair. Enter a name and click "Download Key Pair" to download the private key, this will be used to connect to the server via SSH.

Post successful creation, navigate to the instance page and right-click on the newly created instance. Click on connect which opens a pop-up detailing the steps to connect via SSH.

RDS Setup
- Head towards the RDS database dashboard.
- Before creating a database, a subnet group will be created to communicate with the server. It will expand over two availability zones to protect the database against server failure.
- Click on the subnet group tag and then click on create DB subnet group.
-
Add a Name and Description and select the VPC which was created. Then, attach the private subnets for that VPC.

-
Now we are ready to create our database.

On the next page, set the VPC and the subnet group that was created. Remember the username and password that you set here, this will be used to connect to the SQL server.
-
The advanced setting can be done as shown below:

Click on Create database button to finish the setup.
-
While the database is being created, head to the VPC dashboard and create a new security-group following the same steps as above and set the inbound rule as shown below:

Then, attach this security group to the database by clicking the modify button and selecting the security group under Networking and Security section.
To check everything is working correctly, ssh into your instance by opening a new terminal, and connecting the same way as shown above.
Install MySQL with the following command:
sudo apt-get install mysql-server mysql-client
During installation, setup will ask you to enter MySQL root account and password to connect to the local database.
After successful installation, connect to the host database by typing the command
mysql -u username -p -h hostname
Input the password that you used while setting up the rds. Hostname(Endpoint) can be found from RDS dashboard page under Connectivity & security tab in database summary page.
If things go well you will see a screen like this after a successful connection from the terminal.

React and Node Project Setup:
Project Github link: https://github.com/Asim1996/blog
Deploying the project to AWS EC2 instance.
SSH into your instance first using
ssh i- “keypair.pem” ubuntu@public-ip-addressInstall git using the command:
sudo apt-get update
sudo apt-get install git
- Clone your project into the server with the command:
sudo git clone link-to-repo
- After cloning the project we can see all the files as shown

- Installing node and npm
We will install nvm(node version manager) first using
sudo curl https://raw.githubusercontent.com/creationix/nvm/v0.34.0/install.sh | bash
Then, install node using
nvm install node-version I had used (v8.16.0)
- Post-installation we can head into our server directory and install all packages using npm install, but first, we need to give write permissions to that folder using:
sudo chmod 777 path-to-directory
path-to-directory in this project was (/home/ubuntu/blog/server)
- For the client side of our application we will be using yarn.Set it up as follows:
curl -sS https://dl.yarnpkg.com/debian/pubkey.gpg | sudo apt-key add -
echo "deb https://dl.yarnpkg.com/debian/ stable main" | sudo tee /etc/apt/sources.list.d/yarn.list
sudo apt update
sudo apt install --no-install-recommends yarn
After this switch to the client directory and run yarn add to install all dependencies after setting the required permission as done previously.
- Run the command yarn run build to get the build folder which will be served by Nginx in the next step.
Configure NGINX to serve the Node.js API and React front-end
Since our application is made up of two separate projects that both need to be accessed via the same port (HTTP on port 80), we're going to use NGINX as our public-facing web server to receive requests for both the front-end and back-end, and decide where to send each request based on its path. Requests beginning with the path /api/* will be proxied through to the Node.js API running on port 5000, while other requests will serve the React front-end app and associated files.
Installing Nginx by typing the following command in terminal:
sudo apt-get install -y nginx
To check if it's running, access: http://ec2-public-ip/. If it shows ‘Welcome to nginx!’ this means that nginx is running and we can proceed to the next step.
Next, head to the following directory
cd /etc/nginx/sites-available/
-
Delete the default file and create a new one with the following code:

Save the file and restart nginx using
sudo systemctl restart nginx
-
NGINX Config guide:
- server { ... } defines a server block that contains the configuration for a virtual server within NGINX.
- Through location / { ... } we define a block that contains the configuration for requests that have a URI beginning with a forward slash (/), in it we set the react build as the root route. Then we set the index.html file as the main index, and on every subsequent request we serve the same index.html file.
- The location /api { ... } defines a location block to serve requests that have a URI beginning with /api which will be proxied to our Node server using the property proxy_pass http://localhost:5000;
Optional: Setting up phpmyadmin
It will make our life easier by accessing the database using a secure web interface instead of using the terminal for DB commands.
- First install PHP using the command:
sudo apt install php-fpm php-mysql
- Then Install phpMyAdmin using:
sudo apt-get install phpmyadmin
During the installation, It will ask you which web server you would like the software to automatically configure. Since we are Nginx which isn’t one of the available options, you can just hit TAB, and then ENTER to bypass this prompt. The next prompt will ask if you would like dbconfig-common to configure a database for phpMyAdmin to use. Select “Yes” to continue. Enter the database administrator password that was configured during the MySQL installation to allow these changes.
- After installation, for the Nginx webserver to find and serve the phpMyAdmin files correctly, we’ll need to create a symbolic link from the installation files to our Nginx document root directory:
sudo ln -s /usr/share/phpmyadmin /var/www/html
- phpMyAdmin relies on mcrypt PHP module so this need to be enabled too
sudo phpenmod mcrypt
sudo systemctl restart php7.0-fpm
- Setting up an authentication prompt before visiting /phpmyadmin route in the browser.
We’ll create a password file that will store the authentication credentials. Nginx requires that passwords be encrypted using the crypt() function.
To create an encrypted password, type:
openssl passwd
It prompts to enter a password and then will return an encrypted version of it, copy that as we will be using it while setting authentication file
Navigate to /etc/nginx/ and create a new file pma_pass with the following content
username_of_your_choice:copied_encrypted_version_password
Save and close the file.
-
After this, update the default file under the nginx folder as shown below:

Restart nginx using sudo systemctl restart nginx
-
Adding our RDS server in phpMyAdmin
Navigate to:
sudo nano /etc/phpmyadmin/config.inc.php
Find the following lines in config.inc.php:
    /*
    * End of servers configuration
    */
Append the following lines above the "End of servers configuration" line:
    $i++;
    $cfg['Servers'][$i]['host'] = 'xxxxx.xxxxxxxxxx.us-east-1.rds.amazonaws.com';
    $cfg['Servers'][$i]['port'] = '3306';
    $cfg['Servers'][$i]['connect_type'] = 'tcp';
    $cfg['Servers'][$i]['extension'] = 'mysql';
    $cfg['Servers'][$i]['compress'] = TRUE;
Save the file and exit.
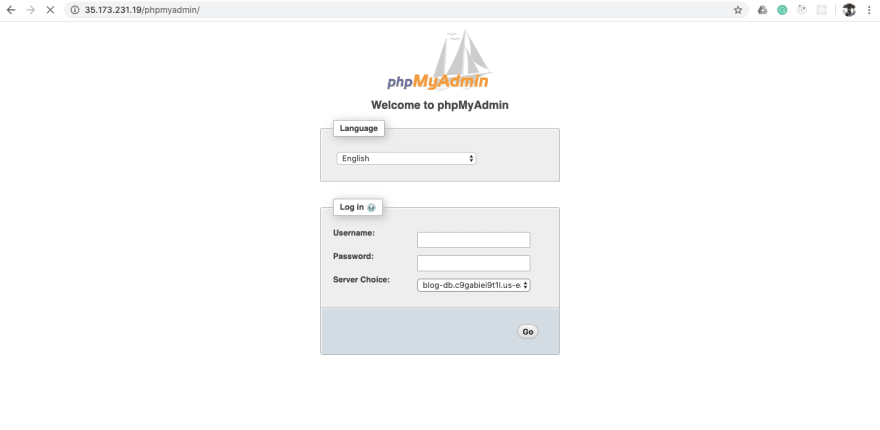
Head to browser and type (http://ec2-public-ip/phpmyadmin/) which results in:
Optional: PM2 setup
PM2 is a cluster manager and allows us to run our app automatically and also restart it automatically if it crashes.
- Install pm2 using:
npm install pm2 -g
- To start pm2 navigate to the server directory and type:
pm2 start app.js -i 0
PM2 figures out how many instances to create on its own using the above command.
Below are some useful pm2 commands:
- pm2 list: list all the running processes
- pm2 restart app 0: restart app with id 0
- pm2 delete app 0: delete app with id 0
- pm2 logs Display all processes logs in streaming
- pm2 stop all Stop all processes
And Finally, Test our new application running on AWS
Enter the hostname(ec2 instance public IP) in the browser to view your application live on the web.
Additionally, you can buy a domain name from any Domain Name provider (GoDaddy, BigRock, etc) and link it by using an Elastic IP which is preserved even if we stop and start our instance in a virtual private cloud.
To do this
- Allocate an Elastic IP address from Amazon’s pool of public IPv4 addresses.
- Associate the Elastic IP address with the running instance.
Head to your domain name provider and create an A record and link the Elastic IP with your domain name to complete the entire setup.
and phew! that's it! Thanks for reading and congrats on making it till the end. I hope this makes your deployment lifecycle easier as a newbie.
Cheers!!


Top comments (12)
I think Beanstalk (with Docker) + RDS for backend, S3 for frontend would be a better solution for production use. Way easier to manage, and you will get a bunch of handy features out of the box. (auto scaling, monitoring, alerts)
Agreed, S3 would have been a better option for serving the front end. I haven't worked with Beanstalk yet!
Agreed, please check this article and provide your feedback dev.to/hozefam/create-a-production...
What does this cost a month? I’m interested in building a small node app, it needs node + DB. I found a page that uses beanstalk with auto scale and provided cost was $27 approx per month. I have never done anything on AWS except CDN static assets. Thinking about hosting a node app there just for learning AWS reasons. Nice write up, will read it fully later.
Looks good. But I would rather pick s3 bucket for hosting the react app here.
Yeah, that could be done too 👍
Hi. It is really good. It is missing the command to install nginx via terminal.
Thanks a lot for pointing that out.
Hi Asim
How would you compare this with AWS Amplify? Which do you prefer?
Great tutorial no doubt, but why the hell have you made those nginx blocks like images, it would be a lot easier to just copy/paste the server block code...
Awesome, Asim! Congratulations! Could you tell me the approximate monthly cost to maintain an application like this on AWS? Would it be cheaper if I opt for the S3 + Beanstalk solution? Thanks!