
This post was originally published on my personal blog site.
Welcome! This is the first in a series of posts that will teach you how to build a blog site using React and Firebase. This one will probably be the longest because there are few things to do to set everything up.
At the end of this post, you'll have learned how to connect your app to Firebase and pull some data from Firebase's Realtime Database. Next time, we'll start setting up our CRUD functions with a "Create Post" feature. After that, we'll see what we can do to make an interface on the frontend that will make it easy to call our CRUD functions and easy to create more interesting functions.
Ready to get started? :)
Table of Contents
- Sign up for Firebase
- Create a project
- Clone the Starter Code
- Connect Firebase to the Application
- Add Data to the Database
- Read from the Database
- Wrapping Up
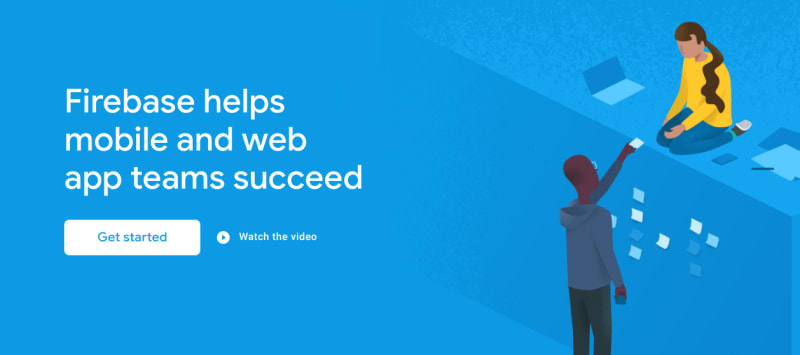
1. Sign up for Firebase
This one is easy! Head over to Firebase's website and click the "Get started" button. The page looks like this:
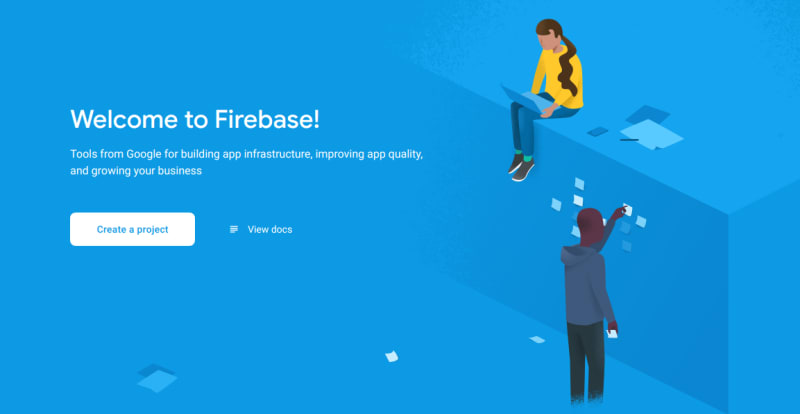
You'll be prompted to choose a Google account if you're not already signed in to one. Once you're signed in, you can create a project. Here's what that page will look like if you're brand-new to Firebase:
2. Create a Project
Click the "Create a project" button to begin the three step process. First, you'll be prompted for a project name. I'm naming my project react-firebase-blog. You can change your project ID if you want, but going with the automatically generated one is fine too.

Step 2 asks us if we want to set up Google Analytics for the project. I'm selecting "Not right now". If you choose this option, the process ends here. Otherwise, there's another step
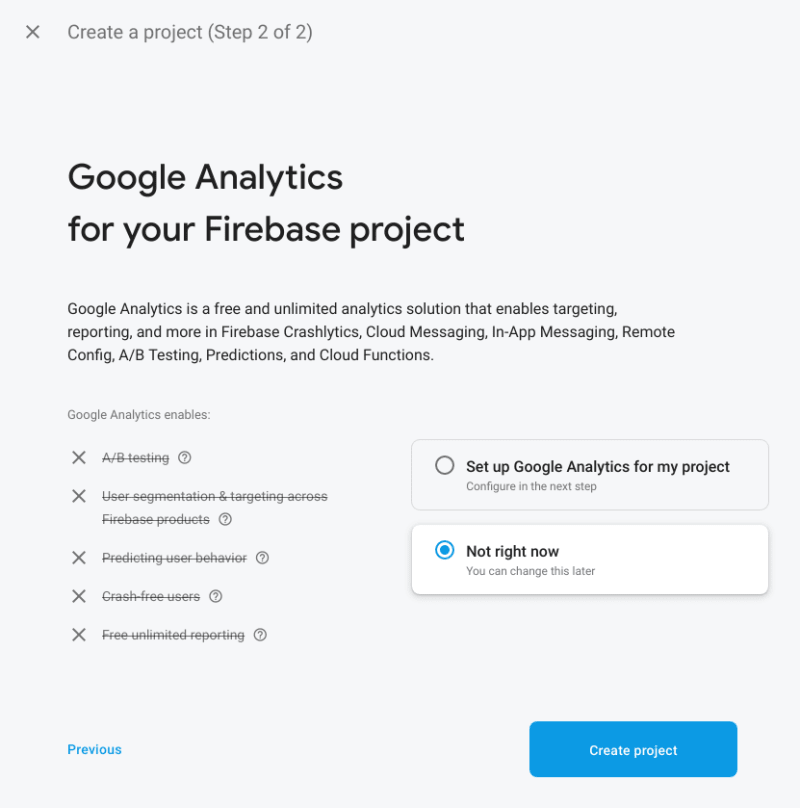
Click "Create project" and you'll be brought to a loading screen. When it says, "Your new project is ready," click the "Continue" button.

3. Clone the Starter Code
You can clone the starter code by running the following command in a terminal:
git clone https://github.com/ashleemboyer/react-firebase-blog-starter.git
Let's see what we've got! Go ahead and get the project rolling by changing into the react-firebase-blog-starter directory and running npm install, and running npm run start. Here's what you should see:

Hooray! Go ahead and explore the project a little. I'll highlight a few areas for you to begin.
src/App.js
We have 4 Routes: the home page, a 404, and another for handling blog post slugs (aka URLs). You might be wondering why there's not one for handling non-matching paths. Good catch! We're actually handling that in the Post component (src/pages/post.js). Let's go ahead and look at that one.
src/pages/post.js
Because we're using a Router in src/App.js (comes from react-router-dom), the components we name in Route elements will have a match passed into their props. We can get the slug for a post from the URL bar with match.params.slug, then compare that to a list of slugs we support on the site. Those are hard-coded into a postSlugs variable for now. If the slug does not exist, we return a Redirect to our 404 page. Otherwise, we'll display the correct post.
src/pages/home.js
First, you'll se the blogPosts variable. We're hard-coding our posts until we connect our app to Firebase. All this page does is return a section element for every blog post in the blogPosts array. You shouldn't need to change anything after the return statement as we make our way through this series.
4. Connect Firebase to the application
First, install the firebase package by running npm install firebase in the root directory of the project.
Now, create a JavaScript file in the src directory of the project and call it firebase.js. This is where we'll define our Firebase configs and initialize the Firebase objects.
Before we add some code to this file, let's get the config data we need about our Firebase project. Go to the Firebase project settings by clicking the settings gear in the left sidebar and selecting "Project settings" from the menu. Scroll down to the "Your apps" section of the page. It's probably at the bottom. It should say, "There are no apps in your project."
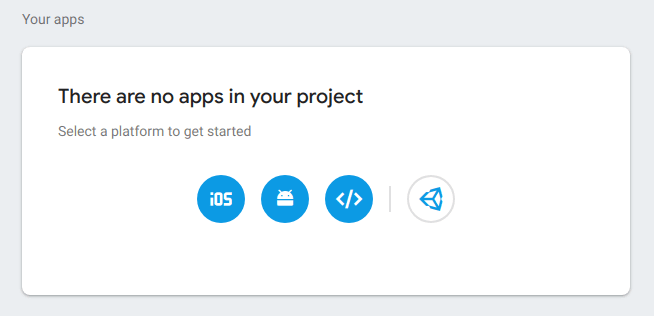
Click the circle that looks like </> in order to add Firebase to a web app. You'll be prompted for the App's nickname. I'm calling mine React Firebase Blog.
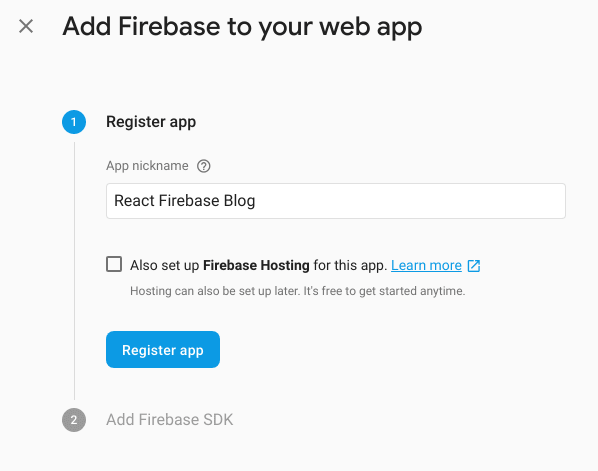
Click the "Register app" button, and after the page finishes loading, you'll see some HTML code that has a variable called firebaseConfig. Copy the JSON attributes from that variable and hold on to them for our firebase.json file. Click the "Continue to console" button to get back to your project settings. If you lose the JSON attributes you copied previously, you can find them again here, under the "Your apps" section that now has our app listed.
Let's go back to our firebase.js. Have your config data ready and plug it in to the following code:
import firebase from "firebase/app";
import database from "firebase/database";

const config = {
  apiKey: "<YOUR-API-KEY>",
  authDomain: "<YOUR-AUTH-DOMAIN>",
  databaseURL: "<YOUR-DATABASE-URL>",
  projectId: "<YOUR-PROJECT-ID>",
  storageBucket: "<YOUR-STORAGE-BUCKET>",
  messagingSenderId: "<YOUR-MESSAGE-SENDER-ID>",
  appId: "<YOUR-APP-ID>",
};

let firebaseCache;

export const getFirebase = () => {
  if (firebaseCache) {
    return firebaseCache;
  }

  firebase.initializeApp(config);
  firebaseCache = firebase;
  return firebase;
};
The getFirebase() function will ensure we only call initializeApp one time.
5. Add Data to the Database
We can't read any data from our database until we actually add to it! Go back to your Firebase project and click the "Database" option under the "Develop" heading in the sidebar. You'll have to scroll down the page a little until you find the "Realtime Database" section.
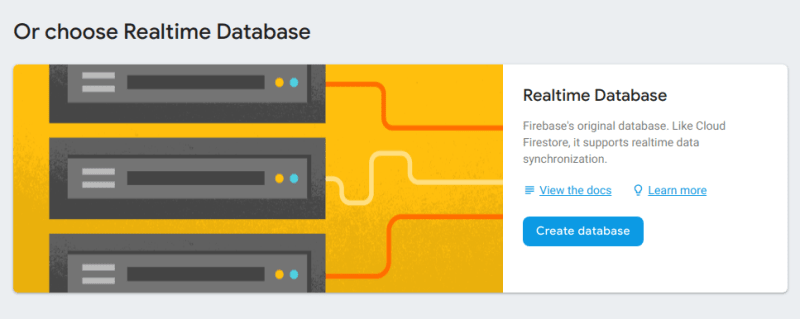
Click the "Create database" button within this section. You'll see a modal come up asking you about the security rules for your database.

Select "Start in test mode" and click the "Enable" button. Your database will be empty and read something like:
<YOUR-PROJECT-ID>: null
If you didn't already know, the Realtime Database is just a JSON object. You can read more about that here.
The quickest way to get started is to import data using a JSON file. I'm also providing this for you in case you're following along closely and want to have the same things show as what I have here. You can find this file in the root directory of the starter project. Click the three dots menu and select "Import JSON" to get to the file upload. Browse for your file, and then click the "Import" button.
Now you should have some data attributes you can expand and explore!

6. Read from the Database
Finally! The moment we've all been waiting for. Let's head over to src/home.js and see if we can get some stuff from the database!
First, add some imports to the top of the file:
// You only need to add the `{ useState }` portion here.
import React, { useState } from "react";

// This is new.
import { getFirebase } from "../firebase";
Now, let's get blogPosts into a state and try to read them from the database. You can read more about the useState hook over here. We're also going to add a loading state so we can easily do two things:
- Make sure we only call
getFirebaseonce - Show the user a loading screen while we wait for data
Replace the blogPosts constant with the following code:
const [loading, setLoading] = useState(true);
const [blogPosts, setBlogPosts] = useState([]);

if (loading && !blogPosts.length) {
  getFirebase()
    .database()
    .ref("/posts")
    .orderByChild("date")
    .once("value")
    .then(snapshot => {
      let posts = [];
      const snapshotVal = snapshot.val();
      for (let slug in snapshotVal) {
        posts.push(snapshotVal[slug]);
      }

      const newestFirst = posts.reverse();
      setBlogPosts(newestFirst);
      setLoading(false);
    });
}

if (loading) {
  return <h1>Loading...</h1>;
}
Tada! You should see the exact same thing we had before. 🎉
7. Wrapping Up
There was a ton of stuff here. If you have any questions or concerned, please send me an email or DM me on Twitter! I'll try to give you a hand if you're feeling stuck or overwhelmed. Stay tuned for tomorrow's post where we will cover writing CRUD functions for our new, fancy blog site! If you're feeling squirrely and want to give it a go before then, I encourage you to check out the Firebase documentation.
Did you know I have a newsletter? 📬
If you want to get notified when I publish new blog posts or make major project announcements, head over to https://ashleemboyer.com/newsletter.


Top comments (23)
I was thinking also about this in order to reduce costs, but left it float around some time until I decided it’s not SEO worthy
Hey, Gabriel! Thanks for your comment. Could you talk a little bit more about your thoughts on SEO? I’m not sure I fully understand what you mean.
From my understanding if you are fetching for the content on the client the web crawler won’t parse and index that part.
you can use next.js to do it!
Yes. But then the purpose of reduced costs is not accomplished.
I have a small Romanian NGO, and the change we drive isn’t employed by online content. So there was no reason to invest in this strategy.
Keeping things simple and mostly free is one of my main objective.
I chose React-Static with Contentful. Not sure if it’s the right decision regarding SEO, but it was the most intuitive to make
nowadays google and other search engines can index pages with dynamic content. I think it's not a big deal for you! But, if you really want strong SEO you'll need to switch to next, gatsby..
I definitely second Gatsby here! And there is also a plugin you can use that will pull data from Firebase and then make it available through GraphQL. I’ll try to look it up today and link here!
Great Article Ashlee! I have done a bit of work with firebase over the years and would have to say this article is one of the easiest to follow that I have seen!
Re SEO, I haven't used it but have heard a lot of good things about react-snap (github.com/stereobooster/react-snap) which allows you to make your create-react-app SEO friendly, which might be worth some people checking out!
I'll definitely use in my future projects. Thanks!
I am getting this error
./src/index.css (./node_modules/css-loader/dist/cjs.js??ref--6-oneOf-3-1!./node_modules/postcss-loader/src??postcss!./src/index.css)
Error: Cannot find module '@csstools/normalize.css'
after 3rd step and running npm run start
Did you run “npm install” first? That’s something I was missing in the first version of the post but it has since been updated.
Hey developer it didn't resolved my error.can you tell some other solution.
did u mean uninstall npm ?
I’m typing from my phone and it didn’t like “npm”. Corrected! 😅
Hi, @ashleemboyer ! Nice the way you make things so simple. I've seen many bloated solutions around.
Just one question: why did you choose real-time database instead of Cloud Firestore? I ask this cause I was giving a first look at this stack yesterday and documentation says Firestore is the preferred choice.
Thanks for the post, looking forward for the next parts of the series!
Hey, Marcelo! Thank you for your question. The answer is that I’ve always used the Real-time Database in my projects with Firebase. I have multiple years of experience with it and am used to it. I’d love to take a deeper dive into the Firestore implementation one of these days! 😌
I found the GitHub repo for the Gatsby plugin I was looking for. I have only done brief testing, but I'm pretty sure it'd accomplish SEO needs! Might play around with this a little more another time.
Gatsby plugin to turn Firebase into a Gatsby data source.
Gatsby Firebase Source
Quick and dirty firebase source for Gatsby. Allows you to query your firebase data right into your statically generated pages with Gatsby.
Usage
First you need a Private Key from firebase for privileged environments, find out how to get it here: firebase.google.com/docs/admin/setup (or click the settings gear > Service accounts tab > Generate New Private Key button at the bottom)
Place that private key .json file somewhere in your gatsby project (the root is fine).
Configure gatsby-config.js
Nice 👌
Great post
Thank you! I’m glad you enjoyed it. Stay tuned for the next one later today! 🤩
I love it ✌😉
Hi dev, I got this error: attempted import error : getFirebase is not exported from ..firebase
Have tried every possible solutions but not working
Hey Ashlee,
This is an amazing series. Would you like to submit this series on Google's Dev Library too? devlibrary.withgoogle.com/