
In case it helped :)

We will cover briefly:
- Testing in Jetpack Compose
- (Optional) Screenshot testing in Compose
Note: This article assumes the reader knows about Jetpack Compose
Testing in Jetpack Compose
Compose provides a set of testing APIs to find elements, verify their attributes and perform user actions.
In our previous articles, we managed to create our TodoApp. Now, let's write some tests.
Setup
- Install the dependencies inside
build.gradleof your app
androidTestImplementation "androidx.compose.ui:ui-test-junit4:$version"

debugImplementation "androidx.compose.ui:ui-test-manifest:$rootProject.composeVersion"- Create a file called TodoComposeTest and add the ComposeTestRule as
@get:Rule
val composeTestRule = createComposeRule()
Compose comes with a
ComposeTestRulewhich can be obtained by callingcreateComposeRule(). This rule lets you set the Compose content under test and interact with it.
There are three main ways to interact with elements:
- Finders let you select one or multiple elements (or nodes in the Semantics tree) to make assertions or perform actions on them.
- Assertions are used to verify that the elements exist or have certain attributes.
- Actions inject simulated user events on the elements, such as clicks or other gestures.
We can simplify things considerably by testing a component in isolation. You can choose what Compose UI content to use in the test. This is done with the setContent method ofComposeTestRule
Finding UI elements, checking their properties, and performing actions are done through the test rule, following this pattern:
composeTestRule{.finder}{.assertion}{.action}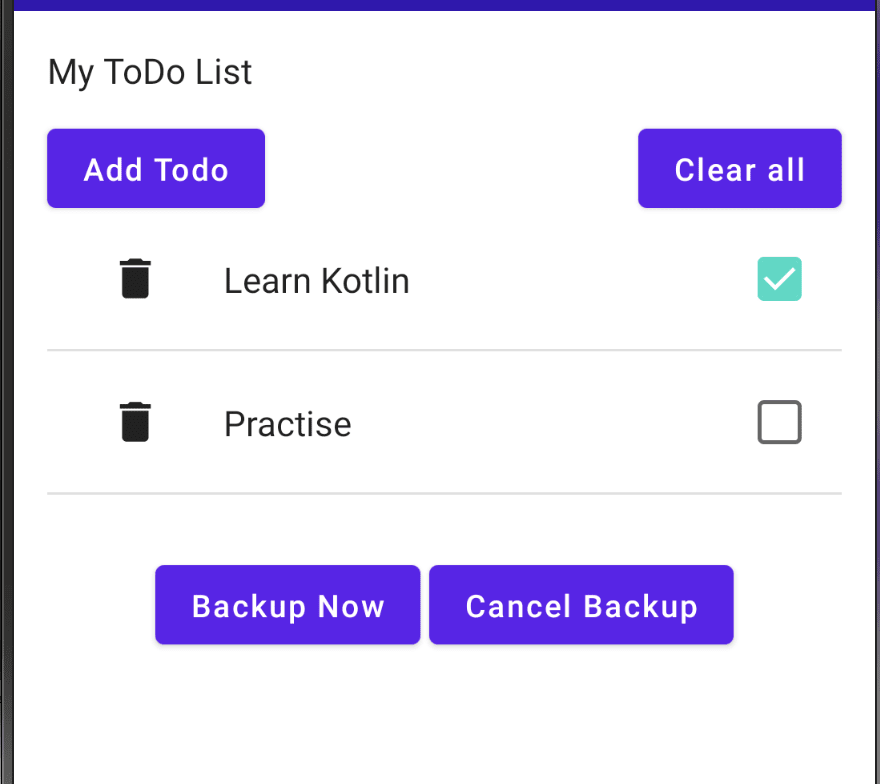
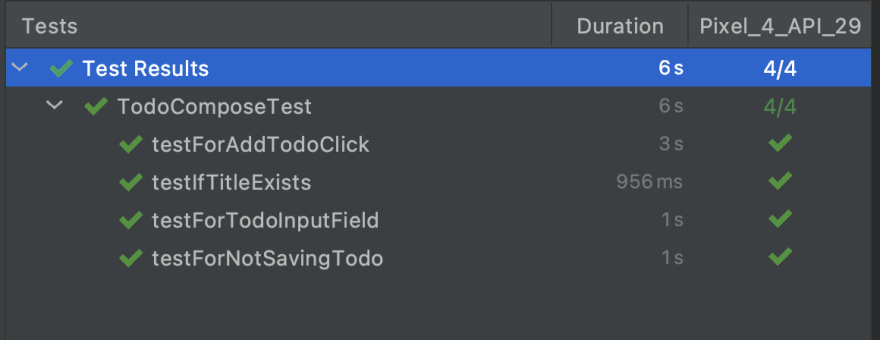
Test1: testIfTitleExists
- We set the content screen having the title. In our case, we set it to HomeView using the
setContentmethod ofComposeTestRule
@Before
fun setUp() {
  navController = TestNavHostController(ApplicationProvider.getApplicationContext())
}
@Test
fun testIfTitleExists() {
  composeTestRule.setContent {
      HomeView(navController)
  }
composeTestRule.onNodeWithText("My ToDo List").assertIsDisplayed()
}
Since our views have a navigation controller as a required parameter, we make use of
TestNavHostControllerthat exposes navigation APIs for testing.
- Next, we find the node with the text (as specified in the brackets), using
onNodeWithText
OnNodeWithText: Finds a semantics node with the given text.
- Finally, using the assertion
assertIsDisplayedwe make sure the text is present on the screen.
Test2: testForAddTodoClick
- We set the content screen to NavigationComponent, which is the parent component of our UI.
@Test
fun testForAddTodoClick() {
composeTestRule.setContent {
NavigationComponent()
}
composeTestRule.onNodeWithText("Add Todo").performClick()
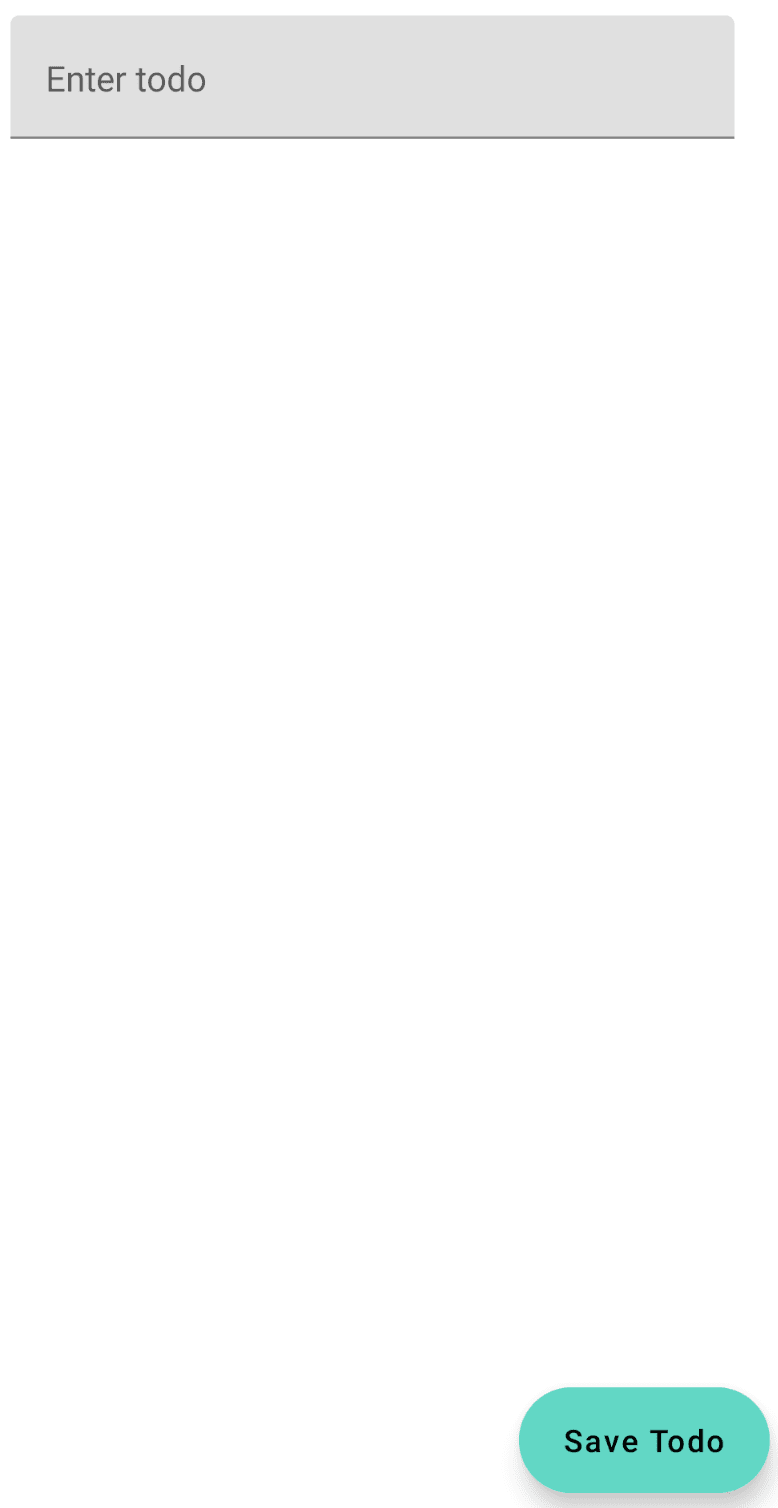
composeTestRule.onNodeWithText("Save Todo").assertExists()
}- Now, we find the text node, and if found we perform the click action on it.
- On clicking of
Add Todoit takes us to the new screen. On this new screen, we have a textSave Todo - We verify if our test can find this node using
assertExists
Test3: testForNotSavingTodo
- We set the content screen to NavigationComponent.
@Test
fun testForAddTodoClick() {
 composeTestRule.setContent {
     NavigationComponent()
 }
 composeTestRule.onNodeWithText("Add Todo").performClick()
 composeTestRule.onNodeWithText("Save Todo").assertExists()
 Espresso.pressBack()
 composeTestRule.onNodeWithText("My ToDo List").assertExists()
}- We find the text node, and if found we perform the click action on it.
- On clicking of
Add Todoit takes us to the new screen. On this new screen, we have a textSave TodoWe check if our test can find this node usingassertExists - Now, we simulate the back button press on the device using Espresso. Add it to your app
build.gradle
androidTestImplementation 'androidx.test.espresso:espresso-core:3.3.0'
- We come back to the home screen and verify if the text node
My ToDo Listexists.
Test4: testForTodoInputField
- We set the content screen to AddView since this view contains our todo input field.
@Test
fun testForAddTodoClick() {
 composeTestRule.setContent {
     AddView(navController)
 }
 val tag = "InputTodo Tag"
 val dummyText = "Dummy Text"

 composeTestRule.onNodeWithTag(tag).performTextInput(dummyText)
 composeTestRule.onNodeWithTag(tag).assertTextEquals(dummyText)
}- For identifying our input field, we associate a tag with it. This tag is the same as when we defined our input field.
- We make use of
onNodeWithTagwhich helps in finding a semantics node by the given tag. Once found, we useperformTextInputto enter the dummy text. - Finally, we compare if the text entered in the input field is the same as the assertion, using
assertTextEquals
Screenshot testing in Compose
In this section, we will see how to perform screenshot tests. We will be testing our AddView screen (see the screenshot above).
- We take a screenshot of the screen, by running the test and letting it fail. This creates a screenshot for us, present inside the app’s cache folder.

- Next, we move this file (renamed it to add_todo) and place it under our assets folder (inside AndroidTest).

- Create a file called ScreenshotComparatorTest and add the ComposeTestRule as
@get:Rule
val composeTestRule = createComposeRule()
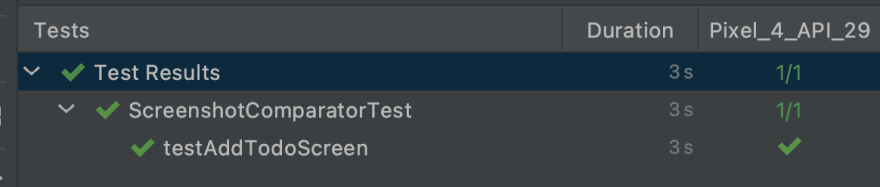
Test1: testAddTodoScreen
- We set the content screen to AddView since we are comparing the above screenshot with it.
@Before
fun setUp() {
  navController = TestNavHostController(ApplicationProvider.getApplicationContext())
}
@Test
fun testAddTodoScreen() {
  composeTestRule.setContent {
     AddView(navController)
  }
 assertScreenshotMatchesGolden("add_todo", composeTestRule.onRoot())
}-
assertScreenshotMatchesGoldenis our custom function, which takes in the name of the golden file (add_todo) and compares to the current composable screen usingcomposeTestRule.onRoot
As per the docs for composeTestRule.onRoot :
Finds the root semantics node of the Compose tree. Useful for screenshot tests of the entire scene.
- Inside the
assertScreenshotMatchesGolden, we capture the current screen as a bitmap, and then we save the image as a file with a name and current timestamp in milliseconds. - This file is saved under the app’s cache folder (see the above screenshot)
fun assertScreenshotMatchesGolden(goldenName: String,node:  SemanticsNodeInteraction) {
  val bitmap = node.captureToImage().asAndroidBitmap()
 saveScreenshot(goldenName + System.currentTimeMillis().toString(),  bitmap)

val golden = InstrumentationRegistry.getInstrumentation()
            .context.resources.assets.open("$goldenName.png").use {   BitmapFactory.decodeStream(it) }

// This function does the comparison
golden.compare(bitmap)
}- Using
InstrumentationRegistrywe get access to the low-level APIs, which in our case are the assets. - Finally, we open the screenshot captured by the test and compare it with the asset image (which we saved on the initial run of this test)
In case it helped :)


Top comments (1)
If we want to pass add to do and pass to do as parameter i.e. to match a string by dynamically passing parameter. how can we do that