Scenario
We were deploying to both the Play Store and App Store manually, which was taking a lot of time. We were going to move with Travis and Code-push, but then we stumbled on the article by BigCheeseApp and we just could not help by trying it out. Special thanks to JonnyBurger for writing about the tricks and cases 🙏
Github Actions
Github Actions is the workflow automation tool with CI/CD that allows you to do some tasks, such as running the test suite, deploying code and etc based on the Github Events and Types. When an event is triggered, your defined workflow will be run and help you to do some awesome jobs.
Fastlane
fastlane is the easiest way to automate beta deployments and releases for your iOS and Android apps. 🚀 It handles all tedious tasks, like generating screenshots, dealing with code signing, and releasing your application.
Setting up Github Actions
Make sure to have a git repository setup with remote pointing to GitHub.
Creating Workflow
First, we will have to create a workflow in .github/workflows directory. Similar to other CI/CD services, you may configure the workflow using YAML syntax. Multiple workflow files can be created in the directory and each workflow must have at least a Job.
Now, let’s create a publish.yml workflow and put a name for the workflow.
name: Publish iOS and Android App to App Store and Play Store
Setting Trigger Event
We want to trigger the workflow when a Github Release is published. Thus, we will be using the release event in Github Actions to trigger our workflow. We want to trigger the workflow when the event is release and the activity type is published.
name: Publish React Native App to App Store and Play Store

on:
  release:
    type: [published]
Creating Jobs and Defining Steps
Each workflow must have at least a Job. Since we are building iOS and Android app, let’s add two jobs: release-ios and release-android in the workflow.
    name: Publish React Native App to App Store and Play Store

    on:
      release:
        type: [published]

    jobs:
      release-ios:
        name: Build and release iOS app
        runs-on: macOS-latest
        steps:
          - uses: actions/checkout@v1
          - uses: actions/setup-node@v1
            with:
              node-version: '10.x'
          - uses: actions/setup-ruby@v1
            with:
              ruby-version: '2.x'
          - name: Install Fastlane
            run: bundle install
          - name: Install packages
            run: yarn install

      release-android:
        name: Build and release Android app
        runs-on: ubuntu-latest
        steps:
          - uses: actions/checkout@v1
          - uses: actions/setup-node@v1
            with:
              node-version: '10.x'
          - uses: actions/setup-ruby@v1
            with:
              ruby-version: '2.x'
          - name: Setup react-native kernel and increase watchers
            run: echo fs.inotify.max_user_watches=524288 | sudo tee -a /etc/sysctl.conf && sudo sysctl -p
          - name: Install Fastlane
            run: bundle install
          - name: Install packages
            run: yarn install
In the workflow above, we have added a few steps as follows:
-
actions/checkout@v1– Checkout the current repository. -
actions/setup-node@v1– Install Node 10.x to run React Native >= 0.60 -
actions/setup-ruby@v1– Install Ruby 2.x for the usage of Fastlane -
Increasing the number of watchers- Increase the number of file watchers on the machine -
bundle install– Install Fastlane -
yarn install– Install NPM packages
Build and Publish Android app
There are 2 things that we need to build and publish an Android app:
-
keystore– Signing the APK. Learn more about how to create your keystore. -
Google Credentials– Authenticate with Play Console for publishing the app. You can learn more about how to create your Google Credential or follow us:
Getting Google Credential Keys
- Open the Google Play Console
- Click the Settings menu entry, followed by API access and Click the CREATE SERVICE ACCOUNT

- Follow the Google Developers Console link in the dialog, which opens a new tab/window:
- Click the CREATE SERVICE ACCOUNT button at the top of the Google Developers Console
- Provide a
Service account name
- Click Select a role and choose Service Accounts > Service Account User

- Click the Create Key button
- Make sure JSON is selected as the
Key type - Click Create and press Done

- Back on the Google Play Console, click DONE to close the dialog
- Click on Grant Access for the newly added service account
- Choose Release Manager from the Role dropdown and Click ADD USER to close the dialog
Encrypt the Google Credential Key
Now, rename the json file to google-private-key.json , add it into .gitignore and save it inside /android/app . So, we need to encrypt the key and keystore :
    gpg --symmetric --cipher-algo AES256 android/app/your-secret.json
    gpg --symmetric --cipher-algo AES256 android/app/your-keystore.keystore
Script to decrypt the Google Credential Key
Let’s create a script to decrypt the Keystore and the Google Credential so that we can use them in our workflow. Create scripts/android-gpg-decrypt.sh and add the following codes:
    #!/bin/sh

    # --batch to prevent interactive command --yes to assume "yes" for questions
    gpg --quiet --batch --yes --decrypt --passphrase="$ENCRYPT_PASSWORD" \
    --output ./android/app/your-keystore.keystore ./android/app/your-keystore.keystore.gpg

    gpg --quiet --batch --yes --decrypt --passphrase="$ENCRYPT_PASSWORD" \
    --output ./android/app/your-secret.json ./android/app/your-secret.json.gpg
Updating Workflow
The ENCRYPT_PASSWORD is the password that you used to encrypt your secret files and we will put it as an environment variable later. Now let’s add the remaining steps to complete the Android workflow.
    name: Publish React Native App to App Store and Play Store

    on:
      release:
        type: [published]

    jobs:
      release-ios:
        ...

      release-android:
        name: Build and release Android app
        runs-on: ubuntu-latest
        steps:
          ...
                - name: Jetifier AndroidX transition
            run: npx jetify
                - name: Decrypt keystore and Google Credential
            run: sh ./scripts/android-gpg-decrypt.sh
            env:
              ENCRYPT_PASSWORD: ${{ secrets.GPG_ENCRYPT_PASSWORD }}
                - name: Dump secrets to .env
            run: env > .env
            env:
              REQUIRED_ENV: ${{ secrets.REQUIRED_ENV }}
          - name: Bundle and Upload to PlayStore
            run: bundle exec fastlane build_and_release_to_play_store versionName:${{ github.event.release.tag_name }}
            env:
                        VERSION_NAME: ${{ github.event.release.tag_name }}
              GITHUB_RUN_NUMBER: ${{ secrets.GITHUB_RUN_NUMBER }}
              STORE_PASSWORD: ${{ secrets.STORE_PASSWORD }}
              KEY_PASSWORD: ${{ secrets.KEY_PASSWORD }}
In the workflow above, we have added few steps as following:
- To add environment variables in Github Actions, we can add env in the steps that need the variables.

- We are using the name of the tag as the
versionNameof the app and GITHUB_RUN_NUMBER as theversionCodeso, we have to modifyandroid/app/build.gradleas:
        defaultConfig {
                        ...
                        versionCode System.env.GITHUB_RUN_NUMBER.toInteger() ?: 1
                        versionName System.getenv("VERSION_NAME") ?: "0.1.0"
                        ...
        }
- We are dumping the required secrets to
.envfile as there might be cases where we need to input the secrets usingreact-native-dotenv -
npx jetifywas done for backward compatibility as some might be older packages
Updating Fastfile
We are almost there. Now create fastlane/Fastfile add the build_and_release_to_play_store action in the Fastfile.
    lane :build_and_release_to_play_store do |options|
      # Bundle the app
      gradle(
        task: 'bundle',
        build_type: 'Release',
        project_dir: "android/"
      )

      # Upload to Play Store's Internal Testing
      upload_to_play_store(
        package_name: 'com.example.app',
        track: "internal",
        json_key: "./android/app/your-secret.json",
        aab: "./android/app/build/outputs/bundle/release/app.aab"
      )
    end
Build and Publish iOS app
To build an iOS app, we will need to sign the IPA before upload it to App Store Connect and there is no easy way of doing it in the CI/CD environment.
Update the fastlane directory
First, let's generate the Appfile, go into ios directory and then fastlane init. After completing, copy the Appfile into pre-existing folder fastlane in the root (if you have followed above android steps), else make new fastlane folder in the root and copy the Appfile and Fastfile.
PS. Copy the Gemfile and Gemfile.lock to root, and then delete both of them and the fastlane folder inside ios directory as well and edit the Gemfile as:
    source "https://rubygems.org"

    gem "fastlane"
    gem "cocoapods"
Match(sync_code_signing) to generate new certificates
Fastlane provides the sync_code_signing action for us to handle the code signing easily. If you have not set up code signing before, please follow the codesigning guideline to generate your certificates and provisioning profiles or follow us:
- Run
fastlane match init - We are going to choose
google_cloudbucket, cause adding it thoughprivate-github-repois a pain in itself as we cannot change the SSH
- Once logged in, we create or switch to a project, if you have followed the android steps, you might already have a project and keys already setup, but we advice you to create a new one

- Now, copy the key paste it into project root, rename it as
gc_keys.jsonadd it into.gitignore. Then, create a bucket.
- Enter the name of your bucket and then add the permission as Storage Admin to the service account previously created on step 3

- Now, you will have a
Matchfilein thefastlanedirectory, modify it as:
        google_cloud_bucket_name("bucket-name")

        storage_mode("google_cloud")

        type("appstore") # The default type, can be: appstore, adhoc, enterprise or development

        app_identifier(["com.example.app"])
        username("apple-publish@email.com") # Your Apple Developer Portal username
- Before running match for the first time, you should consider clearing your existing profiles and certificates. Let's do that:
        fastlane match nuke development
        fastlane match nuke distribution
        fastlane match nuke enterprise
- Now, run the following to generate new certificates and profiles:
        fastlane match appstore
        fastlane match development
Congratulations, you've successfully added new certificates named in the format as:
Match AppStore com.example.app and Match Development com.example.app
Encrypt the Google Credential Key
gpg --symmetric --cipher-algo AES256 gc_keys.json
Script to decrypt the Google Credential Key
Now, let’s create a script to decrypt the gc_keys.json so that we can use them in our workflow. Create scripts/ios-gpg-decrypt.sh and add the following codes:
    #!/bin/sh

    gpg --quiet --batch --yes --decrypt --passphrase="$ENCRYPT_PASSWORD" \
    --output ./gc_keys.json ./gc_keys.json.gpg
Updating Workflow
The ENCRYPT_PASSWORD is the password that you used to encrypt your secret files and we will put it as an environment variable later. Now let’s add the remaining steps to complete the iOS workflow.
    name: Publish React Native App to App Store and Play Store

    on:
      release:
        type: [published]

    jobs:
      release-ios:
        name: Build and release iOS app
        runs-on: macOS-latest
        steps:
          ...
                - name: Decrypt Google Cloud Key
            run: sh ./scripts/ios-gpg-decrypt.sh
            env:
              ENCRYPT_PASSWORD: ${{ secrets.GPG_ENCRYPT_PASSWORD }}
                - name: Dump secrets to .env
            run: env > .env
            env:
              REQUIRED_ENV: ${{ secrets.REQUIRED_ENV }}
          - name: Build and Upload to TestFlight
            run: bundle exec fastlane build_and_release_to_app_store versionName:${{ github.event.release.tag_name }}
            env:
                        VERSION_NAME: ${{ github.event.release.tag_name }}
              GITHUB_RUN_NUMBER: ${{ secrets.GITHUB_RUN_NUMBER }}
              FASTLANE_PASSWORD: ${{ secrets.FASTLANE_PASSWORD }}
              FASTLANE_SESSION: ${{ secrets.FASTLANE_SESSION }}
              FASTLANE_APPLE_APPLICATION_SPECIFIC_PASSWORD: ${{ secrets.FASTLANE_APPLE_APPLICATION_SPECIFIC_PASSWORD }}

      release-android:
        ...
In the workflow above, we have added a few steps as follows:
To add environment variables in Github Actions, we can add env in the steps that need the variables.
We are using the name of the tag as the
version_numberof the app and GITHUB_RUN_NUMBER as thebuild_numberFASTLANE_PASSWORDtakes the actual app-store-connect password-
You must have the 2FA open on the account since we need to authorize it from the Github-Actions itself, so:
- You need to generate a login session for Apple ID in advance by running
fastlane spaceauth -u apple-publish@email.com. The generated value then has to be stored inside theFASTLANE_SESSIONenvironment variable on your CI system. Please note:- An Apple ID session is only valid for a certain region, meaning if your CI system is in a different region than your local machine, you might run into issues
- An Apple ID session is only valid for up to a month, meaning you'll have to generate a new session every month. Usually, you'd only know about it when your build starts failing
- If you want to upload builds to App Store Connect or TestFlight from your CI machine, you need to generate an application-specific password:
- Visit appleid.apple.com/account/manage
- Generate a new application-specific password
- Provide the password by
FASTLANE_APPLE_APPLICATION_SPECIFIC_PASSWORD
- You need to generate a login session for Apple ID in advance by running
We are dumping the required secrets to
.envfile as there might be cases where we need to input the secrets usingreact-native-dotenv
Updating Fastfile
Now let’s add build_and_release_to_app_store actions into Fastfile.
    lane :buid_and_release_to_play_store do |options|
      ...
    end

    lane :build_and_release_to_app_store do |options|
        # Pod Install
      cocoapods(
        podfile: "./ios/Podfile"
      )

        # Set the build number
      increment_build_number(
        build_number: ENV["GITHUB_RUN_NUMBER"],
        xcodeproj: "./ios/app.xcodeproj"
      )

      # Set the version name
      increment_version_number(
        version_number: ENV["VERSION_NAME"],
        xcodeproj: "./ios/app.xcodeproj"
      )

      # Create a custom keychain for code signing
      create_keychain(
        name: 'keychain',
        password: 'password',
        default_keychain: true,
        unlock: true,
        timeout: 3600,
        add_to_search_list: true
      )

      # Import the appstore code signing
      match(
        type: "appstore",
        keychain_name: 'keychain',
        keychain_password: 'password',
            app_identifier: ["com.example.app"],
        readonly: true
      )

        # Disable automatic signing
        update_code_signing_settings(
        use_automatic_signing: false,
        path: "./ios/app.xcodeproj"
      )

        # Building the iOS app
      gym(
        workspace: "./ios/app.xcworkspace",
        include_bitcode: true,
        include_symbols: true,
        silent: true,
        clean: true,
        scheme: "App",
        export_method: "app-store",
        xcargs: {
          PROVISIONING_PROFILE_SPECIFIER: "match AppStore com.example.app"
        }
      )

        # Enable automatic signing
        update_code_signing_settings(
        use_automatic_signing: true,
        path: "./ios/app.xcodeproj"
      )

      # Upload to testflight
      testflight(
        app_identifier: "com.example.app",
        username: "apple-publish@email.com",
        skip_submission: true,
        skip_waiting_for_build_processing: true
      )
    end
In the Fast-file above, we have added a few steps as follows:
- Remember we add the
cocopodsgem earlier, we are going to use it now forpod install - We create a custom-keychain to store the provisioning certificates, however, we had set match as readonly so that we only extract the previously created certificates, rather than regenerating new ones
- Also
use_automatic_signingis set to false cause there higher chance than your.xcodeprojhas set it so, and if we don't do that, we cannot append ourPROVISIONING_PROFILE_SPECIFIER. To eradicate this, you can uncheck the Automatic Signing and set the Provisioning Profile here.
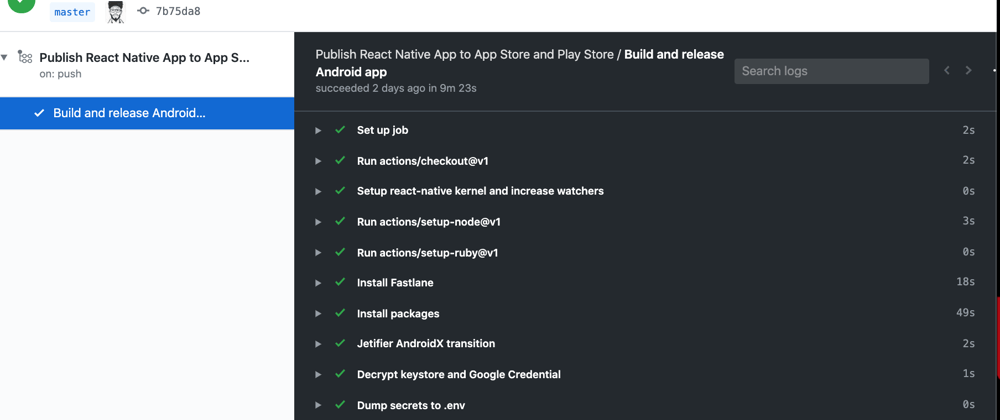
Testing Your Workflow
To test your workflow, you can create a Release and go to the Actions tab in Github to view the log of your workflow.
Watching the logs
Watching the logs scroll up the window is a very satisfying feeling. Recently, Github Actions started supporting streaming the logs, but there is one big caveat. You can only see the logs that were printed after you loaded the page.

Final Notes
Github-Actions is good, while the pricing side it's good:
- On the Linux/Docker front, you get 2000 minutes for free (3000 minutes with a Pro subscription)
- Building on macOS, you pay per minute, which means it’s a lot cheaper if you stay under 500 minutes
However, Use GitHub actions at your own risk as said by Julien Renaux, cause the secrets approach is quite flimsy, heard they are working on an API to fix that exactly🤞. We can only hope.
Thanks for giving this a read. We will continue to keep you posted on the updates and cool stuff.
Until next time 👋


Top comments (5)
Thanks for very useful post.
I think it's probably typo.
↓
Nice post. Thanks for sharing
Great job ! Thanks a lot !
Great post, helped me a lot.
great post