
This being my first post on here, forgive any error or lack of sophistication. :)
So, there are about 4 ways I KNOW by/in which you can create a SpringBoot Web App AUTOMATICALLY without having to write a single line of code for configuration, e.t.c.
Namely:
- By installing extension(s) in VSCode(Virtual Studio Code)
- By using start.spring.io's website, well your'e not creating the web app but the means to the web app.
- By using the STS(Spring Tool Suite) App
- By installing extension(s) in Intellij IDEA
- Okay so allow me break this down. I have only used the first two ways/methods, the last two have been confirmed by "sight seeing" :). I can most assuredly tell you that all 4 ways/methods work perfectly fine.
I will only show you how in the order of the no-brainer to the somewhat more brainer :), which are actually easy but for emphasis sake.
You simply type into your browser "start.spring.io" without the (" ") just like that.
This page shows up;

VOILA!
You just go right ahead and give your project a name, and your dependencies, basically whatever suits you.
Since i'm talking about Creating a Web App, i'll be selecting two(2) dependecies,

not that it's a must to select TWO but i believe they are necessary/core to the Web app. As you can see, I've named my project name and selected Maven as the Build Automation Tool for my Java project.
Then you go right ahead by clicking the Generate button, then a zip file is automatically downloaded. As shown below;

that zip file is the key to our Web App, basically, that's our web app in a Zip file, YES i said it! :)

Now that's that on the usage of the start.spring.io site, you can go right ahead importing(after extracting the zip file ofcourse.) it over to your Java supported IDE(Eclipse, VScode, Intellij IDEA, just to name a few.) and start kicking.
Take a good look at the contents of your zip file, we'll be seeing same in the next method using VSCODE Extension download.
*VSCODE
Now, you have your VSCode installed, if you don't, download it via Visual Studio
So, you get things running, and you have this, as shown below;

You are just a few steps closer to your Web App, Congratulations!
You dive right in to your Extensions by clicking the Extensions tab(in the marked section) or using the Windows command CTRL+SHIFT+X, as shown below;
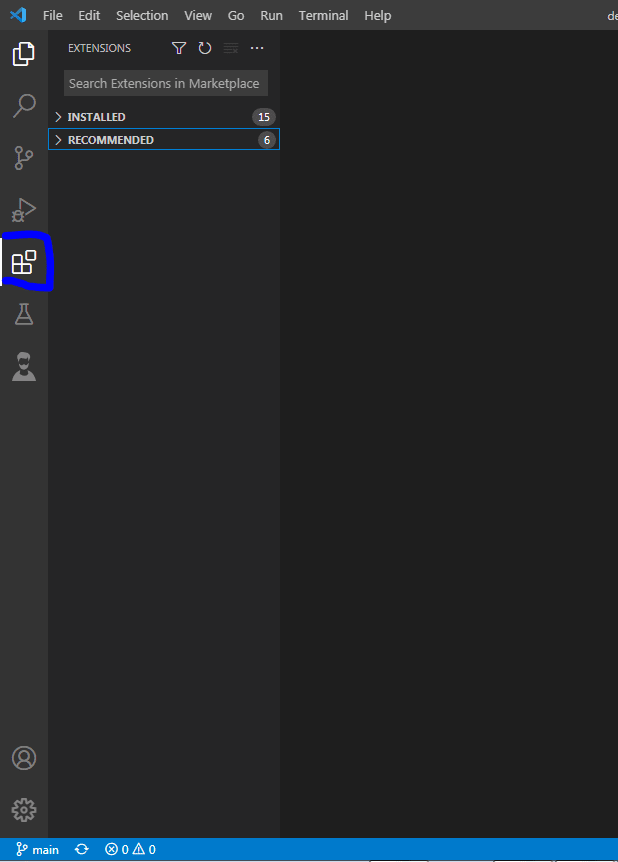
Then search for the Extensions; SpringBoot and Java(as it will be necessary for running the JAVA web app you want), you want to install the SpringBoot Extension Pack and the Java Extension Pack
As at the time of Writing this Post, I think i've seen something better(A combination of both extension packs and much more by Publisher Loaine Groner) to install instead of the the aformentioned, it is shown Below;

Once installed, you go right ahead by using the Command Palette by pressing the command; CTRL+SHIFT+P or simply by Pressing the F1 key on Windows only, then search for spring initialzr, as shown below;

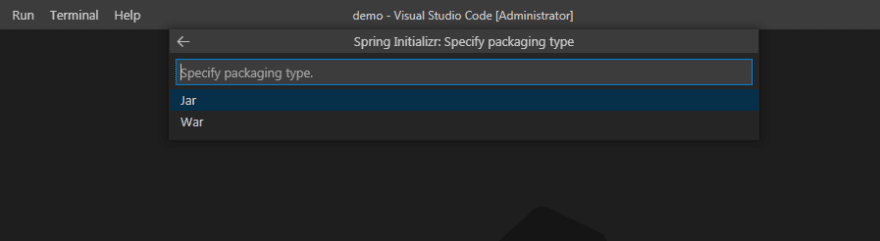
Then click on the Create a Maven Project or whichever suits you, just like the start.spring.io's website we looked into just moments ago, but this is in the UI of VSCode.
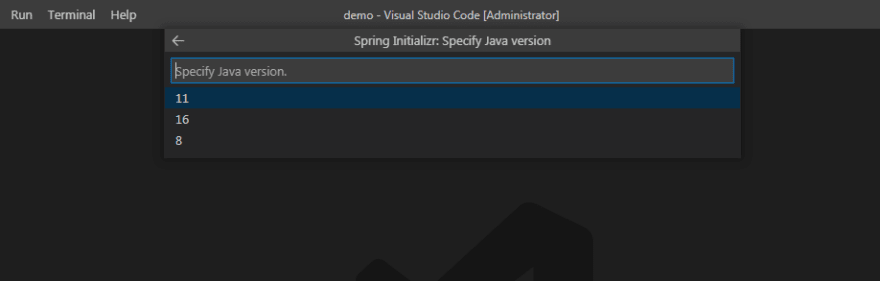
Then your'e asked to select Maven version, e.t.c, pretty much all what you did in the first case of the site.


Here we select our dependencies, WEB and DEV Tools

Here we are asked to generate our Web App files into a location just like the one of the site but here, the difference is that, VScode's come extracted(prepared).

There you have it, your files are ready, everything's ready, just to click a few button's all.
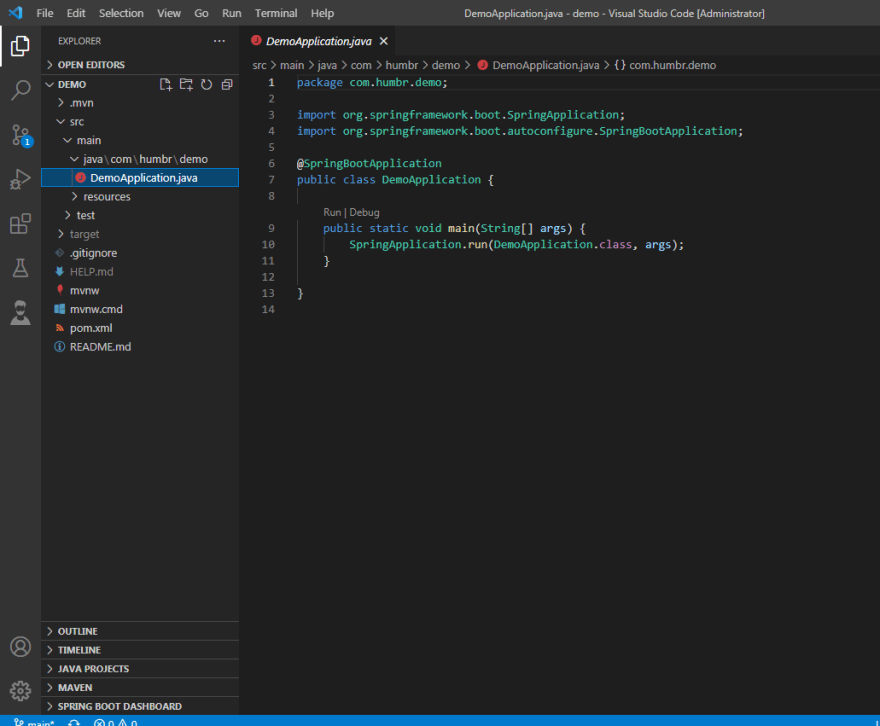
After that, you should check your VSCODE and import the java project, or you open the folder in your VSCODE. You should be seeing something like this on the Side(Explorer)bar/section of your VSCODE;

Well, we are just but a handful of steps away, click on the Tree drop down of the src till you get to:
Now we are that point! Irrevocably committed to booting up our WEB APP!
Then We click run, you should see it in the code, or you just right click and run application.
Then you should see your SpringBoot web app coming to life as a Terminal will be displayed for you to see the fruit of your effort. Your BACK-END is Alive!

If you just about scroll down in your Terminal Bar, you'd notice your web app is running on Port 8080.
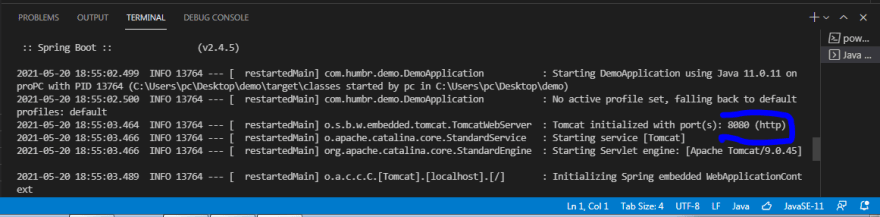
So, let's check that to be sure we really are live on our browser, go ahead and type localhost:8080
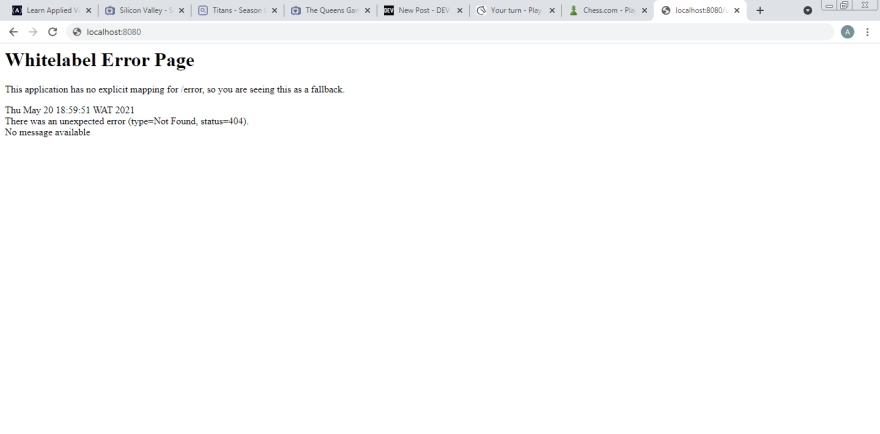
Voila!!
We are Up.
Although, you'll see a fallback error message, what this means is;
'Your'e seeing this because you haven't stated what you want to see'.
So, there you have it folks, that's how you create a SpringBoot Web App.
check out my Github for code
Github
I hope this helps someone.
Thank you.


Top comments (0)