
Another fun little project to see how to reduce the overhead of managing contact forms. Do I really want to throw up an API Gateway with Lambda to save what will no doubt be a bunch of spam... sort of, but I also want to leverage Google Sheets today.
I hadn't realized you can actually build in scripts to extend Google Sheets. This actually appears to be pretty powerful setup, but again, let's do a super basic setup!
After a few different attempts, I found Jamie Wilson's setup the easiest to implement. So I'll regurgitate (what a wonderful word) Jamie's setup and how I integrated it into Hugo.
Overview

The end goal is to have a message saved to Google Sheets. We will do this by creating a Google App which will manage access to the google sheet and parse out the form submission. It will also do a redirect when it has saved the contents.
The contact form will just perform a standard POST to the Google App.
Google Sheets
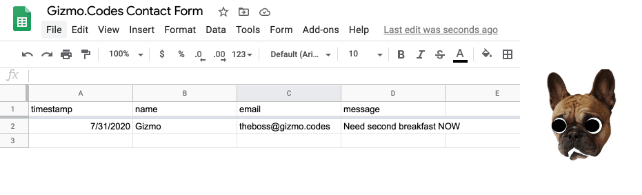
Starting at the end goal, I setup a new Google Sheet and give it some headers that will match our form fields which will be:
- name
- message
And we will add in an additional system generated field, timestamp, to give us the following in Row 1:
Google App Scripts
Right, from within the Google Sheet, you want to select Script Editor under the Tools menu.
And we want to replace the code segment with the following:
var sheetName = 'Sheet1'
var scriptProp = PropertiesService.getScriptProperties()

function intialSetup () {
  var activeSpreadsheet = SpreadsheetApp.getActiveSpreadsheet()
  scriptProp.setProperty('key', activeSpreadsheet.getId())
}

function doPost (e) {
  var lock = LockService.getScriptLock()
  lock.tryLock(10000)

  try {
    var doc = SpreadsheetApp.openById(scriptProp.getProperty('key'))
    var sheet = doc.getSheetByName(sheetName)

    var headers = sheet.getRange(1, 1, 1, sheet.getLastColumn()).getValues()[0]
    var nextRow = sheet.getLastRow() + 1

    var newRow = headers.map(function(header) {
      return header === 'timestamp' ? new Date() : e.parameter[header]
    })

    sheet.getRange(nextRow, 1, 1, newRow.length).setValues([newRow])
    return HtmlService.createHtmlOutput(
      "<script>window.top.location.href='https://gizmo.codes/contact/thanks';</script>"
    );
  }

  catch (e) {
    return ContentService
      .createTextOutput(JSON.stringify({ 'result': 'error', 'error': e }))
      .setMimeType(ContentService.MimeType.JSON)
  }

  finally {
    lock.releaseLock()
  }
}
You can see here that we are looking for Sheet1, pulling the headers from row 1 and mapping them to the parameter passed in. Once we set the data in the new row, we then return a HTML script to redirect to the Thanks page!
Let's save the file and kick off the setup!
Google App Initial Setup
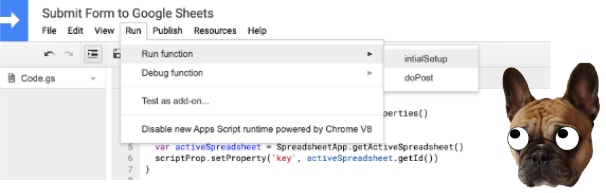
You will see we have two function in the code block above, initialSetup() and doPost(). To execute initialSetup() you will want to select it from under Run→Run function→initialSetup:
You will be prompted to grant permission for App Scripts to modify your spreadsheet.
Publish App
Now that we have the script all done, we will convert this into an application which will give us a URL to call it. Select Publish→Deploy as a web app... from the menu. You can select all the defaults and save the web app URL that you get.
Trigger
Now we want the other method to execute when we launch the app, so we will configure it as a Trigger by going to Edit→Current project's triggers. This will open a new tab showing all the triggers related to the project, which currently should be 0. Select Add Trigger and configure the trigger to match:

Hugo
Finally we wrap this all up by adding a contact form to our blog!
Open up Hugo's config.toml and add the following in with your personal google sheets web app URL:
# Contact Form Action
contact_form_action = "https://script.google.com/macros/s/..."
And opening the layout or page that you want your form to appear on:
        <form id="custom-contact-form" action="{{ .Site.Params.contact_form_action }}" method="post" class="row mt-5">
          <div class="col-lg-6">
            <input type="text" class="form-control mb-4" name="name" id="name" placeholder="Name">
          </div>
          <div class="col-lg-6">
            <input type="email" class="form-control mb-4" name="email" id="email" placeholder="Email">
          </div>
          <div class="col-12">
            <textarea name="message" id="message" class="form-control mb-4" placeholder="Message..."></textarea>
          </div>
          <div class="col-12">
            <button class="btn btn-primary" id="custom-contact-form-submit">Submit</button>
          </div>
        </form>
Which completes the whole process - now to just wait for those messages to arrive.. any minute now...


Latest comments (0)