Note: For this article, I suppose you already have installed a fresh copy of Laravel 8 with the Jetstream and Inertia authentication stack.
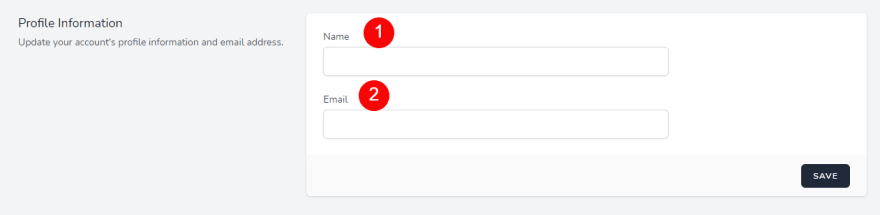
The default installation of Laravel has only two fields in the profile information section of a user profile. These two fields are the name and email fields as shown in the screenshot below:
To add a new field in this section, we need to go through the following steps. In this example, we are going to add a phone field to the profile.
Step 1: Add field to the UI
Go the file \resources\js\Pages\Profile\UpdateProfileInformationForm.vue and locate the HTML code segment for the email field. Duplicate this code for the new field and replace the email keywords with the phone.
<!-- Email -->
<div class="col-span-6 sm:col-span-4">
    <jet-label for="email" value="Email" />
    <jet-input id="email" type="email" class="mt-1 block w-full" v-model="form.email" />
    <jet-input-error :message="form.errors.email" class="mt-2" />
</div>

<!-- Phone -->
<div class="col-span-6 sm:col-span-4">
    <jet-label for="phone" value="Phone" />
    <jet-input id="phone" type="text" class="mt-1 block w-full" v-model="form.phone" />
    <jet-input-error :message="form.errors.phone" class="mt-2" />
</div>
Further down the same file, add the new field to the form data. In the code snippet below, you can see I have added the line phone: this.user.phone below the email field line email: this.user.email.
data() {
    return {
        form: this.$inertia.form({
            _method: 'PUT',
            name: this.user.name,
            email: this.user.email,
            phone: this.user.phone,
            photo: null,
        }),

        photoPreview: null,
    }
},
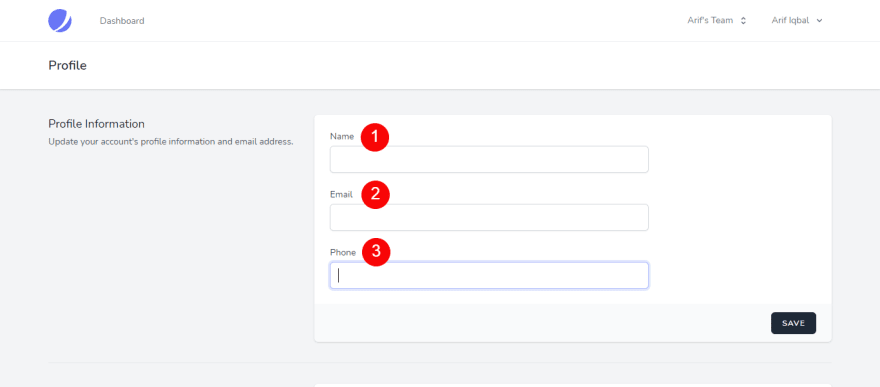
Now, run the npm run dev command so that the changes in the javascript file are compiled. With this, the UI part of your task is done. You can now see the new field added to your profile section.
Step 2: Update Database Schema
Now that we have added the new field to our UI, we need to add it to the database too. We will run a php artisan command to make a database migration file.
php artisan make:migration add_phone_to_users --table="users"
Running this command will generate the migration file with the up() and down() methods as below.
<?php

use Illuminate\Database\Migrations\Migration;
use Illuminate\Database\Schema\Blueprint;
use Illuminate\Support\Facades\Schema;

class AddPhoneToUsers extends Migration
{
    /**
     * Run the migrations.
     *
     * @return void
     */
    public function up()
    {
        Schema::table('users', function (Blueprint $table) {
            //
        });
    }

    /**
     * Reverse the migrations.
     *
     * @return void
     */
    public function down()
    {
        Schema::table('users', function (Blueprint $table) {
            //
        });
    }
}
We then add our phone field in the up() method like this:
public function up()
{
    Schema::table('users', function (Blueprint $table) {
        $table->string('phone')->after('email_verified_at')->nullable();
    });
}
The up() method is called with the php artisan migrate command and the field is added to the database table, as shown in the screenshot below:

We need to add the field in the down() method too, for rollback option.
public function down()
{
    Schema::table('users', function (Blueprint $table) {
        $table->dropColumn('phone');
    });
}
The down() method is called with the php artisan migrate:rollback command and the field is dropped from the database table.
Step 3: Add the implementation logic
The implementation logic goes in two files:
- The
\app\Actions\Fortify\UpdateUserProfileInformation.phpfile - And the
\app\Models\User.phpfile
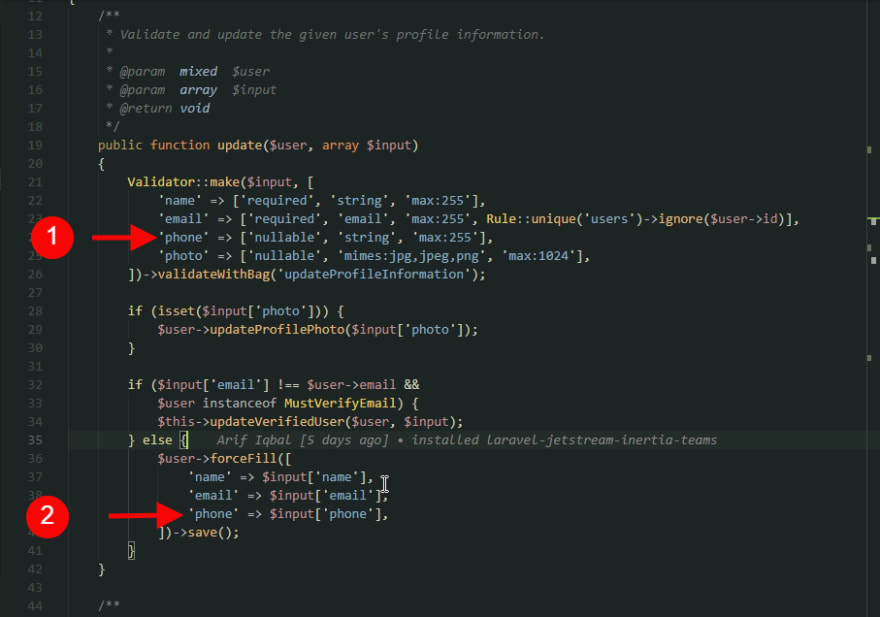
In the UpdateUserProfileInformation.php file, we need to update two functions, update() and updateVerifiedUser().
In the update() function, add the new field in two places, one in the validation array and the other in the array for the save function call as shown below.
The other place in the same file is the function updateVerifiedUser as shown below:

Next, we need to add the phone field into the fillable array of the User Model in app\Models\User.php file.
/**
 * The attributes that are mass assignable.
 *
 * @var array
 */
protected $fillable = [
    'name',
    'email',
    'password',
    'phone',
];
That was it!
Side notes
- I am new to Laravel. I like to write on dev.to as I learn.
- This is my first post about Laravel here. Before this, I wrote my introductory post
- Thanks to @zeshan77 for reviewing my post in draft state and sharing his invaluable feedback.
- Your feedback in the comments section will be appreciated.


Top comments (3)
Both the explanation and example are clear and amazing. Thank you
Thank you for this. It was helpful for me as I am also another beginner to Laravel. Just enough information to do a simple update I wanted to do on a Laravel project.
Thank you for your comment, @mrclemrkz . I am glad this post helped you. I am still learning #Laravel and #JavaScript with the #100DaysOfCode challenge. I post on Twitter every day about my progress. I would encourage you to come and join us in the challenge and learn/share something new everyday with us.