When we set out to build a comprehensive Connection Guide for Databases, we looked for what web framework to build with. Next.js was the clear choice. Especially for a 100+ page, wiki-style repository with a formulaic structure, Next.js made coding and pushing the site a delight.
Why build a Database Connections Guide?
Arctype is a SQL client that strives for speed and simplicity. SQL and databases get complex quickly and we encourage users to chat with us on Intercom and Discord. 90% of these conversations concern successfully connecting to the database. There are many things that can go wrong, from 5 inputs with 1 misspelling to firewalls, to private key permissions. And containers. Oh, Docker...
Take our SSH connection screen. In most cases, only 7 of these inputs will need to be filled out. But if the developer has a passphrase on their key, if they use a nonstandard port, a different SSL mode, or any other combination, we still need to support them. There’s also the issue that SSH error messages are notoriously opaque.

Next.js implementation
Next.js could help us deliver on our main goals: speed, easy development, and site generation. The three features we looked to were: dynamic routing to turn each documentation page into a URL, image optimization, and simple Markdown rendering. Finally, the advanced server side rendering and export functionality helped us deploy.
We were able to use these features together to produce a resource site that is lightening fast (see GIF) and easy to maintain.

Dynamic Routing
First up, dynamic routing. The paradigm of generating routes for the site on the fly, from created pages, is powerful. It means that we can focus on the content and the structure of files and folders without hardcoding anything in. Need to add another folder or additional pages? Just add a markdown file to the repository. Not only did this fit our goal of easy development, but it addressed another goal by allowing quick changes to the content. In the GIF above you can also see how fast the site is to click between different pages.
With regards to the content, what we needed was a new repository of information on connecting to databases. It had to be fast, easily updateable, and support a large number of screenshots. Coding it was going to be formulaic. Despite the dizzying array of options (and at the time Arctype only supported two databases!), there was a certain pattern for how to gather information for the connection and enter it.
To get started, we mapped the most common languages and security options. After all, connecting to your database is not just about the client. It’s about the frameworks and languages you use to develop your application. And the way to connect and set up these interfaces also differs across cloud providers.
| Connections | Hosting | Languages | Databases |
|---|---|---|---|
| Plain | PlanetScale | Node | Postgres |
| SSL | GCP | Python | MySQL |
| SSH Direct | Heroku | Java | |
| SSH Bastion | AWS | Go |
The routes we used looked like this, pages/[typeSlug]/[tagSlug]/, and below is a sample of code we used to fill out the site structure. This code starts at the pages folder and traverses the file tree, building a set of nested URLs as it goes.
export async function getStaticPaths () {
    const topLevelFolder = 'posts_markdown'
    const folders = getDirectories(topLevelFolder)
    const paths = folders.flatMap(folder => {
    const innerFolders = getDirectories(topLevelFolder, folder).flatMap(innerFolder => {

    // Create slug
    const files = getFiles(topLevelFolder, folder, innerFolder).map(filename => {
    const slug = filename.replace('.md', '')
    return {
        params: {
            typeSlug: folder.toLowerCase(),
            tagSlug: innerFolder.toLowerCase(),
            slug: slug
            }
        }
    })
    return files || []
    })
    return innerFolders || []
    })
    return { paths, fallback: false }
}
Image Optimization
Up next: image optimization. Like we said earlier, we wanted crisp images that actually showed the user what flows to go through on the AWS console, and what outputs to expect after running commands in the terminal. These touches always make for the best documentation.
Next.js comes with built-in image collection and optimization tools which meant that all of our media got bundled together and served in the most optimized way. Surprisingly to us, this also worked great for GIFs, which are notorious for slow page loads.


Markdown Rendering
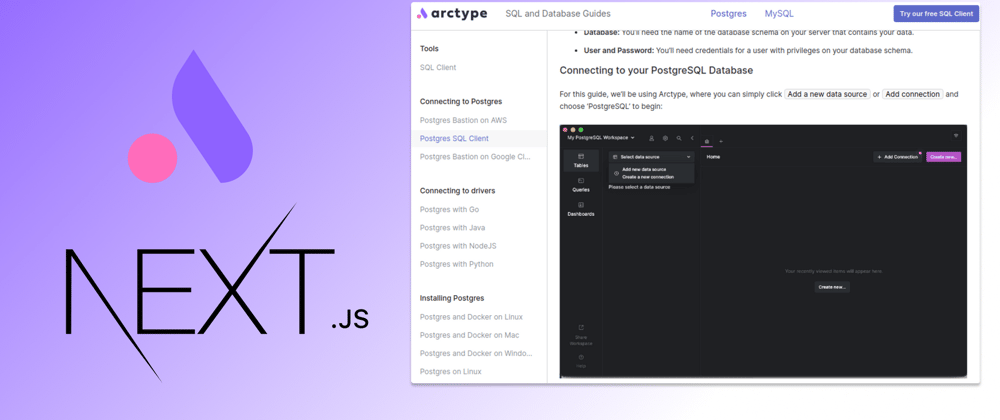
Finally, we decided on a formulaic structure for the pages where the content could be filled in. Above you can see a few of our pages with their combinations of technologies.
To organize all this information, we developed a simple page structure: H1, H2s for each step, H3s for extra information or anecdotes. Each section would usually have a paragraph of text explaining the step, an image or code block, and a caption. Then, there is meta information to provide to search engines. Finally, we decided to go with a database switcher up top and a list of the available pages on the left sidebar, organized into some loose categories to fit what the user wanted to accomplish (installing vs connecting).
Each page could be parsed like so:
const { data: frontmatter, content } = matter(markdownWithMetaPost)
Then, with very little code, we could build a full HTML page.
function Post ({
    title,
    content,
    breadcrumps,
    typeSlug
}) {
return (
    <>
    <Breadcrumps content={breadcrumps} typeSlug={typeSlug} />
    <h1 css={headerStyle}>{title}</h1>
    <div css={contentStyle}>
    <div dangerouslySetInnerHTML={{ __html: marked(content) }} />
    </div>
    </>
    )
}
With our content created and our site built, the last step is deployment. With Next.js export options we were able to hook together some simple build scripts to get the site live. So simple, that we even built a slack bot for our developer relations team to publish the site whenever they wanted.

Conclusion
In the end, we published over 100 pages of connection information for developers to set up their databases. It’s unlikely we could have produced a fast-loading site with so little code in such a short time frame without Next.js. We are very excited about the possibilities to expand our content libraries to help developers with other aspects of SQL and databases and Next.js is sure to be the cornerstone of those efforts.


Top comments (0)