

Hi there, thanks for checking out this post. Some people like to watch, and some people like to read. So, if you're a watcher, check out the video, it's about 10 minutes long. And if you're a reader, the same content is here in the text, along with screenshots, illustrations, and pointers to specific sections of the video.
1. Introduction
As developers, it often feels like all of our time is spent wading through huge file trees, fixing failing test cases, waiting for code reviews and having meetings. What we want is a smooth flow for understanding what code actually does, which code is relevant to what we’re doing, and we want to be able to share as much knowledge as possible with our team.
So, with that in mind, I want to introduce AppMap.
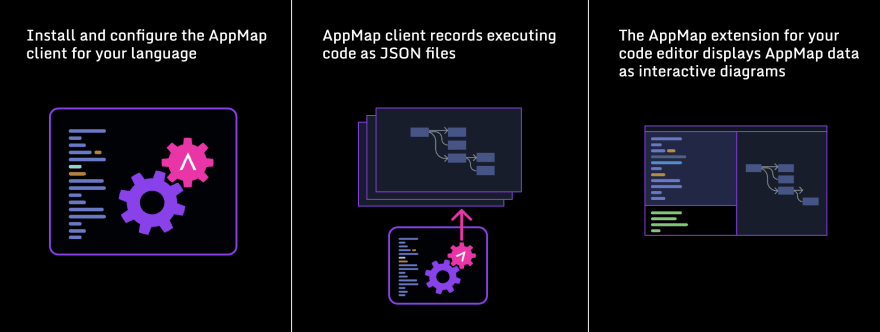
It’s an open source framework that records your code execution into JSON files. And it’s a code editor extension that turns these files into interactive diagrams and useful code analysis.
2. Opening a new Issue
Let’s step through an example that shows how AppMaps can make development more efficient and more enjoyable.
00:40 I've created a branch of the Rails Sample App, which is a Twitter clone. Here’s an odd thing we noticed about it - even when you’re not logged in, you can see the feed of any user.
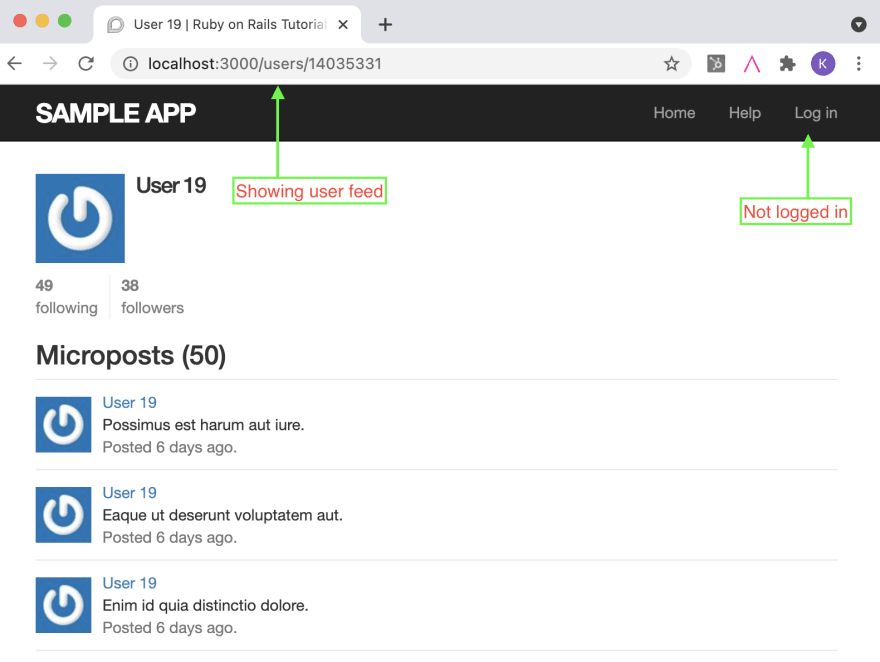
If this were a real app, this behavior would be considered a privacy risk, because information about you could be scraped off the website by anonymous bots.
So what if I want to change the app to require login to see the user page? I’d start by opening a new Issue - I might call it “Require login to view a user.”
3. Enhancing the Issue description with AppMaps
Now, I would like to communicate as much useful information about this issue as I can. Why? Because the hardest part of development, especially on unfamiliar code, is not writing the code. It’s building a mental model of how the code works, and imagining a solution of how it should work. So one of the best things we can do is making it easier to understand what the code really does.
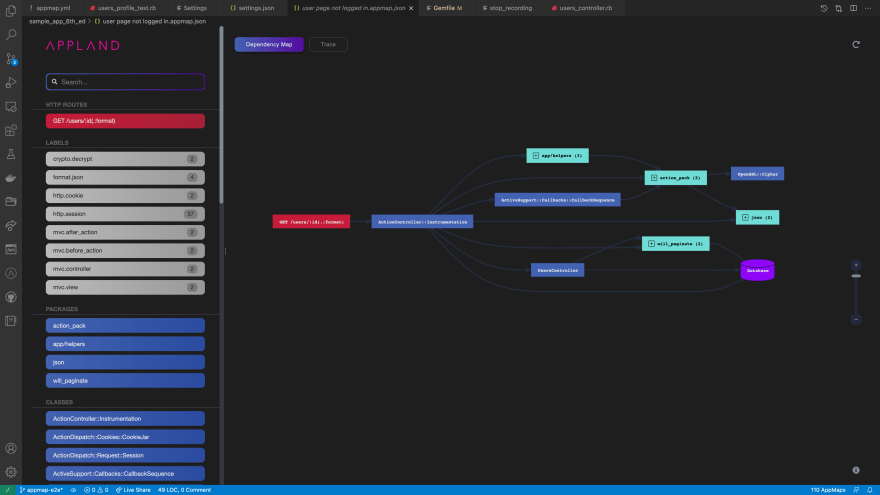
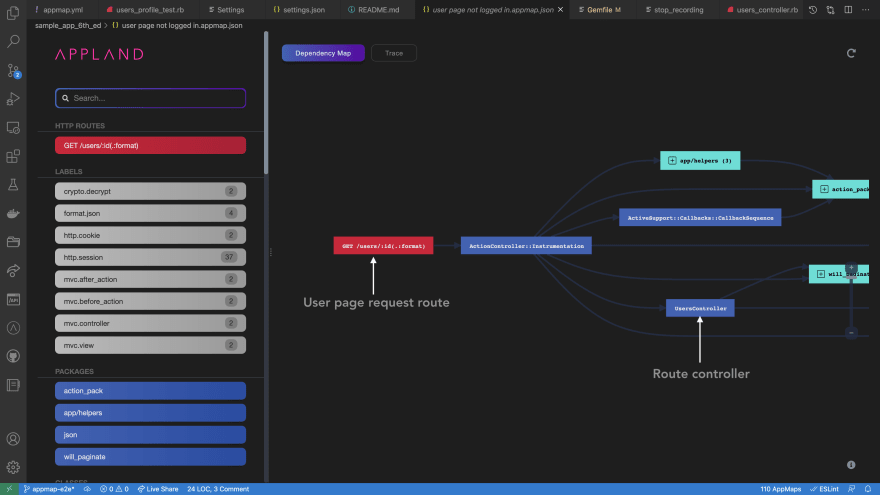
01:40 Here’s where AppMap comes into play. AppMap diagrams provide a design level view of the code. The Dependency map is a conceptual view of how the code is organized. The Trace diagram is a drill down into all the details of code execution paths, like parameters, status codes, and SQL. And it’s all linked to source code.
Now, an AppMap is a recording of a specific scenario. It doesn’t try to show you the entire code base at once. That just doesn’t work, it’s too much information, and most of it is irrelevant to any particular task. So because an AppMap shows you a specific end to end code and data flow, all the code you see, and all the relationships, are relevant to the job you’re trying to do. Code that isn’t relevant simply isn’t in the diagrams; so you don’t see it and you don’t need to worry about it.
Now I’m going to enhance this GitHub issue by adding AppMaps. Often I create AppMaps by recording test cases, but I can also make them by recording the server while I use the app.
02:28 I'll begin a "remote recording" with a start_recording script. Then I go to the app UI and hit the page that I’m interested in. Then I stop the recording. When I stop it, an AppMap file is created. I’ll name the AppMap, and then I can just click it to open it in VSCode.
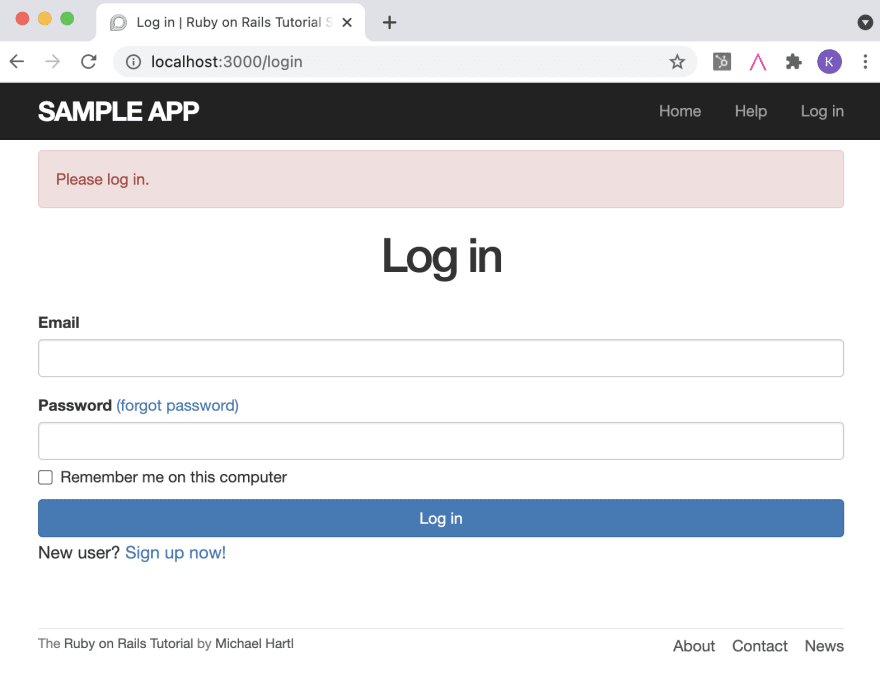
I’m also going to make an AppMap of the kind of behavior that I want this page to have when it’s fixed. If I click on “followers” I get a login page. That’s what I want the user page to do.
So I will make a recording of the followers page, too.
03:56 Now I can open my AppMaps in finder, and zip them. (You can’t attach JSON files directly to GitHub issues). Then, I'll drag the zip over into the Issue.
Notice that I don’t need to know much at all about Rails or how the solution will work. I’m just recording some relevant aspects of the app and sending them to the developer. Adding an AppMap is like including a screenshot of the UI; but for the backend. It makes the your backend visual; it’s interactive, and has many dimensions of useful data.
4. Using AppMaps to learn and inspect the code behavior
Ok, now I’m going to switch roles, to the developer who’s working on this issue. I’ve pulled down these AppMap files into my local workspace and I’m going to use them to create my code solution.
04:31 I will start with the first AppMap, “user page not logged in”.
From this AppMap, I can see one important piece of information, which is the route that shows the user page. I can also go right to the controller action that serves the page. It will be interesting to compare this flow to the second AppMap.
From the second AppMap, I can see how the login security works. Clicking on the label security.require_login takes me right to the function that requires the user to be logged in; and redirects them to the login screen if they aren’t.
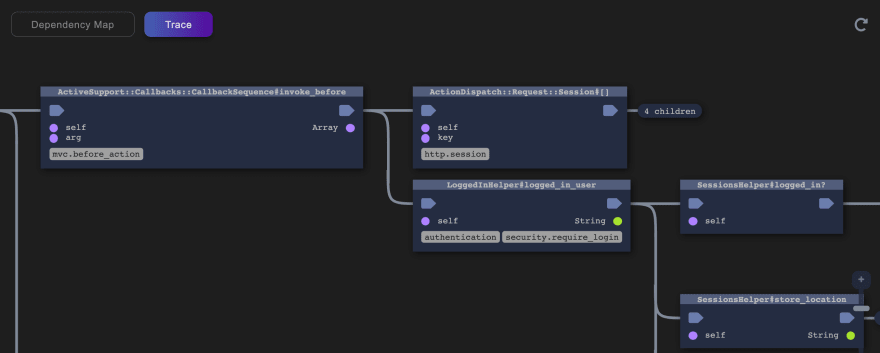
I can also see that the login requirement is triggered by a before_action.
5. Fixing the issue
05:41 From the first AppMap I know that the user controller handles this request. So, adding :show to the login before_action should fix the behavior. I will update the doc on the method as well.
Clicking the user route in the UI confirms that the user page requires a login now.
The next step is to run my tests. I’m expecting to see a test failure, since hitting the user page without logging in first should result in a redirect to the login page.

So, I will update the test to expect a 302 redirect if the user isn’t logged in and a 200 if they are logged in.
06:21 Once I update the tests, I regenerate the AppMaps. I can review the AppMaps to make sure the code flow matches my expectation.
The first test is called “profile display while anonymous”. I can find this AppMap and see that the login action is required. It looks up the user ID in the session, and when it’s not found, it sends a redirect. I’ll compress this AppMap file so I can add it to the pull request.
The second test is called “profile display while logged in as the user”. I’ll find this AppMap too, and I’ll see that this time the code flow continues by making SQL queries and rendering the user page. I’ll compress this file also.
6. Demonstrating web service changes by auto-generating Swagger
Now, when I submit this code for review, I want it to be obvious to the reviewer how the user web service has changed.
08:34 To document the web services, I’m using Swagger. Swagger is a file format that describes the detailed operation of a web services API.
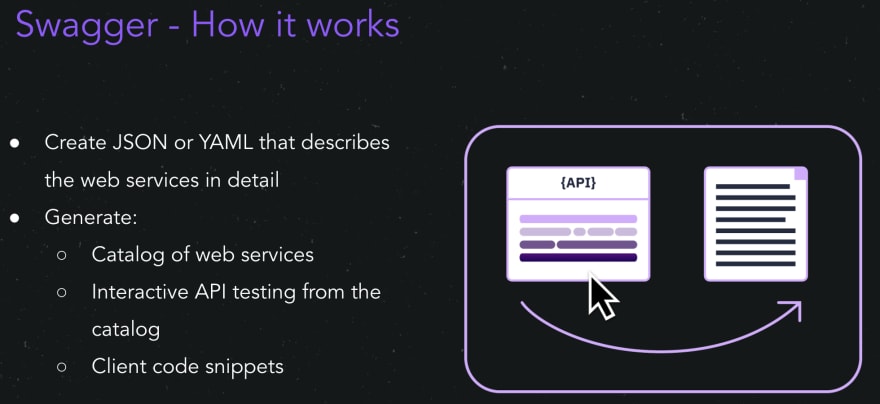
But I don’t need to maintain the Swagger files by hand. I’m using AppMap swagger, which generates a swagger description of all the web services. So, when I change the tests, I also update the swagger yaml by running bundle exec rake appmap:swagger.
Reviewing the git diff, there’s now a 302 status as well as 200 for the GET request to the user route.

7. Opening the pull/merge request
09:35 I’m ready to open a PR. I’ll attach the AppMaps for the new code behavior. Along with the source diff and the swagger diff, this gives a reviewer a ton of info about what I’ve done and how it behaves. So without much effort, the code reviewer is going to hit that Approve button and merge this change.
8. Wrap-up
10:11 That’s a quick tour of how smooth and efficient a Rails workflow can be with AppMap. Try it out for yourself at https://appland.com/docs.
Happy Mapping!


Top comments (0)