Flash Morse Code Messages on the Pico W - with an interactive, secure, authenticated web app!
This tutorial shows you how to create an Anvil app which takes a text input from a visitor, converts that text into Morse code, and makes your Pico W's LED flash with that Morse code message. It also shows you how to add user authentication to your app, so that you can control who has access to it.
It consists of the following steps:
- Getting Started
- Showing Morse code on your Pico
- Translating text into Morse code in your app
- Building a user interface for your app
- Running the app to check that it works!
- Adding user authentication
Getting started
First, you'll need to get your Pico W running with the Anvil Uplink. Follow the Getting Started guide, then come back here when you're done!
Showing Morse code with your Pico's LED
For this Morse Code tutorial, you'll be using a bigger Python environment than your Pico W, (in your Anvil app itself), to do the Morse conversion. Then, you'll call from code there to code running on your Pico so that the Pico only has to render the dots and dashes.
Let's start with the code that will run on your Pico. Open up main.py from your Pico, which should appear as a drive on your computer after installing the Anvil firmware.
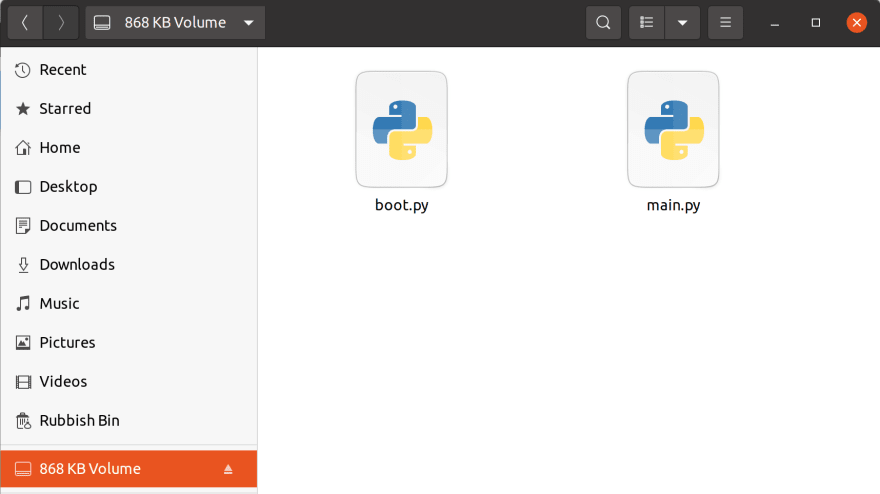
This is how your Pico W will appear after you've installed the Anvil firmware. Open up the main.py file. At the bottom of the file, you'll see this line of code:
anvil.pico.connect(UPLINK_KEY, no_led=True)
Directly above that, add the following code, which defines a function to make the LED on your Pico W blink fo a set duration:
# We use the LED to display the message in Morse Code
led = Pin("LED", Pin.OUT, value=0)


async def blink(duration_ms):
    led.on()
    await a.sleep_ms(duration_ms)
    led.off()
Now, add the following function, which takes a Morse code string input and makes the LED of your Pico blink appropriately:
@anvil.pico.callable_async()
async def morse_message(msg):
    print(f"{await anvil.pico.get_user_email()} has requested the message: '{msg}'")
    for m in msg:
        if m == ".":
            await blink(100)
        elif m == "-":
            await blink(400)
        else:
            await a.sleep_ms(700)
        await a.sleep_ms(200)
The anvil.pico.callable_async decorator means that this function will be callable from your Anvil app when your Pico is connected to the Uplink.
Now, save and close this file, and reboot your Pico W.
Translating text into Morse code
Next, you'll need to write the code that takes a text input and turns it into Morse code. This bit will be done in your Anvil app itself.
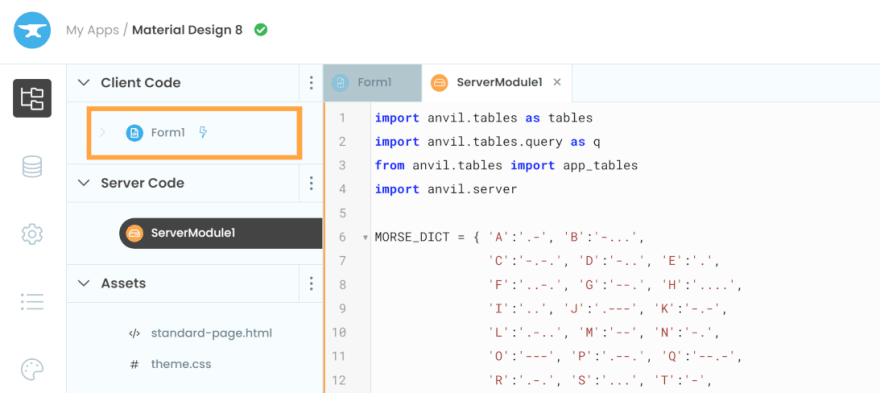
In your Anvil app, open up your app's Structure view by clicking on the top icon on the left-hand sidebar. In the menu that pops out to the right, add a Server Module by clicking on the three-dots menu next to 'Server Code', and clicking 'Add Server Module'.

This will open up your new Server Module in the Editor.

This is where you can write code that will run a full Python 3 environment, and it's where you're going to write the function that will turn text into Morse code.
To do this, your app will need a way to translate text characters into Morse characters, which is a perfect job for a dict. Add the following into your Server Module:
MORSE_DICT = { 'A':'.-', 'B':'-...',
               'C':'-.-.', 'D':'-..', 'E':'.',
               'F':'..-.', 'G':'--.', 'H':'....',
               'I':'..', 'J':'.---', 'K':'-.-',
               'L':'.-..', 'M':'--', 'N':'-.',
               'O':'---', 'P':'.--.', 'Q':'--.-',
               'R':'.-.', 'S':'...', 'T':'-',
               'U':'..-', 'V':'...-', 'W':'.--',
               'X':'-..-', 'Y':'-.--', 'Z':'--..',
               '1':'.----', '2':'..---', '3':'...--',
               '4':'....-', '5':'.....', '6':'-....',
               '7':'--...', '8':'---..', '9':'----.',
               '0':'-----', ', ':'--..--', '.':'.-.-.-',
               '?':'..--..', '/':'-..-.', '-':'-....-',
               '(':'-.--.', ')':'-.--.-', ' ': ' '}
This dictionary will allow you to write a function which steps through a string, converting each character to Morse code as it goes. Here's a function which does just that:
def display_message(msg):
  morse = "".join([MORSE_DICT[m] for m in msg.upper()])
  return morse
Now, you'll want to be able to call this function by clicking a button in your app's user interface, which means you need to make it callable from the client. To do this, add the anvil.server.callable decorator to your function, so that it looks like this:
@anvil.server.callable
def display_message(msg):
  morse = "".join([MORSE_DICT[m] for m in msg])
  return morse
Finally, you're going to want this server function to call the morse_message function on your Pico with the Morse code string it's generated. To do that, replace the return statement with another anvil.server.call:
@anvil.server.callable
def display_message(msg):
  morse = "".join([MORSE_DICT[m] for m in msg])
  anvil.server.call('morse_message', morse)
Building a user interface for your app
In order for your app to take user input to display as Morse on your Pico W, it will need a user interface. In the Anvil Editor, open up Form1 from your app's structure menu:
This will open the web page you built as part of the Getting Started guide. So far, it only has a single button. Make sure you're using the Design view for your form:

Drag a TextBox from the component toolbox on the right, and drop it above the button.

To edit its properties - like its placeholder text, and the name of the Python object that represents it in client code - you can use the Properties panel on the right, below the component toolbox.
In the above GIF, the Python name is being set to self.txt_message and the placeholder text is being set to 'Type your message here!'.
You'll see the changes appear on your Form as you alter the properties of your components.
You can do the same thing with the button that's already on the page. Click it once, and the Properties panel will change to show the properties of the button, so that you can edit them. Set the 'text' property to 'Send message'.
Now, double-click the button, and you'll be taken to the function that runs when the button is pressed. If you followed the Getting Started tutorial, this will already have some code in it. Change this function so that it calls the display_message function in your Server Module:
  def button_1_click(self, **event_args):
    """This method is called when the button is clicked"""
    anvil.server.call('display_message', self.txt_message.text)
(Your function's name might be different if you changed the Python name of the button component in the Properties panel.)
Putting it all together
Now, click the 'Run' button in the top right of the Editor. Type in 'SOS' to your text box, click the 'Send message' button in your app, and watch the LED on your Pico W flash the Morse code!
Adding user authentication
Now, you might not want just anyone having access to the ability to flash LEDs on your Pico. This section covers adding user authentication to your web app, so that only authorised users can enter text and have it sent as Morse code to your Pico.
Adding the Users Service
Click the '+' button in the lower left of the Editor to bring up the list of available services for your app, and select the Users service. This will bring up the configuration page for the Users Service in your app.
From here, you can choose the possible authentication methods for your users - such as email address and password, or single-sign-on with various providers like Google and Facebook. For now, leave the authentication method as 'Email + password'.
Under 'New user registration', check the box that allows new visitors to sign up for an account, and uncheck the box that allows their accounts to be used right away. If you like, you can require your users to confirm an email address before their accounts can be activated.

This configuration lets new users sign up for accounts, but requires you (as the app's owner) to manually enable accounts before they can be used.
Go to the code for 'Form1' by clicking on the 'Code' view button in the top left of the middle section of the Editor. Before, you've edited the code that runs when your button is pressed, but now you're going to add a line of code to your Form's __init__ method. This method runs whenever someone opens this Form - so, for example, when a user first visits your web app.
Change the __init__ method so that you require users to log in when the Form first opens:
  def __init__(self, **properties):
    # Set Form properties and Data Bindings.
    self.init_components(**properties)

    # Any code you write here will run when the form opens.
    anvil.users.login_with_form() # Add this line here
Now, click the 'Run' button in the top right of the Editor. You'll see a pop-up asking you to either log in or to sign up for a new account. Sign up for a new account using the email and password of your choice. If you've opted to require email confirmation, you'll need to do that before your account can be activated. Once you've done that, you should see a new row in the table at the bottom of the Users Service configuration page, like this:
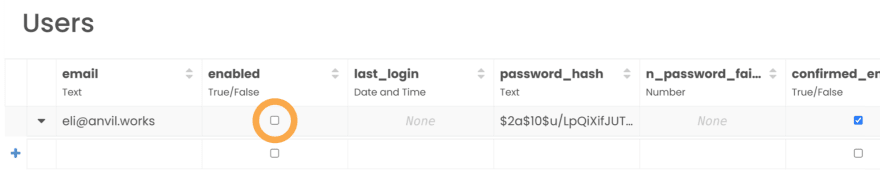
You'll see that the 'enabled' checkbox is not yet checked, which means that you can't yet use this account to log in to your app. Check this box, and then click the 'Run' button again, and you will be able to use this account to log in. Then, you'll see the UI you previously built, and you can send messages to your Pico!
Finally, if you want an extra layer of security, you can change the code in the main.py file on your Pico W. Open it up, and add require_user=True to the decorator on your morse_message function, like this:
@anvil.pico.callable_async(require_user=True)
async def morse_message(msg):
    ...
This means that whenever a call is made to this function, Anvil will check that it came from an authenticated user in your web app. Save and close this file, then reboot your Pico.
Now, go to the public URL for your app that you chose while publishing your app in the Getting Started tutorial. You'll be prompted to log in, which you can now do with the account you created and enabled, and you'll be able to enter a text message and see the Morse code flash on your Pico!
And that's it! You've connected your Pico to a web app that takes user input and processes it, and uses the results to flash the LED on your Pico appropriately - and you've made sure that it's only available to the users you choose.
More about Anvil
If you're new here, welcome! Anvil is a platform for building full-stack web apps with nothing but Python. No need to wrestle with JS, HTML, CSS, Python, SQL and all their frameworks – just build it all in Python.


Top comments (0)