
Introduction
I’ve started to learn rust GUI and GTK probably in june 2022. All this time I tried to get a job (and still trying) and was doing some tests tasks which took some time. And september was something like no-code month for reasons.
I found GTK documentation for Rust is pretty weird sometimes. I just had to google instead of reading docs. Some answers I found on the old forums, some I got by myself. Anyway I like the fact I can write at least something simple. It was interesting and I’ll try to do something else.
You wont find nothing special in this code, no difficult algorithms or original ideas. It is just an example for «advanced juniors» or something like that created by self educated person with no IT background.
Technical details
The whole code is here. It may be changed later, but this article includes all the code you need to reproduce this app.
Project’s structure:
src
|– constants.rs
|– functions.rs
|– gui.rs
|– lib.rs
|– main.rs
tests
|– integration_test.rs
File Cargo.toml
[dependencies]
glib = "0.15.12"
rand = "0.8.5"
gdk = "0.15.4"
chrono = "0.4.19"
gtk = "0.15.5"
glib-macros = "0.15.11"
Before starting this project you need to install gtk-3-dev on your machine
For Linux machines:
sudo apt install libgtk-3-dev build-essential
or
sudo apt-get install libgtk-3-dev
For Windows and Mac check official docs.
GTK does not work with nightly, so check rustc version:
rustc --version
rustup default stable
Ok, let's hit the ground running.
Application files
main.rs
Main file is pretty common and obvious:
use gtk::prelude::*;

mod constants;
mod functions;
mod gui;

fn main() {
    let application = gtk::Application::new(
        Some("com.github.gtk-rs.calculator_gtk"),
        Default::default(),
    );
    application.connect_activate(gui::build_ui);
    application.run();
}
Application ID is just your application name like «com.github.gtk-rs.application _name».
constants.rs
Why I used constants instead of using &str ‘s directly? 1. Such kind of signs are easier to spot in a huge code. 2. You may need to change the value in the process. Then you simply change the value of the constant. Otherwise you have to change the value wherever it was applied.
pub const ADD: &str = " + ";
pub const SUBTRACT: &str = " - ";
pub const MULTIPLY: &str = " \u{00D7} "; // " × "
pub const DIVIDE: &str = " \u{00F7} "; // " ÷ "
pub const EQUALS: &str = " = ";
The reason I use additional "-" sign is because I split String by spaces and I just need to be sure the negative numbers have no spaces like «-1 * -2»
pub const NEGATIVE: &str = "-";
I used this constant because it was more convenient for me. It isn’t mandatory.
pub const NONE: u8 = 0;
gui.rs
Import
Most interesting part if you are learning GTK and closures. First of all import this
use gtk::Entry;
use std::cell::Cell;
use std::rc::Rc;
use gtk::prelude::*;
use glib_macros::clone;
Connect constants and functions
use crate::functions::entry_parser;
use crate::constants::*;
Using GTK Entry
This is how we get text from entry
entry.text()
Each time you click numeric button, method text() gives you the whole entry content, for example:
Click Button 0 -> 0
Click Button . -> 0.
Click Button 2 -> 0.2
Click Button + -> 0.2 +
etc.
First part of gui.rs
should look like this. Nothing special
pub fn build_ui(application: >k::Application) {
let window = gtk::ApplicationWindow::new(application);
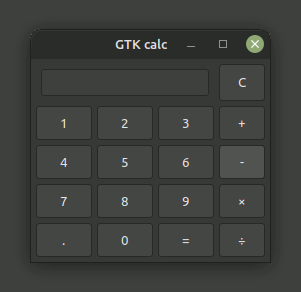
window.set_title("GTK calc");
window.set_default_size(200, 120);
let margin = 5;
let grid = gtk::Grid::builder()
.margin_start(margin)
.margin_end(margin)
.margin_top(margin)
.margin_bottom(margin)
.row_spacing(margin)
.column_spacing(margin)
.build();
window.set_child(Some(&grid));
// Operational data
let value: Rc<Cell<u8>> = Rc::new(Cell::new(NONE));
let operand: Rc<Cell<bool>> = Rc::new(Cell::new(false));
// Text entry and display
let entry = Entry::builder()
.margin_start(margin)
.margin_top(margin)
.margin_end(margin)
.margin_bottom(margin)
.build();
grid.attach(&entry, 0, 0, 3 ,1);
The second part.
Here is the for each loop. This is how we can create all the 0-9 num buttons with very few lines of code
    for iterator in 0..=9 {
        let button = gtk::Button::with_label(&iterator.to_string());
        let mut column = 0;
        let mut raw = 1;

        button.connect_clicked(clone!( @strong entry, @strong value => move |_| {
            if value.take() == 0 { value.set(1) }
            else { value.set(2) }
            entry.insert_text(&iterator.to_string(), &mut -1);
        }));

        if iterator == 1 || iterator == 4 || iterator == 7 { column = 0 }
        if iterator == 2 || iterator == 5 || iterator == 8 { column = 1 }
        if iterator == 3 || iterator == 6 || iterator == 9 { column = 2 }
        if iterator == 0 { column = 1 }

        if (1..=3).contains(&iterator) { raw = 1 }
        else if (4..=6).contains(&iterator) { raw = 2 }
        else if (7..=9).contains(&iterator) { raw = 3 }
        else if iterator == 0 { raw = 4 }

        grid.attach(&button, column, raw, 1, 1);
    }
Part three.
Making other buttons
    let plus_button  = gtk::Button::with_label(ADD);
    let minus_button = gtk::Button::with_label(SUBTRACT);
    let mult_button  = gtk::Button::with_label(MULTIPLY);
    let div_button   = gtk::Button::with_label(DIVIDE);
    let equals_bttn  = gtk::Button::with_label(EQUALS);

    let dot_button   = gtk::Button::with_label(".");
    let clear_button = gtk::Button::with_label("C");
Part four.
Connecting functions. We have to clone some of variables like this @strong entry to use them inside closures.
Negative numbers work only if there is no space between - and a number, so we can not use SUBTRACT “ - “ constant and use NEGATIVE “-” constant instead. And we need to know which time use NEGATIVE or SUBTRACT, so we can use value and operand like markers. For example: if value == 0 and "Button -" is pressed we’ll get NEGATIVE; if value == 1 we’ll get a SUBSTRACT because we are already have the first number.
Button Clear resets value and entry to default.
Button Equals calls for entry_parser() function. See next chapter.
Other buttons are using entry.insert_text() to append new characters to entry.
    plus_button.connect_clicked(clone!(@strong entry, @strong operand => move |_| {
            operand.set(true);
            entry.insert_text(ADD, &mut -1);
        }));
    minus_button.connect_clicked(clone!(@strong entry, @strong value, @strong operand => move |_| {
        if value.take() == 1 && !operand.take() {
            operand.set(true);
            entry.insert_text(SUBTRACT, &mut -1)
        } else {
            entry.insert_text(NEGATIVE, &mut -1)
        }
        }));

    mult_button.connect_clicked(clone!(@strong entry, @strong operand => move |_| {
            operand.set(true);
            entry.insert_text(MULTIPLY, &mut -1);
        }));

    div_button.connect_clicked(clone!(@strong entry, @strong operand => move |_| {
            operand.set(true);
            entry.insert_text(DIVIDE, &mut -1);
        }));

    equals_bttn.connect_clicked(clone!(@strong entry, @strong operand => move |_| {
            let get_entry = entry.text();
            let entry_data: String = format!("{}", get_entry);
            let result = entry_parser(entry_data.clone());
            let entry_vew = format!("{} = {}", entry_data, result);

            operand.set(false);
            entry.set_text(&entry_vew);
        }));

    dot_button.connect_clicked(clone!(@strong entry, => move |_| {
            entry.insert_text(".", &mut -1);
        }));

    clear_button.connect_clicked(clone!(@strong entry => move |_| {
            value.set(NONE);
            entry.set_text("");
        }));
The last part.
Just attach operators and extra buttons to grid. Arguments:
0 – Button
1 – Position from left to the right
2 – Position from top to the bottom
3 – Button’s width
4 – Button’s height
    grid.attach(&plus_button,  3, 1, 1, 1);
    grid.attach(&minus_button, 3, 2, 1, 1);
    grid.attach(&mult_button,  3, 3, 1, 1);
    grid.attach(&div_button,   3, 4, 1, 1);
    grid.attach(&equals_bttn,  2, 4, 1, 1);
    grid.attach(&dot_button,   0, 4, 1, 1);
    grid.attach(&clear_button, 3, 0, 1, 1);

    window.show_all();
}
functions.rs
Import constants and make logic now war
use crate::constants::*;
This function performs simple arithmetic operations: addition, subtraction, multiplication, and division. Then the result would be formatted in different ways for addition / subtraction and multiplication / division.
pub fn entry_parser(entry_data: String) -> String {
    if char_check(&entry_data) {
        let v: Vec<&str> = entry_data.split(' ').collect();
        let operand = v[1].parse::<char>().unwrap();

        match operand {
            '+' => (v[0].parse::<f64>().unwrap() + v[2].parse::<f64>().unwrap()).to_string(),
            '-' => (v[0].parse::<f64>().unwrap() - v[2].parse::<f64>().unwrap()).to_string(),
            '×' => format!("{:.6}", extra_zeroes_remover(v[0].parse::<f64>().unwrap() * v[2].parse::<f64>().unwrap())),
            '÷' => format!("{:.6}", extra_zeroes_remover(v[0].parse::<f64>().unwrap() / v[2].parse::<f64>().unwrap())),
            _ => "0".to_string(),
        }
    } else {
        "0".to_string()
    }
}
Remove extra zeroes. I suppose there are few other ways to implement precision
fn extra_zeroes_remover(f: f64) -> String {
    let string_0 = format!("{}", f);
    let mut vec: Vec<char> = string_0.chars().collect();
    for _i in 0..vec.len() {
        let last_element = vec[vec.len() - 1];
        if last_element == '0' {
            vec.remove(vec.len() - 1);
        }
    }

    vec.iter().collect::<String>()
}
Check for wrong input. For example an empty string, or not digits, or extra operator signs etc.
fn char_check(entry_data: &String) -> bool {
    if
    entry_data.contains(ADD) || entry_data.contains(SUBTRACT) ||
    entry_data.contains(MULTIPLY) || entry_data.contains(DIVIDE)
    {
        if entry_data.len() > 4
        && !entry_data.chars().all(|x| x.is_alphanumeric())
        && entry_data.chars().last().unwrap().is_numeric() {
            true
        } else { false }
    } else { false }
}
Tests
Ok… I don't feel like I'm doing well with tests. It's more likely that I don't have a lot of experience. And I don't know how to write tests for the GUI.
I found this video pretty useful: Testing in Rust. If you can help me with better understanding this topic feel free to post some hints in the comments below.
lib.rs
Unit tests are small and focused on separate modules.
Don’t forget to import
pub mod functions;
pub mod constants;
First of all we have to check wrong user input like single number or empty string:
#[test]
fn wrong_input() {
    let entry_data = "-".to_string();
    assert_eq!("0", functions::entry_parser(entry_data));
    let entry_data = "1 -".to_string();
    assert_eq!("0", functions::entry_parser(entry_data));
    let entry_data = "1".to_string();
    assert_eq!("0", functions::entry_parser(entry_data));
    let entry_data = ".".to_string();
    assert_eq!("0", functions::entry_parser(entry_data));
    let entry_data = "stop_war".to_string();
    assert_eq!("0", functions::entry_parser(entry_data));
    let entry_data = "abcd1234".to_string();
    assert_eq!("0", functions::entry_parser(entry_data))
}
Then we test simple arithmetic:
#[test]
fn add() {
    let entry_data = "1.022 + 3.009".to_string();
    assert_eq!("4.031", &functions::entry_parser(entry_data));
    let entry_data = "-1 + -2".to_string();
    assert_eq!("-3", &functions::entry_parser(entry_data))
}
#[test]
fn div() {
    let entry_data = "1.022 ÷ 3.009".to_string();
    assert_eq!("0.3396", &functions::entry_parser(entry_data));
    let entry_data = "6 ÷ -2".to_string();
    assert_eq!("-3", &functions::entry_parser(entry_data))
}
Et cetera
Remember about precision issue for multiplication and division. I am still not sure what is the better way to solve this issue.
integration_test.rs
Integration tests are external and live in a special directory /tests. Cargo knows that files in this directory are integration tests. Every file in /tests directory is gonna be a new crate. Each file would be a different section in terminal output.
We have to bring an adder library use adder; or our project and testing function like use calculator_gtk::functions; into scope.
To run only integration tests you have to
cargo test –test integration_test
If I understand correctly, there should be tests of the graphical part of the application. But I'm not sure.
The full content of integration_test.rs file is:
use calculator_gtk::functions;

#[test]
fn empty_input() {
    let entry_data = "".to_string();
    assert_eq!("0", functions::entry_parser(entry_data))
}
Outro
I know this is not the best way an application should be written. There are few different styles of writing a code in different companies and in different segment of development you should follow to be effective I guess. I need to add new functions, such as calculating percentages. In addition, I believe that algorithms can be made more efficient and I should have to figure out how to improve them.
What I have to do:
– Listen for keyboard events
– Scrollable Entry
– Set rounding precision (1.9869999999999999 -> 1,987)
– More math operations
– Documentation
Hope this article was useful
Good luck
Take care
Post scriptum
I built this app on my laptop running Linux Mint 20.3 Cinnamon:
cargo build --release
And found the file here
/target/release
./calculator_gtk
Everything works just fine.
But any time I tried cross-compile from Linux to Windows or Mac I received few errors. I tried different ways, googled and still have no solution.


Top comments (0)