
Solving problems with code is a lot of fun. But when your creative process gets interrupted by a dependency issue where you have to dig into the terminal and check versions fearing that one wrong move can break what you have been building for weeks, it is definitely a frustrating setback.
On my path to learn Data Science, I have struggled a lot with creating the right environment for my project and making sure that all my packages are installed and are not creating any issues. But what happens when I need to run my application on a server where I don’t have my hand-crafted development environment? Luckily, Docker saves the day.
Docker is an open source platform for developers and sysadmins to develop, deploy, and run applications with containers (from Docker documentation). Here we are talking about linux containers, or in other words, applications that let developers wrap a project into one package that contains all the libraries and dependencies along with the project code itself. A container can be compared with a virtual machine, but it is much more lightweight since it uses only the right amount of resources from the host machine, rather than creating a full operating system inside the host machine.
In this tutorial I will introduce you to some key Docker concepts and components to be able to start using them in your development process.
Installation
- Download Docker: https://docs.docker.com/docker-for-mac/install/
There are 2 Docker editions available: Docker CE (Community Edition) and EE (Enterprise Edition). The documentation recommends CE for learning purposes and small team projects. Docker can be run on AWS or downloaded to run on your local machine. In this tutorial I am going to download Docker for MacOS. If you don’t have a Docker account, you will need to create one to be able to download the installation file.
Run Docker.dmg installation file and move the application to your Applications folder
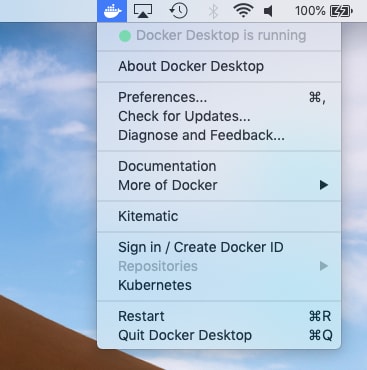
Open Docker from your Applications folder. You will see an icon appearing in the upper right corner of your screen.
Sign in with your Docker ID
- In Terminal type the following to see if it is working correctly:
docker run hello-world
The output should look like thi:
latest: Pulling from library/hello-world
1b930d010525: Pull complete
Digest: sha256:5f179596a7335398b805f036f7e8561b6f0e32cd30a32f5e19d17a3cda6cc33d
Status: Downloaded newer image for hello-world:latest

Hello from Docker!
This message shows that your installation appears to be working correctly.

To generate this message, Docker took the following steps:
 1. The Docker client contacted the Docker daemon.
 2. The Docker daemon pulled the "hello-world" image from the Docker Hub.
    (amd64)
 3. The Docker daemon created a new container from that image which runs the executable that produces the output you are currently reading.
 4. The Docker daemon streamed that output to the Docker client, which sent it
    to your terminal.
Docker Images and Dockerfiles
There are 2 key components of Dockerizing your project: Docker images and Dockerfiles.
An image can be described as a set of tools and instructions that we need to execute the project's code: system tools, libraries, dependencies, etc. Conveniently, this set of tools can be reused in a very easy way, so you would not need to define a new project environment, but can rather reuse an existing one.
A Dockerfile is a text file with a set of instructions to assemble an image. Each line of the Dockerfile is considered a layer which can be later reused.
There is also a cloud service called Docker Hub where Docker users can share Docker images. This service is similar to what GitHub does for git.
Running an existing image
To test how Docker can run a Jupyter server, I followed this tutorial
I started with running this command in my terminal:
docker run ubuntu:16.04
This command will run an image called [ubuntu] with image version [16.04]. If Docker doesn’t find the image on a local machine, it will then look in the Docker Hub to download the image.
There are some extra options for the run command that can be found in the Docker Official Documentation.
As I mentioned before, it is very convenient to use existing images. Let’s run an image already created by Jupyter development community that has just Python and Jupyter installed: https://hub.docker.com/r/jupyter/minimal-notebook
docker run -p 8880:8888 jupyter/minimal-notebook
In the above line, -p <host_port>:<container_port> is the part that tells Docker to open connection between the Docker container and host machine, so interaction with the running container is possible.
jupyter/minimal-notebookis the image that we want to run.
After running this command, you will see this type of output in your terminal:
To access the notebook, open this file in a browser:
        file:///home/jovyan/.local/share/jupyter/runtime/nbserver-6-open.html
    Or copy and paste one of these URLs:
        http://(2f0da4326d97 or [my IP address]):8888/?token=xxxxxxxxxxxxxxxxxxxxxxxxxxxxxxxxxxxxxxxxxxxx
From the last URL we have to take the token number, which I represented with 'x' since it is a secret key. With the port number 8880 that I used to run the image, I was able to access the notebook:
http://localhost:8880/?token=xxxxxxxxxxxxxxxxxxxxxxxxxxxxxxxxxxxxxxxxxxxx
Next step would be to allow to create and make changes to a Jupyter notebook with a container running. There is a special option in run command:
-v <host_directory>:<container_directory>
Host directory specifies where to store the notebook we are going to create, and container directory should be specified in the container documentation (if using Docker Hub container). In our case the container directory from the documentation was /home/jovyan
So the final code to run an image with the option to access it and create notebook is:
docker run -p 8880:8888 -v ~/docker_tests:/home/jovyan jupyter/minimal-notebook
Going to http://localhost:8880/?token=xxxxxxxxxxxxxxxxxxxxxxxxxxxxxxxxxxxxxxxxxxxx in your browser will allow you access your Jupyter server and create notebooks.
Dockerizing your Python project
To Dockerize your project, you will first need to create a Dockerfile containing instructions on what image you are going to be using, what packages you need to install, and what your project’s directory is.
Imagine that you need to Dockerize your python script called add_numbers.py that would require installation of the scikit-learn library.
First, create a file called Dockerfile (don't add extension to it!). Add these lines to the file in any text editor:
FROM python:3

ADD add_numbers.py /

RUN pip install -U scikit-learn

CMD [ "python", "add_numbers.py" ]
FROM command says what image you are using as a template.
ADD tells Docker to add certain script to the Dockerfile. This command takes 2 parameters: source and destination
ADD <source> <destination>
RUN says that before executing the script, installation of scikit-learn should be done.
CMD provides the default command that will be executed after the image has loaded unless overwritten by other command.
My python file add_numbers.py has just the following code:
def add_numbers (a, b):
   return a + b

c = 3
d = 4

print(add_numbers(c, d))
After creating my script and my Dockerfile that has the instructions on how to create an image, I can run this command to build a new image based on newly created Dockerfile:
docker build -t add_numbers .
This commands creates an image called ‘add_numbers’ based on a Dockerfile from the same directory we are running the command from.
Finally, we can run the image with this command:
docker run add_numbers
As my python script contained a function that would add two numbers and print out the result, and also had one function call to add 3 + 4, I got 7 as an output in my terminal.
To learn more, please refer to the official Docker documentation:
https://docs.docker.com/
Useful tutorials on starting working with Docker:
https://runnable.com/docker/python/dockerize-your-python-application
https://www.dataquest.io/blog/docker-data-science/


Top comments (2)
Congrats Anna, nice tutorial.
Have you tested alpine images yet? it will create the smallest images for you.
FROM python:3-alpine // change this line. you will see the difference between the sizes.
Anna this was extremely helpful thank you for writing!