
Create a fun browser game with JavaScript and TensorFlow.js
TL;DR, if you’re just here for the source code, you can download it from my repository below 👇👇👇
 andypotato
/
rock-paper-scissors
andypotato
/
rock-paper-scissors
Rock, Paper, Scissors game implemented with TensorFlow.js and FingerPose
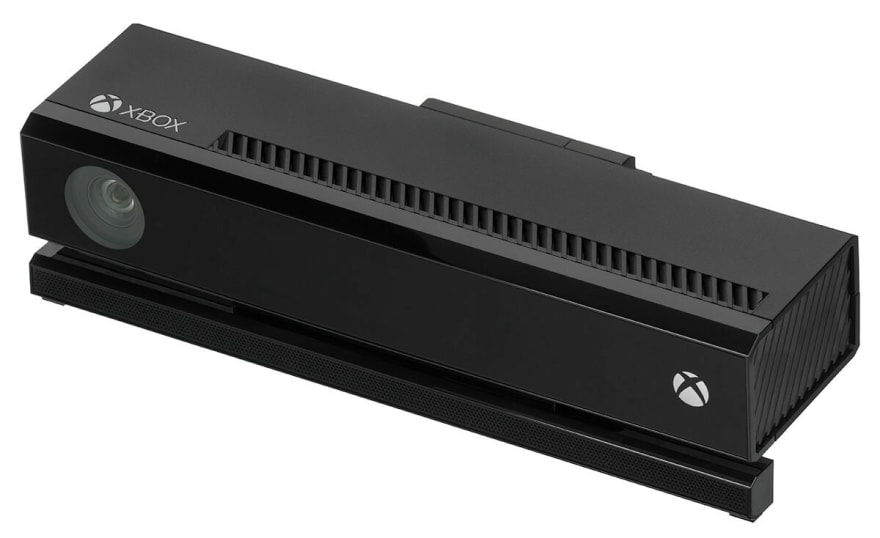
Remember the Microsoft Kinect? That bulky sensor bar which was once the world’s fastest-selling consumer electronics device and later famously had to be unbundled from the Xbox One package?
It didn’t get much love from game developers, but the Kinect was actually a pretty decent piece of hardware. Head tracking and body pose estimation worked very well, and it could even detect simple hand gestures like “pinch” and “fist”. At an affordable retail price of around 99 USD, it quickly became a favorite in hacker and maker communities.
Sadly we haven’t seen a real successor to the 2014 “Kinect 2” model which was discontinued in 2018. The 2019 “Kinect Azure” does not fill this gap for multiple reasons:
It is much more expensive. You can find a used Kinect 2 for around 50 USD while the Azure development kits currently sells for prices north of 1,000 USD.
The Kinect 2 is a self-contained device that works out of the box. The Azure requires an additional Nvidia GPU (RTX 2060 or better) to work. Good luck finding one these days.
Luckily, with all the recent advances in machine learning and computer vision, there are now some great alternatives for adding Kinect-like features to your project.
Introducing TensorFlow.js
Developed by the Google Brain Team, TensorFlow is a popular machine learning (ML) library for the Python programming language. TensorFlow.js (TFJS) is its companion library for JavaScript. Quoting the official website:
TensorFlow.js is a library for machine learning in JavaScript. Develop ML models in JavaScript, and use ML directly in the browser or in Node.js.
TensorFlow.js is not just an amazing piece of software, but it also gives you access to a growing library of machine learning models, ready to use with your project.
In this tutorial, I will show you how to use a TFJS based machine learning model to create a “Rock, Paper, Scissors” game with gesture controls. The final game will be running in your web browser, using just HTML and JavaScript.
Let’s make a game!
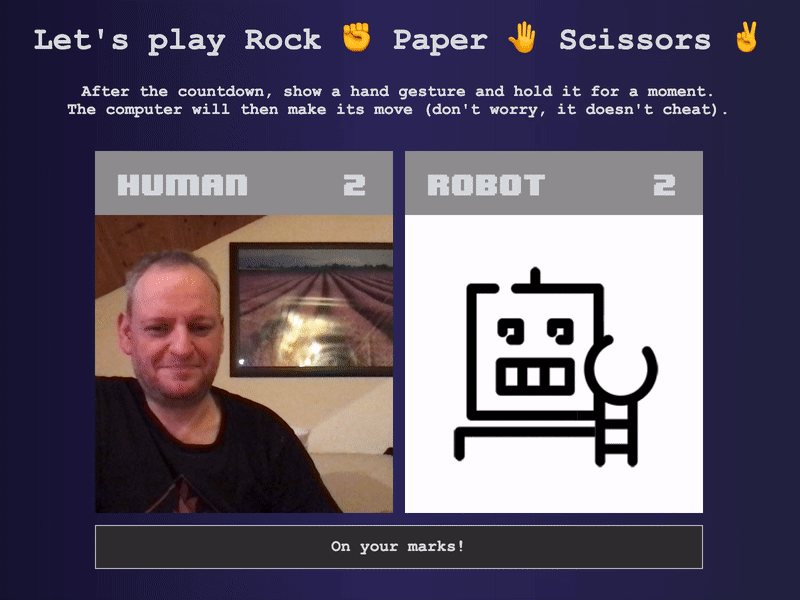
The focus of this tutorial is on the hand gesture recognition part, not so much on game development. So to speed things up, I have already prepared a simple game UI for you. 👇👇
Still, to get a better idea of the game we’re building, let’s create a simple game design document.
The game design document
When developing a game, usually the best way to start is to describe the gameplay by creating a game design document. There are many ways to do this, for example by drawing a story board.

For a simple game like “Rock, paper, scissors”, we will just verbally describe how the game should work:
- Game will load and show a “please wait” message during initialization
- Player and opponent are shown next to each other
- The first round of the game is started by the press of a key or button
- A new round starts with a countdown, asking the player to get ready
- Player should show a hand gesture (rock, paper or scissors)
- Once a valid gesture is registered, it is compared to the computer gesture (which is still hidden at this point)
- The result is evaluated according to the rules of “Rock, paper, scissors”
- Winner is awarded one point, score display gets updated
- Start next round (go to item #4)
With the UI out of the way, let’s get right to the good stuff.
Building a hand gesture recognizer
When building a Rock, Paper, Scissors game, the key challenge is to recognize the three hand gestures ✊🤚✌ inside a camera picture.
Before we look into the actual implementation of things, let’s first take a step back and think about how a high-level process to detect hand gestures would look like:
- We are trying to determine hand gestures from a camera picture. Therefore, the first step is to detect whether a hand is actually inside the camera picture.
- If a hand is detected, we estimate the position of all finger joints to trace the hand skeleton.

The hand skeleton detector returns 21 key points (also called “landmarks”): Four joints for each finger plus the wrist. This is our raw data which we will process further.
Working with the key points
The key points represent 2D coordinates, telling us the position of each skeleton point in the picture. This isn’t very useful to describe a hand gesture, as it is hard to compare two hand gestures based on the position of the joints. A hand can appear anywhere in the picture, it could be rotated, and people could be left- or right-handed.
Let’s try to find a better representation by describing a hand gesture using natural language:
Take the “Thumbs Up” gesture 👍 as an example: It can be described as “All four fingers fully curled and pointing to either the left or right. Thumb must not be curled and point upwards”.
Curl and pointing direction are a much more concise way of describing a hand gesture. They are independent of the size and position of the hand in the camera picture, also both can easily be deduced from the raw 2D coordinates.

This brings us to the next steps in our detection process:
- Using the key points, we describe the curl and pointing direction for each detected finger.
- Finally, we compare this description to a list of known hand gestures and check which one is the best match.
Great, we figured out how to detect hand gestures — At least in theory. Now let’s see how TensorFlow.js can help us to actually implement it:
Picking a suitable machine learning model
As I mentioned in the introduction, TensorFlow.js gives you access to a library of many useful machine learning models which you can immediately use within your own application.
One of the models is called "HandPose" offers “Hand pose detection”. The description reads:
A palm detector and a hand-skeleton finger tracking model. It predicts 21 3D hand key points per detected hand.
Sounds like this model can already cover steps (1) and (2) of our detection process and extract the raw data we need. Awesome! Let’s install it:
Install HandPose
First we need to install the model itself:
npm i --save @tensorflow-models/handpose
Next we install its TensorFlow.js dependencies:
npm i --save @tensorflow/tfjs-core
npm i --save @tensorflow/tfjs-converter
npm i --save @tensorflow/tfjs-backend-webgl
TensorFlow.js can use your computer’s GPU for additional performance. Almost any GPU (Nvidia, AMD, Intel) works as long as it supports WebGL. Yours most likely does, so make sure to install the WebGL backend to get a massive speed boost for free.
Processing the raw data
As I mentioned before, the raw data isn’t very useful for gesture detection. In order to work with the data, we need to transform it into “curl” and “pointing direction”. Luckily there is another library which will do just that:
andypotato
/
fingerpose
TFJS based finger pose classifier for hand landmarks detected by the MediaPipe Handpose model
(Hi 👋 I am also the author of the Fingerpose library)
Install the Fingerpose library with the following command:
npm i --save fingerpose
Define the gestures
Fingerpose expects you to define a hand gesture by describing direction and curl for each finger. Our game uses three distinct hand gestures, so we need to create one GestureDescription for each gesture.
Describe the rock gesture ✊:
The rock gesture is basically just you making a fist:
- You bend your fingers into your palm, curling them under until the tip of each finger touches its corresponding base.
- Then you bend the thumb down so that it falls across the top halves of the index and middle fingers.
This code describes a “rock” gesture as:
- All fingers fully curled
- Thumb must be half curled or not curled at all
In case you wonder about the second condition: It is physically impossible for you to fully curl your thumb (unless you are Houdini). Also, some people, when making a fist will place their thumb next to their index finger, effectively stretching it out. So we tell Fingerpose that both are acceptable and equally valid.
Next let’s look at the “paper” gesture 🖐:
No surprises here. To make a “paper” gesture, you have to stretch out all of your fingers and your thumb.
Lastly let’s have a look at “scissors” ✌️:
The “scissors” gesture closely resembles a “victory” sign. Index and middle fingers are stretched out. Ring and pinky should be half or fully curled. We don’t care about the thumb, so we just omit it.
In case you are wondering about the pointing direction of each finger: Unlike a “Thumbs up” gesture which has a completely different meaning when turned upside down, the gestures of our game do not change their meaning when mirrored or rotated. Therefore, the direction can be omitted to keep the descriptions simple.
Putting it all together
The implementation of the hand gesture recognizer consists of two parts:
- One-time Initialization of the model
- Process every video frame
Let’s see some code for the initialization process:
The code above will first create a Fingerpose GestureEstimator instance. Simply pass the list of known gestures to its constructor, and it is ready to be used.
Afterwards, the HandPose model will load and initialize. This may take some time as it will also download some files (the model weights) from the tfhub.dev website.
The last step is optional but will greatly improve the user experience. After you load the model, I recommend you “warm up” the model by making one single prediction on a sample image. This is because the first prediction can take quite a bit of time, while subsequent predictions will usually be much faster. If you make the first (slow) prediction part of the initialization process, it will not slow down your gameplay later.
Processing a video frame:
Again, let’s see some code first:
The code explained:
- We predict the 21 key points (landmarks) by calling the estimateHands function of the HandPose model, passing the HTML video element as the first argument. The second parameter indicates whether the source video is horizontally flipped.
- If key points were predicted, we pass them to Fingerpose together with a minimum required match score (0 to 10, 10 = perfect match). The match score tells Fingerpose to ignore possible matches with a lower score.
- Depending on your minimum match score, Fingerpose could return an array with multiple possible matches. This code will pick the gesture with the highest match score (confidence).
The return value of this method will be the name of the gesture with the highest match score, or an empty string in case no gesture was detected.
Increase the detection stability
When you run the code above on a source video, you will notice that the predictions are occasionally unstable. In some frames, HandPose will detect “phantom hands” (false positive) or no hands at all (false negative). This can have an impact on gameplay.
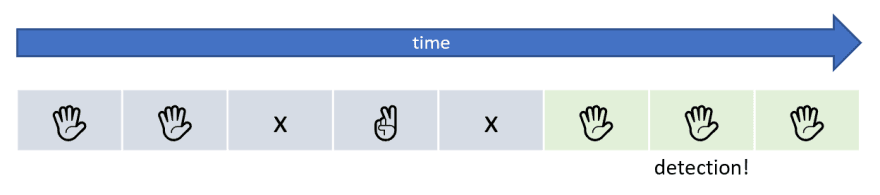
One simple solution is to create a low-pass filter by combining detections from several consecutive frames to a single result. For example, we could wait for three consecutive frames to be classified as “Rock” gesture before we emit the “Rock detected” event:
Prevent blocking the game UI
Running a machine learning model can be quite taxing on your CPU and GPU. While TensorFlow.js is incredibly fast (especially when running with the WebGL backend), it can still cause your game UI to become unresponsive. Especially when you run the model on each frame of a video stream.
Again, there is a simple workaround to prevent the UI from locking up. You can wrap the predictGesture function inside a setTimeout call with a timeout of zero seconds. Check out this thread on StackOverflow to learn more about this workaround.
Below is some example code how to create a non-blocking detection loop:
Wrapping it up
With the code above, we have implemented a fast and stable gesture detector. Check out the full source code to learn how to integrate it in the final game:
andypotato
/
rock-paper-scissors
Rock, Paper, Scissors game implemented with TensorFlow.js and FingerPose
This is the end of my tutorial. Feel free to use my source code as a base for your own game or application. If you have any comments, questions or suggestions please start a conversation in the comments.
Also check out my other tutorial on how to create a fun game using facial expression detection.
andypotato
/
do-not-laugh
A simple AI game based on Vue.js and Electron
Thank you very much for reading this tutorial! Leave me some love ❤️ if you liked it — And I’d love to see all the cool stuff you come up with! ️


Top comments (0)