Are you more automatic or manual?
Hi all 👋,
Continuing my contribution to the developer community as app maker, today I propose to discuss how to effectively automate tasks with NodeJS.
So... How many repetitive manual actions do you do each day? Probably a lot! 😐
And why...? Because automating your scattered actions is long and difficult. Don't have time to build and automate a complete process? Neither do I!
In fact, it's probably easier than you think. If writing automation is giving you a headache, it means you're probably not using the right tool.
An easy way is: Incremental Automation.
Write your process down in a note and start coding parts of your tasks. Thus, you can alternate between manual and automated actions.
I don't know about you, but personally I'm more comfortable learning by testing and prototyping. For me, the best way to achieve this was to use a Javascript playground using Markdown. That's why I recommend you give it a try to my app Znote to capitalize your work, otherwise no problem use your favorite IDE.
Choose a use case
Let's now see with a concrete example how to proceed to build a ready-to-use automation. The best way to do this is to start solving your own problems! So let me expose our first use case.
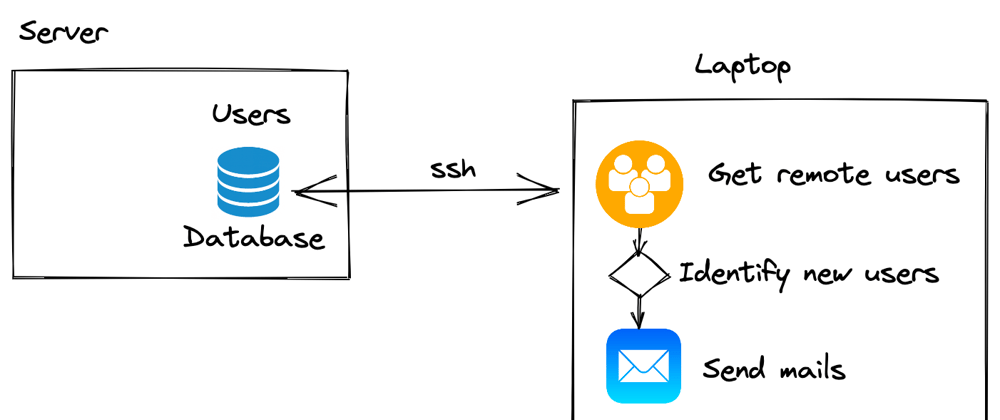
When I have new registered users, I had to regularly
- connect to my remote database with SSH,
- manually extract the users with an SQL query,
- copy the results locally and compare with the existing users.
- Once the new users were identified,
- I sent a welcome email to each new member to get their feedback.

Make an SQL query on a remote database
1 - Make an SQL query
async function getSQL(sqlQuery, host, port, user, password, database) {
 const { Sequelize } = require('sequelize');
 const sequelize = new Sequelize(user, password, database, {
    dialect: "mysql"/* one of 'mysql' | 'mariadb' | 'postgres' | 'mssql' */,
    host: host,
    port: port
 });

 sequelize.authenticate();
 const [results, metadata] = await sequelize.query(sqlQuery);

 sequelize.close()
 return results;
}
2 - Make an SQL query with SSH
async function getRemoteSQL(sqlQuery) {
  const { spawn } = require('child_process');

  // connect to server (don't forget to copy your ssh-key on the remote server)
  const ssh = spawn('ssh', [
   '-L', '3307:localhost:3306',
   'user@XXX.ovh.net',
  ]);
  await sleep(4000); // wait connection
  // make SQL query (replace with your credentials)
  const data = await getSQL(sqlQuery, "localhost", 3307, "USER", "PASSWORD", "DATABASE");
  // quit
  ssh.kill();
  return data;
}
You can now just do anywhere in my notes an SQL query against your remote database
const users = await getRemoteSQL("select purchase_email from license;");
printJSON(users)
Identify new users
Then, we want to identify all new users since the query was last run.
function getNewUsers(incomingData, filename, key) {
  const fs = require('fs');
  let refData = [];
  try {
    refData = JSON.parse(fs.readFileSync(filename, 'utf8'))
      .map(element => key(element));
  } catch (err){}

  const delta = [];
   incomingData.forEach(obj => {
    if (refData.indexOf(key(obj))===-1) {
      delta.push(obj);
    }
  });
  printJSON(delta);
  return delta;
}
Send mail
Finally, we can send a mail to each new user. With Google, you need to generate a dedicated credential: https://support.google.com/accounts/answer/185833
function sendMail(recipients) {
const nodemailer = require('nodemailer');
const transporter = nodemailer.createTransport({
service: 'gmail',
auth: {
user: 'XX@gmail.com', // your gmail
pass: 'XXX', // app credential here
},
});
const result = await transporter.sendMail({
from: '"Anthony" <XX@gmail.com>', // sender address
to: recipients, // list of receivers (,)
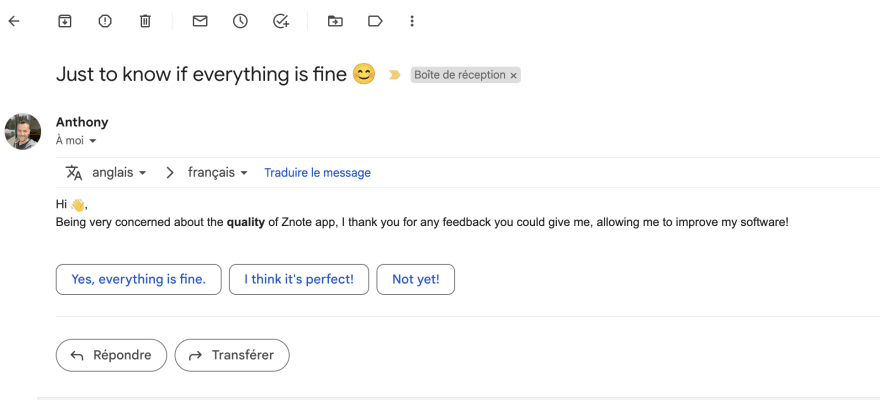
subject: "Just to know if everything is fine 😊", // Subject line
text: "Hi 👋, Being very concerned about the quality of Znote app, I thank you for any feedback you could give me, allowing me to improve my software!", // plain text body
html: "Being very concerned about the <b>quality</b> of Znote app, I thank you for any feedback you could give me, allowing me to improve my software!", // html body
});
printJSON(result);
}
Plug everything in 🔌
It remains to describe our process by calling the different functions.
// get all users in remote database
const allUsers = await getRemoteSQL("select purchase_email from license;");
// show new users since last execution time
const newUsers = getNewUsers(allUsers, '/Users/alagrede/Desktop/users.json', it => it.purchase_email);
// write all users in file
fs.writeFileSync('/Users/alagrede/Desktop/users.json', JSON.stringify(allUsers));
// send mail
sendMail(newUsers.map(e=>e.purchase_email));
Tada!!
To summarize
You now have a bunch of reusable functions and an automated process. Since functions can be reused on other notes, you can capitalize on your existing work and continue to create additional processes. Then export your script, ready to run it in a cron.
👉 I hope this example will inspire you! Did you find this article useful? If so, I have plenty of other examples to share with you.
Go further
I will continue to add some examples when you need them.
Meanwhile, start turning your daily tasks into something easy and repeatable and your job will be more fun. 🌈️
You can check my blog 👉 here
If you want try Znote, it's 👉 here (I will be happy to take any comments)


Top comments (11)
Brilliant, Anthony! Very clever!
Thank you 🙏
Great write up! And Zcode looks pretty cool, looking forward to checking it out!
Thank you Andrew 😊
How to encrypt mail & password?
Hi,
I don't know if I'm answering your question correctly but you can do something like declare a json file containing your credentials:
google.jsonThen use it:
You can also export your variable like this:
export GOOGLE_MAIL="XXX@gmail.com"Then in your node script:
I hope this will help you 😊
I've seen in smtpjs.com where you can encrypt your data by providing host name, email address and password, & port number. It gives secure token, but still here it's json file that might be accessible, isn't it?
As long as the code is running on your server with NodeJS, the JSON file is not accessible. My comment is just about how to avoid to commit your credentials in Github as @darthwalsh pointed out.
Ohh nice
Can we send mail if two step verification is enabled for our mail?
Google app passwords are meant to be used in automation, bypassing 2FA. Make sure not to upload them to GitHub!