In this article we will learn how to connect GCP's code versioning service (Cloud Source Repositories) to Cloud Build to automate building Docker images and pushing them to GCP Container Registry.
Cloud and containers have truly revolutionized deployment and management of web infrastructure. Ability to build docker images triggered by a push or a pull request allows developers focus more on code and less on infrastructure.
The process of setting up this pipeline will follow these steps:
- Create a repository in Cloud Source Repositories
- Push source code files to our repo
- Create a trigger in Cloud Build service
- Set trigger to build a Docker image when there is a new commit to the specified branch
1. Creating a repository in Cloud Source Repositories
Navigate to Cloud Source Repositories using sidebar or a search bar at the top.
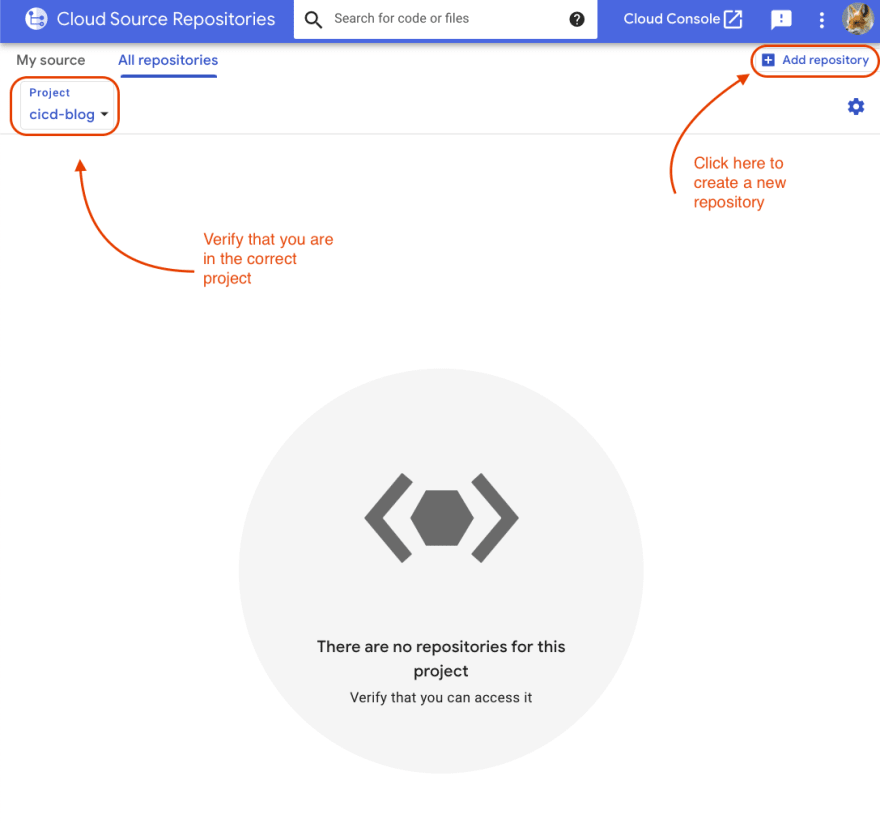
Verify that you are creating your repository in the correct project and then click Add repository button in the top right corner:
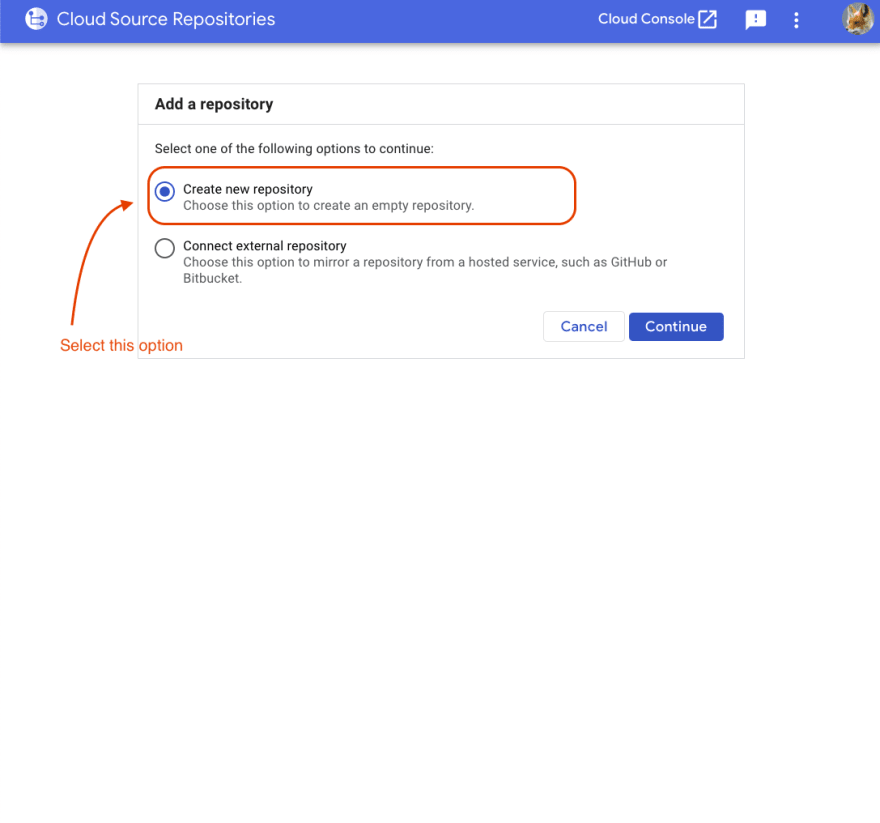
Since we will be using GCP's version control we need to select Create new repository option and click Continue:
Next we will need to enter the name of our repo and select the project. Click Create button after you are done:

For the final step we will clone our newly created repository to our local machine using the instructions provided:

You can upload your code to the repo using either SSH (1st option) or using gcloud CLI. I will let reader decide which option to use.
2. Source files
For this project we will have 2 sources files:
Dockerfile:
FROM python:3.7-slim
RUN pip install flask
WORKDIR /myapp
COPY main.py /myapp/main.py
CMD ["python", "/myapp/main.py"]
main.py:
from flask import Flask

app = Flask(__name__)


@app.route('/')
def index():
    return 'CI/CD pipeline with GCP Cloud Source Repositories and Docker'


if __name__ == '__main__':
    app.run(host='0.0.0.0', port=8080)
Following the instructions push these files to the repo and verify that they are uploaded:

3. Creating a Cloud Build trigger
If you are using Cloud Build for the first time you will be asked to enable the API first. Click Enable to activate this API. It might take a minute, it is normal.
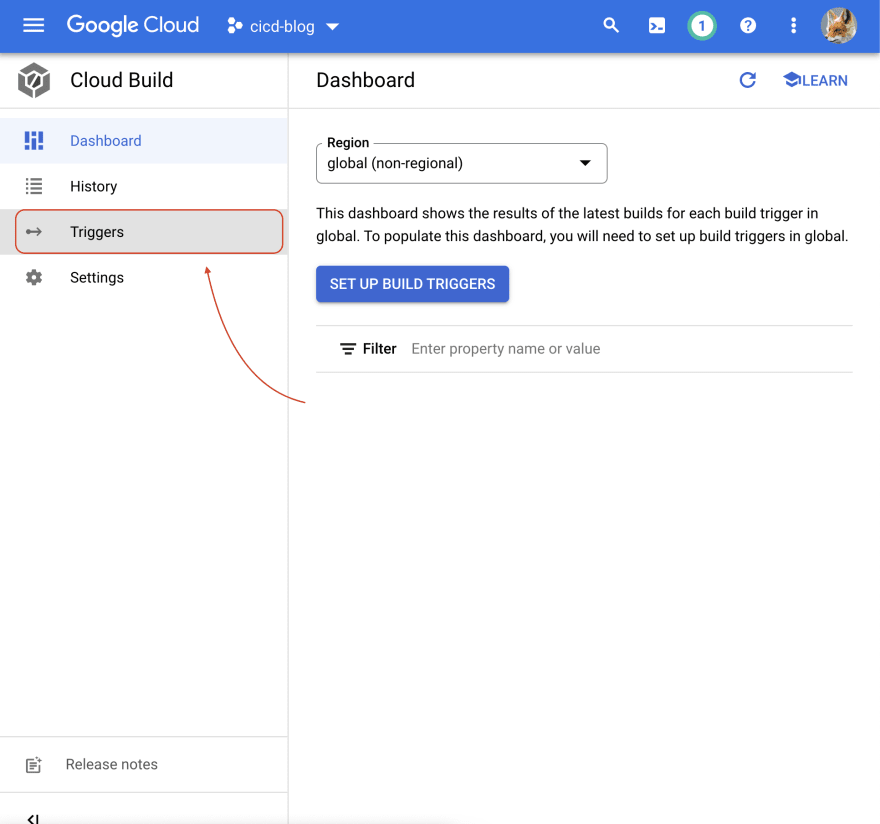
Click on Triggers in the sidebar:
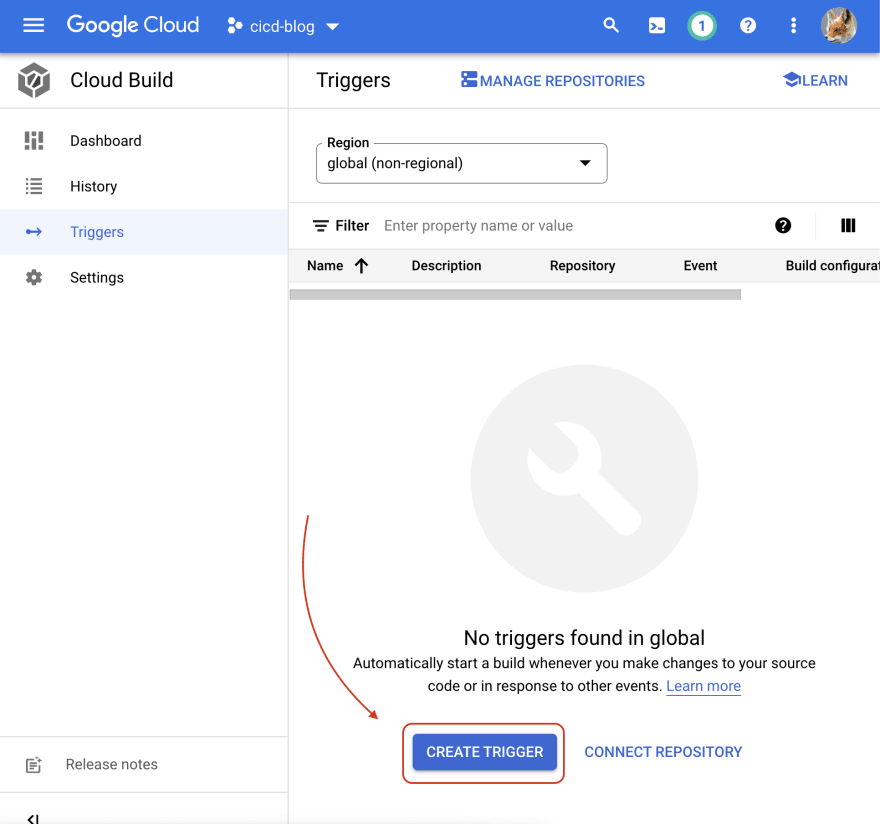
To create a new trigger click on the Create new trigger button at the bottom of the page:
On the trigger creation page we will need to pay attention to 4 important parts:
- Trigger name
- Event that will trigger the action (I left it as default
Push to a branch) - Source repository (click on the dropdown and select your repo and the branch that this trigger will monitor)
- Configuration type (select
Dockerfile)
After you are done click Create to finish setting up the trigger.
To test our trigger we will first invoke it manually by clicking RUN button:
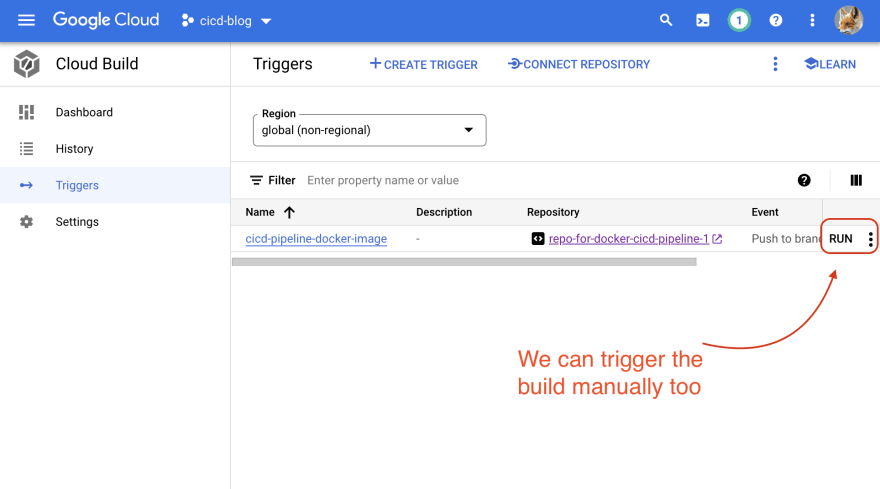
A popup will appear asking for confirmation. Click Run trigger:

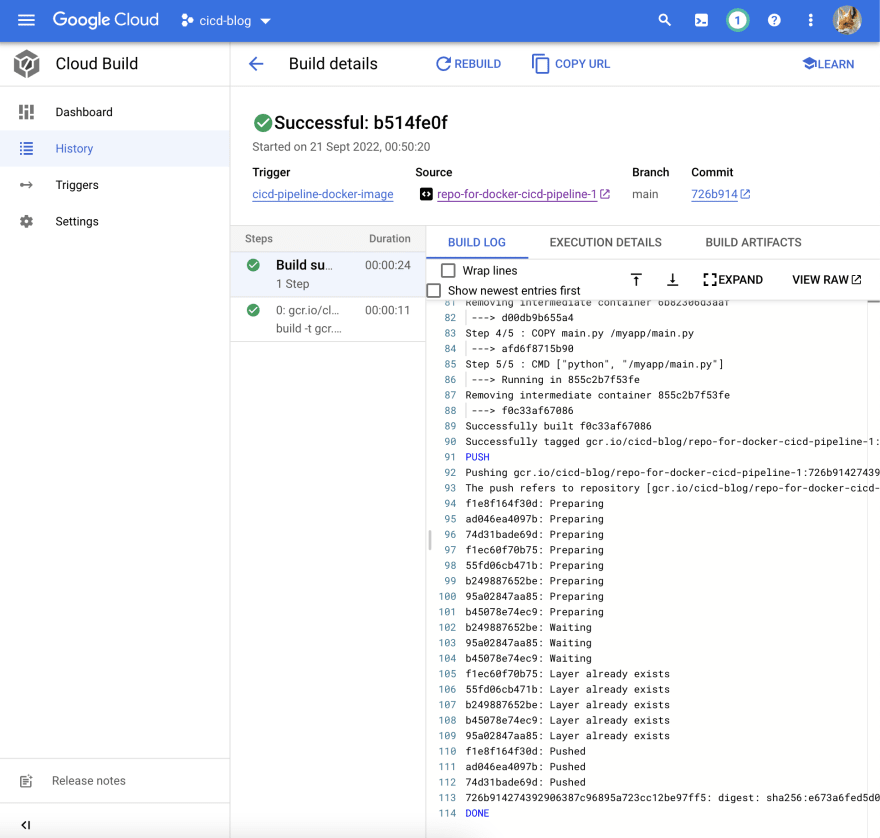
If we click the History option in the sidebar on the left we can see the build history:

My build has succeeded:
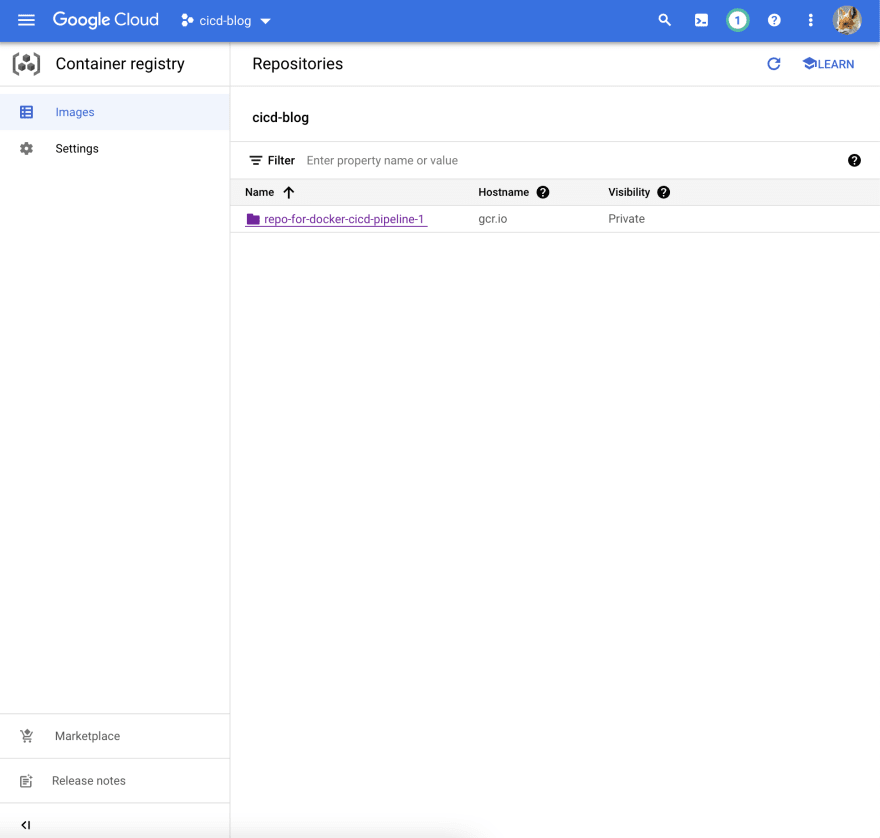
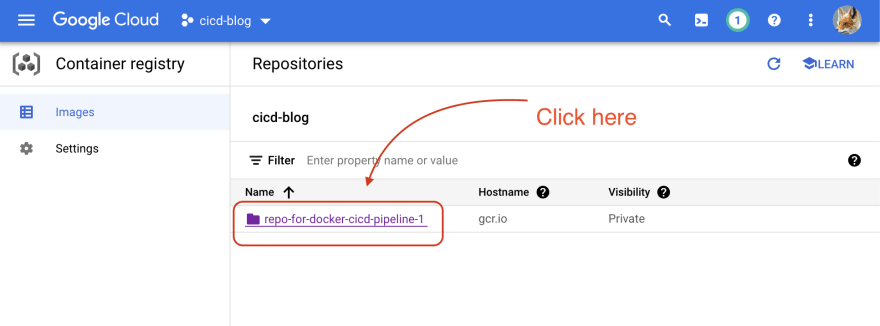
4. Verifying that Dockerimage is built automatically
GCP has a service for storing container image called Container Registry.
Navigate to Contianer Registry and you should see your image there:
And finally, lets do a test with a test push. Let's modify our main.py file and push changes to the repository. I modified the text a little and added v2.0:
from flask import Flask

app = Flask(__name__)


@app.route('/')
def index():
    return 'CI/CD pipeline with GCP Cloud Source Repositories and Docker v2.0'


if __name__ == '__main__':
    app.run(host='0.0.0.0', port=8080)
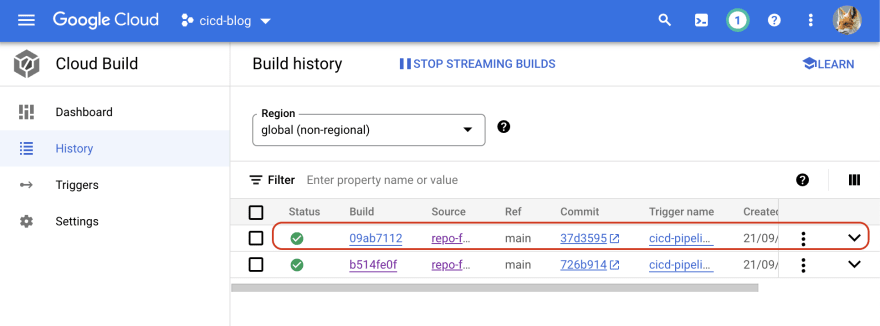
Commit and push new changes to the repo. It should run the trigger automatically. You should see a running process in the History tab (mine completed really fast):
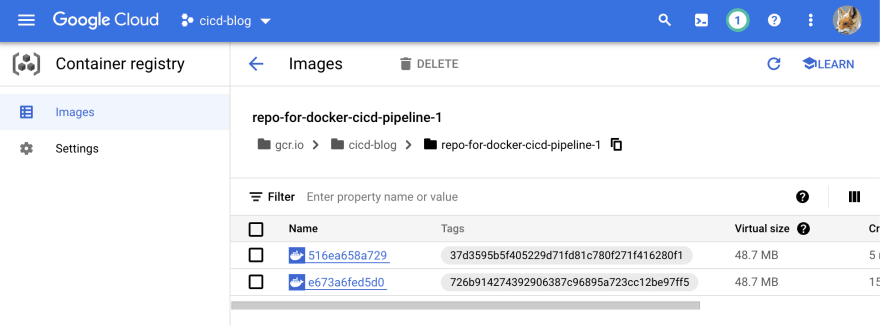
Let's go to the container registry and verify that the new image there:
There will be two images, one from running the trigger manually and the second one from pushing code to the tracked branch.
And yes, as we can see the new image is there!
That's it. You have created a CI/CD pipeline that builds a Docker image when new code is committed to the tracked branch!


Latest comments (0)