A complete IOT stack running on a Raspberry Pi is an effective way to integrated different sensors for home automation. In the last articles, we learned how to manually add a temperature/humidity sensor to the home network. By using PlatformIO, we manually flash the sensor, then choose available library for interacting with a sensor, and adding additional libraries to communicate with MQTT and send correctly transformed JSON data. We have complete control over all these steps, and can configure every single character that the sensor outputs. In addition to this manual way, there are great frameworks to flash and install utility programs to sensors, and also great platforms that access several sensors and show the measurements graphically as well as giving you direct interaction with these sensors.
In this article, you will learn how to leverage the ESPHome framework for configuring, installation and management of ESP8266 boards and attached sensors. Specifically, we will connect an ESP32-Camera board with a built-in camera, and then access this board via the ESPHome Dashboard.
The technical context of this article is Raspberry Pi OS 2021-05-07 and ESPHome v2021.9.1. All instructions should work with newer OS and library versions as well.
This article originally appeared at my blog admantium.com.
ESPHome Essentials
ESPHome is a framework that simplifies configuration, installation and management of ESP8266 or ESP32 boards and their sensors. Out of the box it supports sensors for air quality, energy, movement, distance and much more. Sensors are configured with declarative YAML files. Here, you specify sensor specifics, such as model and GPIO configurations, and sensor features, which functions you want to use and which data you want to access. With this configuration, ESPHome compiles a board specific, custom code that automatically includes all required libraries. The very first time a board is configured, it should be connected directly to the computer running ESPHome. Then, all later configuration changes and updates can be done wirelessly with over-the-air updates.
You also get a dashboard that shows you the status of each node, and you can edit all configurations for all sensors too.
Docker Compose Configuration and Startup
Add the following code to your docker-compose.yml file:
esphome:
  container_name: esphome
  image: esphome/esphome:2021.9.1
  volumes:
  - ./volumes/esphome/config:/config
  devices:
  - /dev/ttyUSB0:/dev/ttyUSB0
  ports:
  - "6052:6052"
  privileged: true
  networks:
  - iotstack_nw
This file makes following choices and assumptions about the ESPHome container:
- Version pinning: Set the image version to the most current, stable version available (here
esphome:2021.9.1) - Volumes: Mount a volume so that all configuration files will be stored on the computer running the container as well, for which you can make backups easily
- Devices: As explained you need to flash the ESP8266/ESP32 home for the very first time via a physical connection. I'm using a FTL USB adapter for this purpose, which is has the device file
/dev/ttyUSB0on the Raspberry Pi - Privileged: This container has privileged access rights to the host for ensuring that it can access connected devices. Once you flashed all boards, try to remove this setting and restart the container.
With this configuration in place, you can then start the container by running docker-compose up -d esphome. The dashboard is available on port 6052.
Basic Board/Sensor Configuration
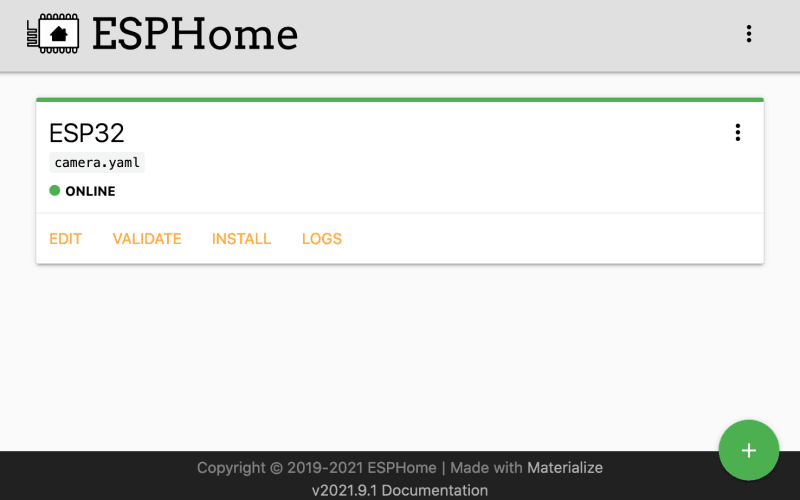
In the dashboard, click on the green plus button, and the configuration dialogue opens.
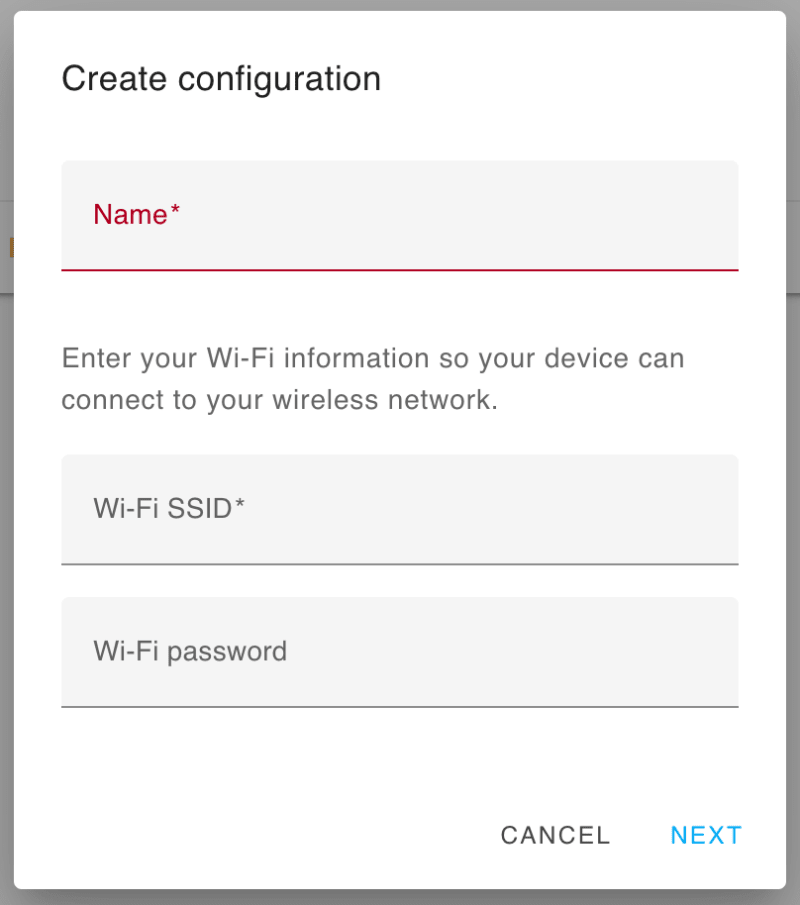
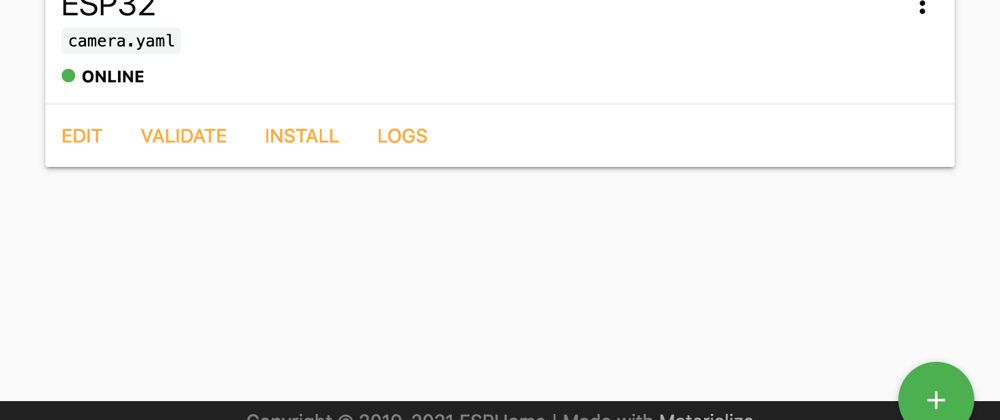
Enter the name of the sensor, the details of the WIFI connection it should use, and click on 'Next'. Here, select the board type, and continue. Now you see the new node in the dashboard. Access its configuration via EDIT. It should look as shown:
esphome:
  name: esp8266-test
  platform: ESP32
  board: esp32dev

# Enable logging
logger:

# Enable Home Assistant API
api:

ota:
  password: "57251b5351294c8728c61e2f04d1109b"

wifi:
  ssid: "TEST"
  password: "TEST"

captive_portal:
This basic configuration includes the provided information about the nodes name, its platform, and the WIFI access. The additional sections ap and captive_portal can be removed. The points api and ota will become necessary when we want to access ESPHome managed devices with other applications or for applying over-the-air updates.
Now, let’s continue with adding the ESP32-Cam board.
Configuring an ESP32-Cam Board
The ESP32-Cam board comes as different versions with different pin layouts. It’s essential to lookup these details on the manufacturer’s homepage and/or manuals. My particular board is an ESP32-Cam AI-Thinker. Combining the ESP32-Cam configuration stanza,applying the specific pin layout, and adding additional configuration options leads me to this configuration:
# ESP32-CAM
esp32_camera:
  external_clock:
    pin: GPIO0
    frequency: 20MHz
  i2c_pins:
    sda: GPIO26
    scl: GPIO27
  data_pins: [GPIO5, GPIO18, GPIO19, GPIO21, GPIO36, GPIO39, GPIO34, GPIO35]
  vsync_pin: GPIO25
  href_pin: GPIO23
  pixel_clock_pin: GPIO22
  power_down_pin: GPIO32
  resolution: 1024x768
  idle_framerate: 0.05 fps
  max_framerate: 5 fps
  vertical_flip: false
  horizontal_mirror: false
  name: esp32camera
Interesting points about this configuration are:
- Resolution: The ESP32-Cam supports 160x120 up to 1600x1200 pixel resolutions, which heavily influences the ...
- Framerate: When idle, the camera records a single picture once very 12 seconds. When used, the
max_frameratesetting is applied. Do not expect more than 5FPS for a medium resolution though, the board is just not powerful enough to deliver a better rate. - Horizontal and vertical flip: These options modify the shown image, use it to adjust to the way where and how you place the board
Confirm that this configuration works by pressing Validate, and then hit Install. You should see the following output:
HARDWARE: ESP32 240MHz, 320KB RAM, 4MB Flash
PACKAGES:
 - framework-arduinoespressif32 3.10006.210326 (1.0.6)
 - tool-esptoolpy 1.30000.201119 (3.0.0)
 - tool-mkspiffs 2.230.0 (2.30)
 - toolchain-xtensa32 2.50200.97 (5.2.0)
Library Manager: Installing Hash
Library Manager: Already installed, built-in library
Dependency Graph
|-- <AsyncTCP-esphome> 1.2.2
|-- <FS> 1.0
|-- <ESPAsyncWebServer-esphome> 1.3.0
|   |-- <AsyncTCP-esphome> 1.2.2
|   |-- <Crypto> 0.2.0
|   |-- <FS> 1.0
|   |-- <WiFi> 1.0
|-- <ESPmDNS> 1.0
|   |-- <WiFi> 1.0
|-- <noise-c> 0.1.1
|-- <DNSServer> 1.1.0
|   |-- <WiFi> 1.0
|-- <Update> 1.0
|-- <WiFi> 1.0
Retrieving maximum program size .pioenvs/terrace_camera/firmware.elf
Checking size .pioenvs/terrace_camera/firmware.elf
RAM:   [=         ]  12.8% (used 41792 bytes from 327680 bytes)
Flash: [=====     ]  52.5% (used 963438 bytes from 1835008 bytes)
Configuring upload protocol...
AVAILABLE: esp-prog, espota, esptool, iot-bus-jtag, jlink, minimodule, olimex-arm-usb-ocd, olimex-arm-usb-ocd-h, olimex-arm-usb-tiny-h, olimex-jtag-tiny, tumpa
CURRENT: upload_protocol = esptool
Looking for upload port...
Use manually specified: /dev/ttyUSB0
Uploading .pioenvs/terrace_camera/firmware.bin
Serial port /dev/ttyUSB0
Connecting....
Chip is ESP32-D0WDQ6 (revision 1)
Features: WiFi, BT, Dual Core, 240MHz, VRef calibration in efuse, Coding Scheme None
Crystal is 40MHz
MAC: 9c:9c:1f:ca:59:20
Uploading stub...
Running stub...
Stub running...
Configuring flash size...
Auto-detected Flash size: 4MB
Compressed 17104 bytes to 11191...
Writing at 0x00001000... (100 %)
Wrote 17104 bytes (11191 compressed) at 0x00001000 in 1.0 seconds (effective 137.1 kbit/s)...
Hash of data verified.
Compressed 3072 bytes to 144...
Writing at 0x00008000... (100 %)
Wrote 3072 bytes (144 compressed) at 0x00008000 in 0.0 seconds (effective 1329.8 kbit/s)...
Hash of data verified.
Compressed 8192 bytes to 47...
Writing at 0x0000e000... (100 %)
Wrote 8192 bytes (47 compressed) at 0x0000e000 in 0.0 seconds (effective 6672.4 kbit/s)...
Hash of data verified.
Compressed 963552 bytes to 533955...
Writing at 0x00010000... (3 %)
Writing at 0x00014000... (6 %)
Writing at 0x00018000... (9 %)
Writing at 0x0001c000... (12 %)
...
Writing at 0x0002c000... (100 %)
Wrote  963438 bytes (812793 compressed) at 0x00000000 in 26.4 seconds...
Hash of data verified.
If you follow these logs, you can see that several core libraries from ESPHome are used, and additional libraries for the selected board. Interestingly, behind the scenes, the versatile tool PlatformIO is involved (which was covered for manual installation of ESP boards in my previous article).
Checking Camera Connectivity
Let’s check that the camera is working correctly by clicking on Logs in the Dashboard.
INFO Reading configuration /config/camera.yaml...
INFO Starting log output from /dev/ttyUSB0 with baud rate 115200
[13:20:32][D][esp32_camera:156]: Got Image: len=10882
[13:20:42][D][esp32_camera:156]: Got Image: len=10575
Yes, the camera captures images correctly!
Over-The-Air Updates
Now, let’s try the over-the-air updates. Click on Install, select Wirelessly, and a new window shows the update process.

You should see something as this:
Updating /config/tower.yaml
------------------------------------------------------------

INFO Running:  esphome --dashboard run /config/tower.yaml --no-logs --device OTA
INFO Reading configuration /config/tower.yaml...
INFO Generating C++ source...
INFO Compiling app...
INFO Running:  platformio run -d /config/terra
Processing terra (board: esp32dev; framework: arduino; platform: platformio/espressif32@3.2.0)
--------------------------------------------------------------------------------
HARDWARE: ESP32 240MHz, 320KB RAM, 4MB Flash
PACKAGES:
 - framework-arduinoespressif32 3.10006.210326 (1.0.6)
 - tool-esptoolpy 1.30000.201119 (3.0.0)
 - toolchain-xtensa32 2.50200.97 (5.2.0)
Library Manager: Installing Hash
Library Manager: Already installed, built-in library
Dependency Graph
|-- <ESPmDNS> 1.0
|   |-- <WiFi> 1.0
|-- <noise-c> 0.1.1
|-- <Update> 1.0
|-- <WiFi> 1.0
Retrieving maximum program size .pioenvs/terra/firmware.elf
Checking size .pioenvs/terra/firmware.elf
RAM:   [=         ]  14.0% (used 45764 bytes from 327680 bytes)
Flash: [=====     ]  54.4% (used 998702 bytes from 1835008 bytes)
========================= [SUCCESS] Took 8.38 seconds =========================
INFO Successfully compiled program.
INFO Connecting to 192.168.3.212
INFO Uploading /config/terra/.pioenvs/terra/firmware.bin (998816 bytes)
Uploading: [============================================================] 100% Done...


INFO Waiting for result...
INFO OTA successful
INFO Successfully uploaded program.
=============== [SUCCESS] /config/tower.yaml ===============


======================== [SUMMARY] ========================
  - /config/tower.yaml: SUCCESS
This also works. Therefore, we have our very first ESP32 board and camera sensor completely installed and fully manageable by ESPHome.
Troubleshooting: Dashboard shows 'Node is offline'
If your sensor appears offline in the dashboard, but its working because e.g. you can access its logs, follow these steps.

- Add a new environment variable to the ESPHome container. In the
docker-compose.ymlfile, add this:
  services:
    esphome:
      ...
      environment:
      - ESPHOME_DASHBOARD_USE_PING=true
- Configure your router to assign a static IP address to the ESP8266/ESP32 node, and add this network configuration to the
configuration.ymlin ESPHome.
  wifi:
    ...
    manual_ip:
      static_ip: 192.168.3.212
      gateway: 192.168.2.1
      subnet: 255.255.254.0
Conclusion
This article showed how to setup ESPHome, a framework for automatically flashing, configuring and updating ESP8266/ESP32 boards and their connected sensors. We learned how to add a new Docker container to our stack and apply the necessary configuration. Then, we opened the ESPHome dashboard and added a first node. Nodes are configured with declarative YAML files, they detail the board specifics and activate board/sensor features. Continuing with applying the necessary configuration for an ESP32-Cam board, we flashed the sensor initially. From here on, we can view its logfiles and perform all future configuration changes or updated wirelessly. Overall, ESPHome is an amazing experience that simplifies working with multiple ESP boards and sensors tremendously.


Oldest comments (0)