
Forms provide a rich way of interacting with users. However, the form handling process is complex. Forms accept user input which poses a major security threat. I like to think of it as an unlocked door. You definitely need some security measures. The rule of the thumb is to never trust a user input or worse malicious attackers taking advantage of unsuspecting users. Caution is required to ensure that the user's data is sanitized and field validation is taken into consideration.
From Class
Django has an inbuilt form Class that allows you to easily create forms. You define the fields of your form, specify the layout, display widgets labels, specify how they have to validate user input and the messages associated with invalid fields. It also provides methods for rendering itself in templates using predefined formats such as tables, list or paragraphs.
In this tutorial, we will focus on creating, processing forms and rendering to the template. The task is to create a form that enables users to subscribe to the newsletter app and then send the new subscribers a welcome email.
Creating Newsletter App
In Django, apps are small components used to build projects For an app to be active, add it to the list of settings.INSTALLED_APPS. .Apps perform a specific function and can be reused in various projects.
Since we are creating a newsletter, we will name it a newsletter. Make sure you are in the same directory as manage.py and type:
python manage.py startapp newsletter
When Django creates the newsletter app, it also creates some files and the structure look like this:
 newsletter/
        __init__.py
        admin.py
        apps.py
        migrations/
            __init__.py
        models.py
        tests.py
       views.py
In order to use the app, we must activate it by adding it to settings.INSTALLED_APPS
INSTALLED_APPS = [
        ...
        'newsletter',
    ]
Now our app is installed and activated, let make it do something!
Creating Models
Next, we going to create our model in models.py. For each model defined Django will create a table for it in the database. Let's define our model and name it NewsUsers and give it 3 fields name, email and date_added
write the following code in your newsletter/models.py
from django.db import models
class NewsUsers(models.Model):
    name = models.CharField(max_length = 30)
    email = models.EmailField()
    date_added = models.DateField(auto_now_add=True)
        def __str__(self):
            return self.email
- import the
models. - Next,I have defined 3 fields:
name,emailand thedate_added
The
__str__()method simply tell python to display a human-readable representation of the model
Make and Run Migrations.
python manage.py makemigrations newsletter
python manage.py migrate
Anytime you make changes to the models remember to run migrations
Adding Models to Admin Site
We will create a simple admin site to manage the newsletters users
from django.contrib import admin
from .models import NewsUsers
class NewsletterAdmin(admin.ModelAdmin):
    list_display =('email','date_added',)
admin.site.register(NewsUsers, NewsletterAdmin)
Create a Superuser and runserver
To Interact with the admin site, we must create a user with admin privileges
python manage.py createsuperuser
Then input the credentials. Below is a snippet
Username: laughing-blog
Email address: "email Adress"
Password:
Password (again):
Run the server and navigate to http://127.0.0.1:8000/admin on the browser.Log in using superuser credentials you created above.
python manage.py runserver
If you are successful then you will see an interface similar to this:
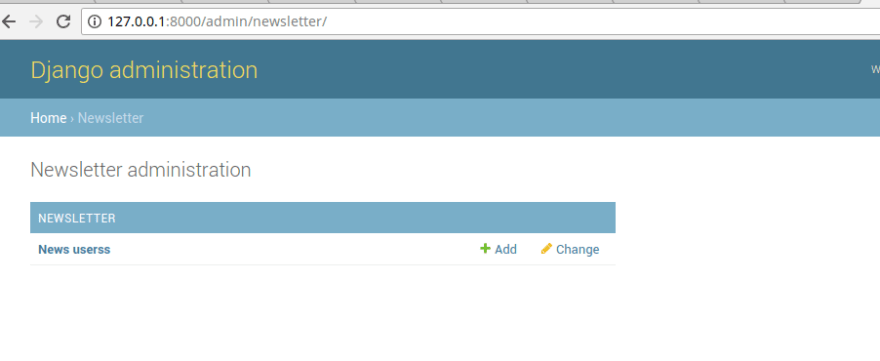
Note: Django is 'smart' and naturally pluralizes the model In admin
We have NewsUserss and that is not cool! To avoid such a scenario, define meta class in models and set the verbose _name=' singular' and verbose_name_plural.
Your models should look like this
from django.db import models
class NewsUsers(models.Model):
    name = models.CharField(max_length = 30)
    email = models.EmailField()
    date_added = models.DateField(auto_now_add=True)

    class Meta:
        verbose_name = "NewsUser"
        verbose_name_plural = "NewsUsers"
        def __str__(self):
            return self.email
always run migrations after modifying the models
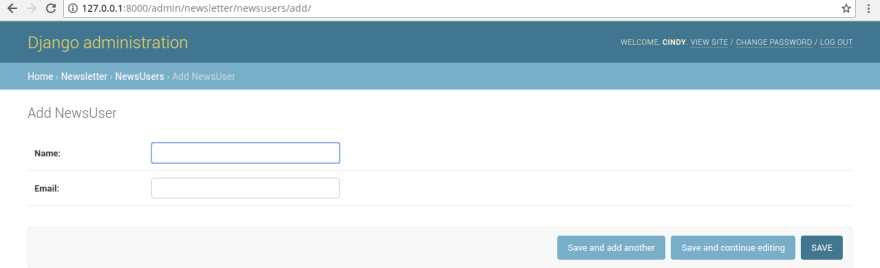
After applying migrations, run the server again and navigate to the admin interface and the extra s should be gone and if you click to add the user, you should be able to add users in the newsletter list
Creating the Newsletter Form
Django has two base classes. The form class and modelForm for creating forms. With the form you get to create standard forms and the ModelForm allows you to build forms from the model's fields.
Depending on your needs you can choose either of the two methods. The standard forms are best in scenarios where the forms do not interact with the database directly.
- Forms: Allows you to build Standard Forms
- ModelForm: Allows you to build forms from a model by defining fields using the
Meta class
In our case, we will create a form using the ModelForm
Create a new file called forms.py in newsletter app.
it's a general practice to create Django forms in a file called
forms.py
Let's go ahead and declare the form. To create our ModelForm, import the form class and the model class
from django import forms
from .models import NewsUsers
class NewsUserForm(forms.ModelForm):
    class Meta:
        model = NewsUsers
        fields = ['name', 'email']
- Import the forms library
- derive from the ModelForm class
- declare the Fields we need in the meta section
Handling Django forms in views
It's time for the heavy lifting
from django.shortcuts import render
from .forms import NewsUserForm
from . models import NewsUsers
def newsletter_subscribe(request):
  if request.method == 'POST':
    form = NewsUserForm(request.POST)
    if form.is_valid():
      instance = form.save()
      print('your email is already added to our database')
  else:
    form = NewsUserForm()
  context = {'form':form}
  template = "newsletter/subscribe.html"
  return render(request, template, context)
huh! what is all that?
First things first, let us deal with the importations. Import NewsUserForm from form.py and NewsUsers from models.
The first step in handling forms in Django is to display an empty form to the user. When our view is initially loaded with a GET request, we create a new form instance that will be used to display the empty form in the template.
form = NewsUserForm()
A form may be blank in the case where you creating a new record or may be pre-populated with initial values. At this stage, the form is unbound because it is not associated with any user input although it may have initial values. At this point, the form is
unbound
The second step is to check if the user has filled the form and submit it via POST. So, If it is a POST request, we create a new form instance and populate it with data from the request. This process is called binding and the form is said to be bound
if request.method == 'POST':
    form = NewsUserForm(request.POST)
binding allows us to validate data. I mean it's meaningless validating a form with no data right?
Next, Check for form validation and clean the data. The method is_valid(), is used to check if the form is valid. Form validation means the data accepted is as specified when defining the fields. In our case, the name fieldaccepts up to a maximum of 30 characters only, theemail` field must be a valid email and so on. This method will return true if the fields contain valid data or false if invalid throwing errors.
If the form is valid, we clean the data. This means performing sanitization of the input i.e removing invalid characters that might be used to send malicious content to the server.
If we have a valid form as in our case, we process the form. To save the data we call save() method.
"save()method"
It is worth mentioning that onlymodelFormshave this method and notform
Creating newsletter/urls.py
Okay, our data is saved in the database. We now want to create the url that will display the form we just created.
Create a new file in newsletter app and name it urls.py then place the code below:
python

from django.urls import path

from .views import newsletter_subscribe

app_name = 'newsletter'

urlpatterns = [

path('subscribe', newsletter_subscribe, name='subscribe'),

]
In the main urls.py include the uurl confi from the newsletter app
Main urls.py
python

from django.contrib import admin

from django.urls import path,include

urlpatterns = [

path('admin/', admin.site.urls),

path('newsletter/',include('newsletter.urls' , namespace='newsletter')),

]
To check if the form is being displayed, run the server using the command down below
bash

python manage.py runserver
When you navigate to http://127.0.0.1:8000/newsletter on the browser, it will return an error that the template does not exist.
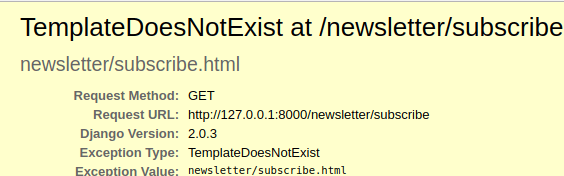
Do not panic just yet, we just need to create the template subscribe.html
Rendering the Form in Templates
Create a templates directory in newsletter app called templates and inside it create another directory called newsletter which will hold the file subscribe.html file. The structure should look like this:
python

newsletter

 templates

 newsletter

   subscribe.html
subscribe.html
python

    {% extends "base.html" %}

    {% block content %}

    <form action="{% url 'newsletter:subscribe' %}" method="post">

    {% csrf_token %}

    {{ form.as_p }}

    <button type="submit">Submit</button>

    </form>

    {% endblock %}
you must include cross-site request forgery {% csrf_token %} tag for POST requests
Run the Server again and navigate to http://127.0.0.1:8000/newsletter/subscribe
$ python manage.py runserver
you should see the form below:

Fill in your name and email and when you hit submit, it saves
check the admin interface and you should see the user you just added.
Recap
So far we have created
- Newsletter App
- Creating Models
- Adding Models to admin site
- Creating forms from models
- Writing views
- Creating urls
- Creating Superuser
newsletter/views.py
The above view will work just fine, but some custom validation on the email field is required to ensure that the same email is not used more than once!
try using the same email more than once and it will save
We do not want that to happen right? so let's add some queries to filter the email. If the email already exists we notify the user it already exists else save.
Update your views to look like this:
python

from django.shortcuts import render

from .forms import NewsUserForm

from .models import NewsUsers

def newsletter_subscribe(request):

  if request.method == 'POST':

    form = NewsUserForm(request.POST)

    if form.is_valid():

      instance = form.save(commit=False) #we dont want to save just yet

      if NewsUsers.objects.filter(email=instance.email).exists():

        print( "your Email Already exists in our database")

      else:

        instance.save()

        print( "your Email has been submitted to our database")

  else:

    form = NewsUserForm()

  context = {'form':form}

  template = "newsletter/subscribe.html"

  return render(request, template, context)
Create the model instance with the save() method, but don't save it to the database just yet by calling commit = False
- The
save()method creates an instance of the model that the form is linked to and saves it to the database.- If called with
commit=False, it creates the model instance but doesn't save to the database just yet!
Then, we check if the email exists by using filter before we save. If it exists, we tell the user it already exists else save and display to the user it has been added to our database.
fill the form using a new email and check if it saves. We have added a notification message on the console, so check your console for guidance. Use the same email again and check the console
Now it validates our emails, Great Work!
Sending Emails
Sending Emails with Django is quite simple.All we need is an Email service Provider.You can use gmail or write to the console for testing .Refer to Sending Emails with mailjet because I will be using mailjet
Remember the .env file we created in Project Structure and update it with your smtp credentials
EMAIL_HOST=in-v3.mailjet.com
EMAIL_HOST_USER="Your Username"
EMAIL_HOST_PASSWORD="Your Password"
EMAIL_PORT=587
EMAIL_USE_TLS=True
Replace "Your Username" with the actual username and "Your Password" with your actual password.
settings.py
EMAIL_HOST = config('EMAIL_HOST')
EMAIL_HOST_USER = config('EMAIL_HOST_USER')
EMAIL_HOST_PASSWORD = config('EMAIL_HOST_PASSWORD')
EMAIL_PORT = config('EMAIL_PORT', cast=int)
EMAIL_USE_TLS = config('EMAIL_USE_TLS', cast=bool)
DEFAULT_FROM_EMAIL = config('DEFAULT_FROM_EMAIL')
newsletter/views.py
We want to start sending emails, Import send_mail .
python

from django.shortcuts import render

from .forms import NewsUserForm

from . models import NewsUsers

from django.core.mail import send_mail

def newsletter_subscribe(request):

   if request.method == 'POST':

    form = NewsUserForm(request.POST)

    if form.is_valid():

      instance = form.save(commit=False) #we do not want to save just yet

      if NewsUsers.objects.filter(email=instance.email).exists():

        print('your email Already exists in our database')

      else:

        instance.save()

        print('your email has been submitted to our database')

        send_mail('Laughing blog tutorial series', 'welcome', 'mail@achiengcindy.com',[instance.email], fail_silently=False)

  else:

    form = NewsUserForm()

  context = {'form':form}

  template = "newsletter/subscribe.html"

  return render(request, template, context)
Conclusion
"What is the difference between Bound and Unbound Form?"
Aboundform has data associated with it.Unboundform has no data associated with it.It is either empty or contain default values.To check if a form is bound useis_bound()method.In our caseform.is_bound()return false while passing even an empty dictionary binds the form.form.is_bound({})returns true
We have successfully created a basic newsletter app and managed to send a welcome message to new subscriptions.The code for this tutorial is available on Github .
In the next tutorial, we will continue to build our newsletter app by making it more readable! Connect with me on Twitter
This post was originally posted on achiengcindy.com


Top comments (4)
Hi Cindy, I know this post is quite old but I have used your tutorial for my website and it works well locally but when I deploy it in HEROKU and I make a subscription it gives me and error that says:
prosen is the app name
relation "prosen_newsusers" does not exist
LINE 1: SELECT (1) AS "a" FROM "prosen_newsusers" WHERE "prosen_news...
and the line with problems is:
if NewsUsers.objects.filter(email=instance.email).exists():
It seems like it doesn't recognize the connection with newsusers and I don't understand why this is not an issue locally but it is when deploye??
Any help will be welcome, thank you!
^
Great work and simple explanation and concept, all lessons were put on my list
I can't find the next toturial
Hi Stylop, I apologize for responding late had issues with my account.I will update soon