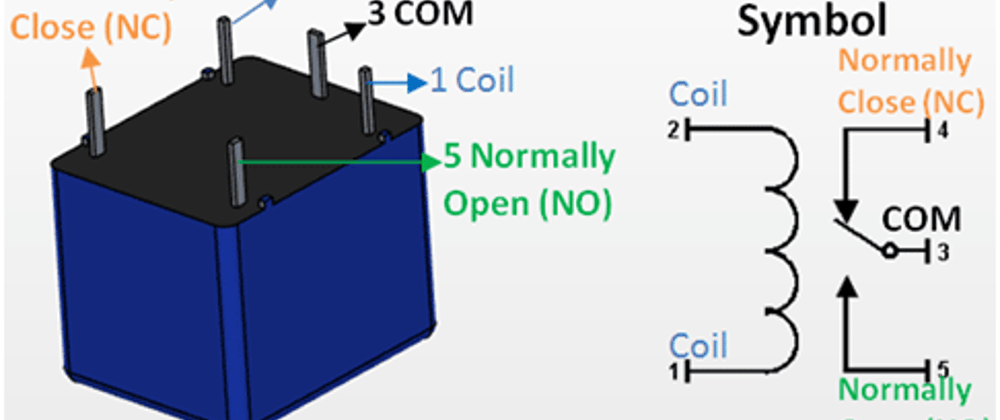
A relay is an electromagnetic switch which allows low powered devices to control highly powered circuits. There are various types of relays, but in this post, I will be focusing on a 5 pin relay.
This post is meant to help you understand how the 5 pin relay works. I am going to show you step by step procedure of using a relay to blink two leds.
One of the leds will be connected to the normally open terminal and the other to the normally closed terminal. We will give the relay a delay of 3000 microseconds to switch between the terminals.
REQUIREMENTS:
→ 2 leds (preferably of different colors)
→ 1 5v 5 pin relay
→ 1 pnp transistor (2N2222)
→ Arduino Uno (or any other of your choice)
→ 1 1N4007 diode
→ 1 1k resistor
→ 2 300ohm resistors
→ Breadboard and several jumper wires for connection
POINTS TO NOTE:
The 1N4007 diode is connected across the electromagnetic coil of the relay and is used to prevent the fallback of high voltages when power supply is disconnected
The transistor (2N2222) amplifies the current to drive the relay
CONNECTING THE CIRCUIT

CODE:
int relay = 8;
void setup() {
Serial.begin(9600);
pinMode(relay, OUTPUT);
}
void loop() {
digitalWrite(relay, HIGH);
Serial.println("relay pin closed; blue should be on");
delay(3000);
digitalWrite(relay, LOW);
Serial.println("relay pin open; red should be on");
delay(3000);
}


Top comments (1)
Awesome and very informative post. Learnt something new today.