Integrating music into your next app has never been easier.

Extensions File
First, create a new .swift file named Extensions. As you could guess by the name, we will create an extension called “Color” where we will create static constants called backgroundColor and buttonColor along with a static function named rgb, where, as you could, guess contains an rgb value. The following snippet shows my own rgb colors, but feel free to edit it and use your own!
import SwiftUI
extension Color {
static func rgb(r: Double, g: Double, b: Double) -> Color { return Color(red: r / 255, green: g / 255, blue: b / 255) }static let backgroundColor = Color.rgb(r: 21, g: 22, b: 33) static let buttonColor = Color.rgb(r: 190, g: 230, b: 100) }
Modules
Next, lets set up our modules. Since SwiftUI projects have Import SwiftUI as the default module, leave it as it is and add AVKit, which is used as, according to Apple, a framework which “provides a high-level interface for playing video content.”
import SwiftUI
import AVKit
Setting Up
Now, lets get to programming! First lets use the @State property wrapper to declare a variable called “audioPlayer” which will be equal to an implicitly unwrapped optional called AVAudioPlayer, which will be used to play the given audio.
struct ContentView: View { @State var audioPlayer: AVAudioPlayer!
Inside the “var body: some View {“ we have to start our main programming. First, we will create a ZStack which will be used for the overlapping content, and then set the background to cover the entire screen, ignoring all safe areas through the following code:
var body: some View {
ZStack { Color.backgroundColor .edgesIgnoringSafeArea(.all)
In order to create the elements in a vertical order we will use the vertical stack and then use the horizontal stack to set the background image and the main title, along with setting the background’s image to fit the entire screen via the aspect ratio command. The additional code is used for additional decorative uses.
VStack {
HStack { Text("Rain").font(.system(size: 45)).fontWeight(.bold).navigationBarHidden(true) .foregroundColor(.buttonColor).background(Image("Image").resizable() .frame(width: 900, height: 900) .aspectRatio(contentMode: .fit)
)
}
The Functionality!
Create another horizontal stack for both the play and stop button, along with an additional spacer to make the layout more appealing. Now its time for the actually functionality! What’s really nice about this project is that the only thing you need is an image for the background if you want, and nothing else for the buttons since those are already provided. To make the audio play, simply use the self.audioPlayer.play() command and set its image as a preset system name, along with a few more properties as shown by the snippet below:
HStack {
Spacer()
Button(action: {
self.audioPlayer.play()
}) {
Image(systemName: "play.circle.fill").resizable() .frame(width: 50, height: 50) .aspectRatio(contentMode: .fit) .foregroundColor(.buttonColor)
}
After adding an additional spacer, create another button with the same command for the action, except with .pause in the place of .play, along with the same exact properties as the play button.
Spacer()
Button(action: {
self.audioPlayer.pause()
}) { Image(systemName: "pause.circle.fill").resizable() .frame(width: 50, height: 50)
.aspectRatio(contentMode: .fit) .foregroundColor(.buttonColor)
}
Spacer()
}
}
}
The Sound
Similar to before, after adding an additional spacer after the HStack to define the constant sound to a certain .mp3 file, you can then apply it to the audioPlayer, hence the sound functionality (Remember to keep ContentView_Preview struct without changing a thing). You can either choose to remove the background or not based on your preference.
.onAppear {
let sound = Bundle.main.path(forResource: "rain-03", ofType: "mp3") self.audioPlayer = try! AVAudioPlayer(contentsOf: URL(fileURLWithPath: sound!)) }
}
}
That’s it! I hoped you like this tutorial on making a music player in SwiftUI! Check out the final app here: https://github.com/Millennium-X/MusicPlayerDemo
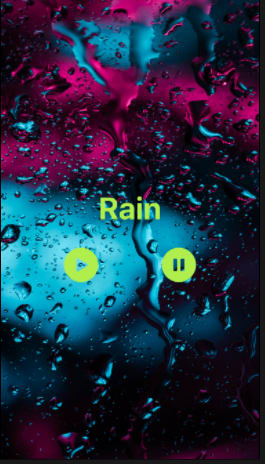
Here’s the finished product:
Thank you for reading this article!
Follow me on Medium at: https://medium.com/@suryanshmansha


Top comments (2)
Please format your code, that would make this so much easier to read!
This article was really interesting! Good work!